background image

www.oster.com

6

www.oster.com

7

 Cooking Time and Temperature

FOOD  

TEMP.*  

TIME  

DIRECTIONS

EGGS, fried  

300° F  

3 to 5 min.  

Turn halfway into cooking time.

BACON  

350° F  

8 to 12 min.  

Turn often.

SAUSAGE  

350° F  

20 to 30 min.  

Turn halfway into cooking time.

FRENCH TOAST  

350° F  

6 to 10 min.  

Turn halfway into cooking time.

HAMBURGER  

350° F  

8 to 14 min.  

Turn halfway into cooking time.

HAM SLICES  

350° F  

14 to 18 min.  

Turn halfway into cooking time.

SANDWICHES  

350° F  

6 to 10 min.  

Butter outside and brown both sides.

PORK CHOPS  

350° F  

20 to 30 min.  

 Brown both sides, reduce temp. to 250° F. 

Turn halfway into cooking time.

POTATOES  

350° F  

10 to 12 min.  

Turn halfway into cooking time.

STEAKS
  Rare  

400° F  

4 to 6 min.  

Turn halfway into cooking time.

  Medium  

400° F  

7 to 12 min.  

Turn halfway into cooking time.

  Well Done  

400° F  

13 to 18 min.  

Turn halfway into cooking time.

PANCAKES  

375° F  

2 to 5 min.  

 Pour batter onto griddle. When bubbles

appear on top, turn.

*Preheat Griddle until Ready Light comes on

NOTE: 

The cooking temperature and times listed in this user manual are estimates. Adjust the 

cooking temperature and time slightly up or down to achieve the results you prefer.

8

   Do not remove the griddle plate until it has had time 

to fully cool down.

NOTE:

 It may be necessary to scrape grease into the 

Drip Tray. Always use wooden or nylon utensils to avoid 

scratching the Non-Stick Cooking Surface.

CAUTION:

 Grease may be hot!

NOTE:

 When cooking consecutive batches of bacon 

or other high fat foods, it may be necessary to empty 

the Drip Tray to avoid grease overfl owing onto the 

countertop.

NOTE:

 Some countertops are more sensitive to heat. 

Use care not to place the Griddle on surfaces where 

heat may cause damage.


CARE & CLEANING

This appliance should be cleaned after every use.

Griddle is hot. Handle carefully.
1

   When cooking is complete, turn the temperature control 

knob to the “OFF” position and unplug the cord from the 

wall outlet. Allow unit to cool before cleaning. Unplug 

the cord from the outlet and allow unit to cool before 

cleaning.

2

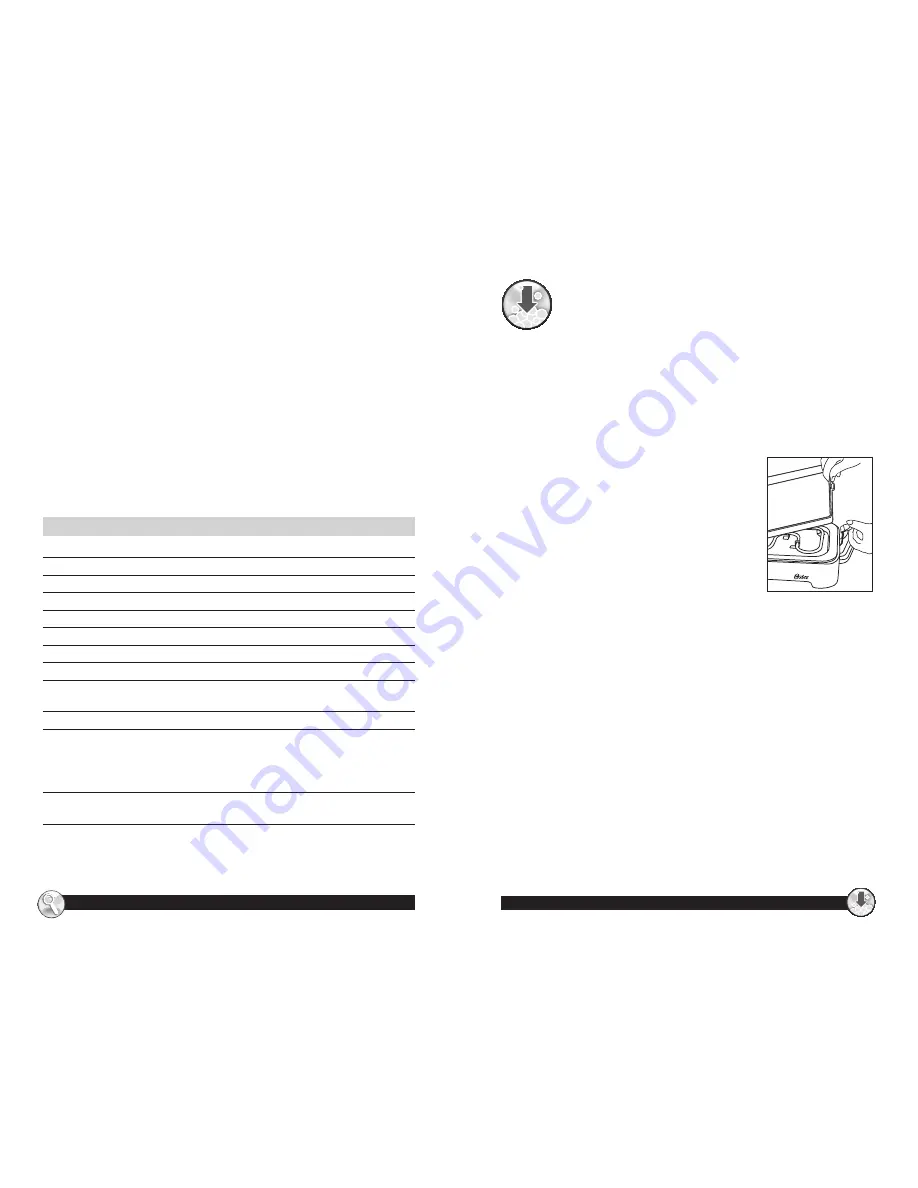
   Remove the Drip Tray and discard its 

contents. 


CAUTION:

 Grease in Drip Tray 

may still be hot even if plate is 

allowed to cool. To remove 

Griddle Plate, push right spring 

latch outward until plate is released. 

Lift plate up and to the right.

3

   The Griddle Plate and Drip Tray can be washed in the 

dishwasher or in warm soapy water with a soft cloth. 

Rinse and dry thoroughly.


CAUTION:

 Never use or submerge Heating Base or 

Cord in water. Heating Base and Cord must always be 

completely dry before use.

4

   With a damp cloth, clean the griddle burner base and 

temperature control.

    •  Use only nylon, plastic, or wooden utensils with care to 

avoid scratching the non-stick cooking surface. Never 

cut food on the griddle.

    •  Remove stubborn stains with plastic scouring pad and 

mild dishwashing liquid. 

CAUTION:

 DO NOT USE steel wool. Any service requiring 

disassembly other than the above cleaning must be 

performed by an authorized Oster® service center.

Содержание CKSTGRRM25

Страница 1: ...ss as Jarden Consumer Solutions All rights reserved Distributed by Sunbeam Products Inc doing business as Jarden Consumer Solutions Boca Raton Florida 33431 Para preguntas sobre los productos llame Sunbeam Consumer Service Canada 1 800 334 0759 EE UU 1 800 667 8623 www oster com 2010 Sunbeam Products Inc operando bajo el nombre de Jarden Consumer Solutions Todos los derechos reservados Distribuido...

Страница 2: ...mitts are required when handling the GRIDDLE PLATE or to remove cooked food from the GRIDDLE PLATE THIS UNIT IS INTENDED FOR HOUSEHOLD USE ONLY SAVE THESE INSTRUCTIONS THIS APPLIANCE IS FOR HOUSEHOLD USE ONLY No user serviceable parts inside Do not attempt to service this product A short power supply cord is provided to reduce the hazards resulting from entanglement or tripping over a longer cord ...

Страница 3: ...operly Make sure that the griddle plate is locked securely into the griddle plate latches located on the base See Figure A NOTE Position the griddle plate with the taller edge facing forward and the drip hole positioned above the drip tray 5 Make sure Griddle is in the OFF position and drip tray is properly inserted Plug unit into standard 120 V AC outlet NOTE The Power Indicator Light will illumi...

Страница 4: ...e hot NOTE When cooking consecutive batches of bacon or other high fat foods it may be necessary to empty the Drip Tray to avoid grease overflowing onto the countertop NOTE Some countertops are more sensitive to heat Use care not to place the Griddle on surfaces where heat may cause damage CARE CLEANING This appliance should be cleaned after every use Griddle is hot Handle carefully 1 When cooking...

Страница 5: ...rranty or condition Except to the extent prohibited by applicable law any implied warranty or condition of merchantability or fitness for a particular purpose is limited in duration to the duration of the above warranty JCS disclaims all other warranties conditions or representations express implied statutory or otherwise JCS shall not be liable for any damages of any kind resulting from the purch...

Страница 6: ... 15 Se requiere el uso de guantes protectores para horno cuando manipule la Superficie de la Plancha o cuando remueva la comida cocida de la Superficie de la Plancha USARSE SOLO EN EL HOGAR GUARDE ESTAS INSTRUCCIONES Este artefacto debe USARSE SOLO EN EL HOGAR No contiene piezas que el usuario pueda utilizar No intente reparar este producto Se proporciona un cable de alimentación corto para reduci...

Страница 7: ...adafirmementeenlospasadores queseencuentranenlabase VerFiguraA NOTA Coloque la placa de la plancha con el borde más alto hacia el frente y el orificio de goteo justo encima de la Bandeja de goteo 5 Verifique que la plancha esté en la posición OFF y que la Bandeja de goteo esté correctamente insertada Conecte la unidad en un tomacorriente de corriente alterna a 120 V NOTA La luz indicadora de corri...

Страница 8: ... evitar que la grasa se desborde sobre su tablero NOTA Algunos mostradores son más sensibles al calor Tenga cuidado de no colocar la plancha en superficies donde el calor pueda causar daños CUIDADO Y LIMPIEZA Este aparato debe ser limpiado después de cada uso La plancha esta caliente Manipule con cuidado 1 Cuando termine de cocinar gire la perilla de control de temperatura a la posición OFF y desc...

Страница 9: ...gal Excepto en la medida en que lo prohíba la ley aplicable cualquier garantía o condición implícita de comerciabilidad o aptitud para un fin determinado se limita en cuanto a su duración al plazo de la garantía antes mencionada JCS queda exenta de toda otra garantías condiciones o manifestaciones expresa implícita legal o de cualquier otra naturaleza JCSnoseráresponsabledeningúntipodedañoqueresul...

Страница 10: ...www oster com 18 www oster com 19 NOTAS NOTES ...

Отзывы: