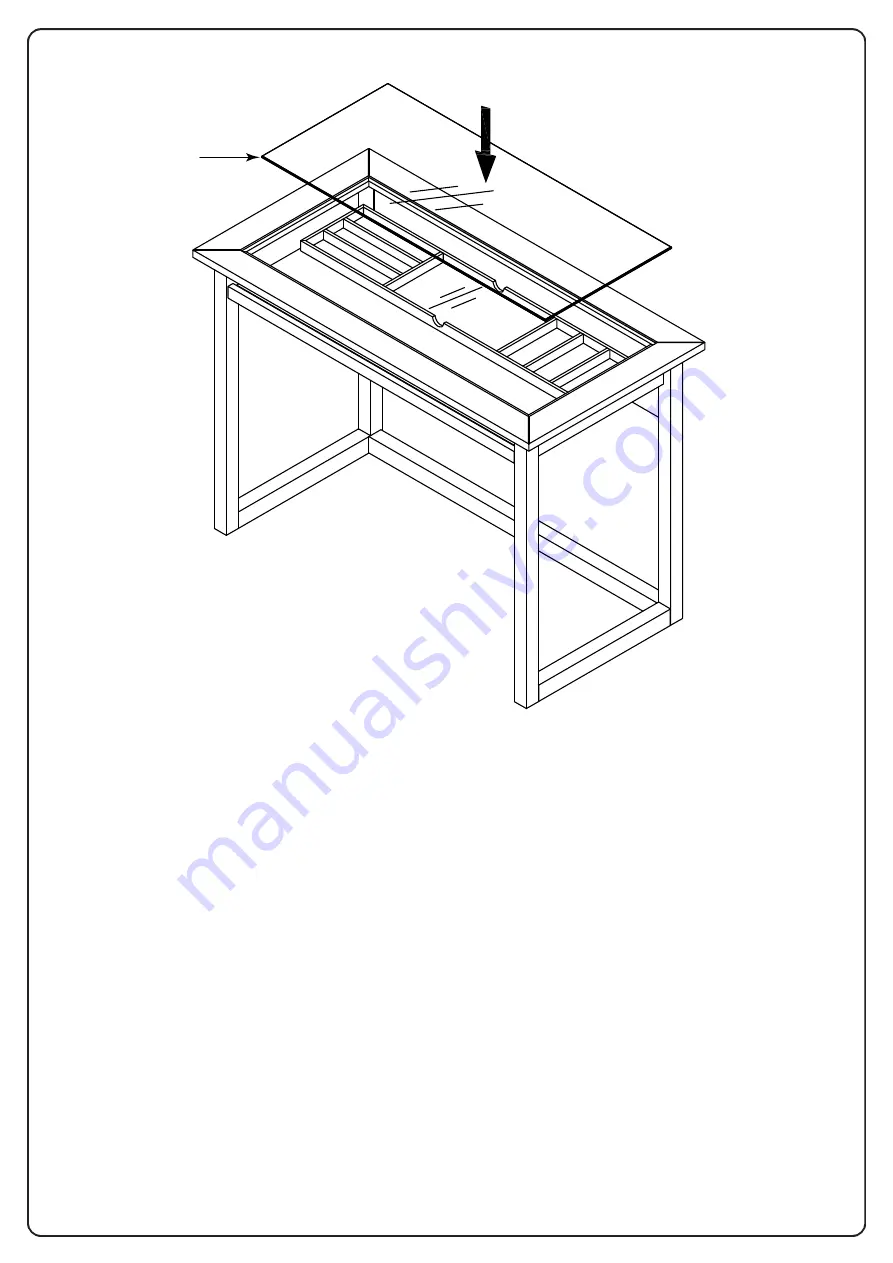
STEP 5
(B)
CAREFULLY PLACE GLASS TOP (B) ONTO TOP FRAME (A).
Страница 1: ...Refer to parts list Please take care when assembling the unit and always set the parts on a clean soft surface If you require any assistance with assembly parts or information on other products pleas...
Страница 2: ...r limitation of incidental or consequential damages so the above limitations or exclusions may not apply to you This warranty gives you specific legal rights and you may also have other rights which m...
Страница 3: ...1 PC Anti Tip Kit 2 HARDWARE LIST NO DRAWING DESCRIPTION QUANTITY C Left Leg Frame 1 PC D Right Leg Frame 1 PC E Back Panel 1 PC F Bottom Rail 1 PC A Top Frame 1 PC B Glass Top 1 PC G Keyboard Tray 1...
Страница 4: ...he ball bearing slide up on one side and down on the other side and then pull the drawer completely out See detail A DRAWER INSTALLATION Detail A Detail B To place the drawer back simply push the ball...
Страница 5: ...STEP 2 STEP 1 C E A D 1 F 1...
Страница 6: ...STEP 3 STEP 4 H G Carefully install keyboard tray see drawer installation page...
Страница 7: ...STEP 5 B CAREFULLY PLACE GLASSTOP B ONTOTOP FRAME A...
Страница 8: ...t hole into wall gently tap Anchor into pilot hole Secure one Bracket to wall using one Long Screw FULLYTIGHTEN LONG SCREW USING PHILLIPS SCREWDRIVER not provided Secure remaining Bracket to rear of d...