background image

79

78

Notes

Please send me free-of-charge and without commitment your latest ca-
talogues and product information on the following products:

Wheelchairs
Active and universal wheelchairs, toilet and shower wheelchairs, elec-
tric wheelchairs, electric wheelchairs, Scooter,
accessories

Equipment for home care, everyday life and the rehabilitation
Bathroom and toilet equipment, walking aids, home care

Содержание ALLROUND 970

Страница 1: ...1 OperatingManual S T A Y M O B I L E ElectricWheelchair ALLROUND 970 ...

Страница 2: ...ing the height of the foot plate 38 5 5 8 4 Adjusting the height of the legrests 39 5 5 8 5 Positioning the calf pad 39 5 5 9 Electrically height adjustable legrests 40 5 5 9 1 Detaching the legrests 40 5 5 9 2 Hanging in the legrests 40 5 5 9 3 Adjusting the height of the foot plate 40 5 5 9 4 Positioning the calf plate 40 Table of contents 1 Foreword 6 2 Legal requirements 7 2 1 Legal requiremen...

Страница 3: ...t with catch 42 6 1 3 Opening the seatbelt 42 6 1 4 Adjusting the belt length 42 6 2 Headrest 43 6 2 1 Adjusting the headrest 43 6 3 Step climber 44 6 3 1 Crossing an obstacle 44 6 3 1 1 Safety information 45 6 3 1 2 Attaching detaching the step climber 45 6 4 Seat lifter 46 6 4 1 Safety information 47 6 4 2 Operating 47 6 4 3 User information applicable before the lifting movement 48 6 4 4 User i...

Страница 4: ...o place Some registration centres do not insist on seeing the vehicle A telephone call beforehand can save you an unnec essary journey The vehicle can then be driven on public highways in accordance with the German Highway Code StVO You must have the type approval report with you at all times when driving on public highways Note All modifications of the vehicle inval idate the type approval 1 Fore...

Страница 5: ...max height of 60 mm Higher obstacles up to 110 mm high can be crossed with a step climber 4 2 Tips for accident prevention 4 2 1 Initial driving practice A low maximum speed must be pre se lected on the control unit for the initial driving practice Make yourself familiar with the driving behaviour of the elec tric wheelchair in small steps The elec tric wheelchair should not be used out side of th...

Страница 6: ...ays Check the functioning of the lighting system before the start of each journey Carry out a short braking and steering test at a very low speed immediately af ter the start of motion 4 2 3 Functional check The functions and safety of the electric wheelchair must be checked before the start of each journey Attention Comply with the contents of the Safety information for electric ve hicles brochur...

Страница 7: ...chair optional lever on the left side Caution The wheelchair should only be switched into the push mode for manoeuvring when it is standing on a level surface Before selecting the push mode in an emergency case and on slopes a help er should hold the wheelchair in order to stop an unwanted movement of the wheelchair The electric magnetic brakes are switched off in the push mode A braking of the ve...

Страница 8: ...nd pull the charging plug out of the control unit 8 9 4 4 1 Charging the battery The batteries should be charged imme diately after the use of the electric wheel chair in order to have the full driving range available at any time Every battery has a normal self dis charge The batteries should be re charged once a month when the elec tric wheelchair is not used for a long period of time This keeps ...

Страница 9: ...ring the first journeys Do this by setting the pre selected speed to the lowest level 4 5 1 Safety information Attention Comply with the contents of the op erating manual for CONTROL UNITS and the Safety information for elec tric vehicles brochure Do not pull out the security plug whilst still in motion A switch off will then cause an abrupt braking of the wheel chair Comply with the max permitted...

Страница 10: ...cken the clamping screw Fig 13 under the armrest by approx one turn Move the control unit into the desired position Tighten the clamping screw Fig 13 12 13 1 4 6 3 Decelerating stopping the wheelchair The wheelchair stops when you let go of the joystick Fig 11 Move the joystick slowly back to the cen tre position zero position for a dosed braking Fig 11 Always ensure an adequate braking distance w...

Страница 11: ...ed in accidents which exposes the user to considerable risks Attention Observe the Safety information for electric vehicles 16 4 7 3 Detaching the control unit Open the cable clip and slacken the clamping screw Fig 15 Push the control unit to the rear Slacken the clamping screw Fig 15 and pull off the entire armrest unit in an upward direction The control unit can now be pulled out to the front Ca...

Страница 12: ...plug after the loading Move the selection lever for the drive motors to the drive mode position 18 19 4 8 2 Transport in vehicles The following items may be necessary for the transport in vehicles Fig 17 1 Taking off the legrests 2 Detaching the control unit 3 Detaching the armrest units 4 Folding over or detaching the back rest The parts detached for the transport must be carefully stowed and car...

Страница 13: ...there is sufficient space for steering correc tions with the wheelchair and no wheel projects over the ramp edge Pre select the lowest maximum speed Only approved ramps or lifting plat forms may be used Attention The loading capacity per ramp or lift ing platform must be greater than 190 kg without driver and greater than 290 kg with driver fixed ramps 4 9 Ramps and lifting platforms The wheelchai...

Страница 14: ...y adjustable seat angle Detach the connecting elements Fig 25 and then swivel up the seat until the locking mechanism latches 1 23 1 5 Components 5 1 Seat 5 1 1 Seat cushion The standard seat cushion Fig 21 is secured to the seat plate with Velcro fas teners and can be pulled off The ERGOpor seat cushion Fig 22 is secured to the seat shell with Velcro fasteners and can be pulled off 5 1 2 Adjustin...

Страница 15: ...sh ion The ERGOpor backrest cushion Fig 30 is secured to the backrest shell with Velcro fasteners and can be pulled off 28 29 2 30 1 1 5 1 4 Swivelling down the seat Attention Carefully swivel down the seat Danger of squashing between the seat and the chassis covers Open the locking device Fig 26 and press on the front edge of the seat with one hand until the locking device latches With seat lifte...

Страница 16: ...tion Only incline the backrest to the rear when the wheelchair is standing on a level surface Danger of tipping over when the backrest is inclined to the rear 33 1 34 5 2 2 Standard backrest Tool 1 x 13 mm open end or ring spanner 1x hexagonal stud wrench WW 6 The angle of the standard backrest Fig 31 can be infinitely adjusted be tween approx 0 to 5 with the adjust ment screw and the lock nut 5 2...

Страница 17: ...ing device audibly latches Check for a correct locking of the locking de vice 38 1 2 39 35 36 1 1 5 2 3 2 Detaching the 30 back rest The 30 backrest can be detached for transport or storage Screw out the se curing screw Fig 35 on both sides and then pull off the backrest in an up ward direction 5 2 3 3 Attaching the 30 back rest Insert the tubes of the backrest from above and then tighten the secu...

Страница 18: ...it to the rear Slack en the clamping lever Fig 42 and pull off the entire armrest unit in an upward direction 42 1 43 4 3 2 The control unit can now be pulled out to the front Carefully route the cable when moving the control unit Retight en the clamping screw 5 3 Armrests The armrests can be adjusted in height and depth to suit the needs of the user Attention Do not use the armrests to lift or ca...

Страница 19: ...ting the height of the foot plate Hold the foot plate and then unscrew the clamping screw Fig 48 by about a turn Move the foot plate to the desired height and then tighten the clamping screw Attention The marking shows the maximum extension 45 1 46 1 47 48 2 5 4 Clothing protector The clothing protector can be horizon tally displaced You do this by slacken ing the securing screws Fig 44 Bringing t...

Страница 20: ...e legrests 774 and 774 2 AL E 5 5 8 1 Detaching the legrests Pull the locking device Fig 49 out wards Swivel out the legrest and then pull it off in an upward direction The contacts will separate automatically 5 5 8 2 Hanging in the legrests With the legrest in a swivelled out posi tion hang in the legrest Fig 50 and then swivel it to the front until the lock ing device audibly latches The contact...

Страница 21: ...ing of the seatbelt 6 1 1 Putting on the seatbelt with Velcro fastener Pull both seatbelt straps to the front and close the Velcro fastener Attention Make sure that there are no objects trapped under the seatbelt Thus you avoid painful pressure points 55 2 3 5 5 9 Electrically height adjust able legrests See the Operating Manual for Control Units for information on how to adjust the electrically h...

Страница 22: ...the marking 58 59 1 60 2 6 1 2 Putting on the seatbelt with catch Pull both seat straps to the front and push the latch tongue deep into the catch Fig 57 until the automatic latching mechanism audibly latches Then carry out a pull test Attention Make sure that there are no objects trapped under the seatbelt Thus you avoid painful pressure points 6 1 3 Opening the seatbelt Unfasten the safety belt ...

Страница 23: ...e spring on the upper side of the step climber from below into the slot of the support plate of the horizon tal beam and secure to the frame with the securing screw Fig 62 The dismantling is effected in the reverse sequence 6 3 Step climber The step climber Fig 61 serves exclusively for the crossing of obstacles The step climber can be detached when its use is not required Attention The step climb...

Страница 24: ...ot cross obstacles with an ex tended seat lifter Danger of tipping over Check the air pressure of the tyres regularly in order to prevent an in stability 6 4 2 Operating The seat lifter is controlled with the con trol unit of the wheelchair see the Op erating Manual for Control Units 64 6 4 Seat lifter The seat height can be increased infi nitely by up to 50 cm with the seat lifter Fig 63 Note The...

Страница 25: ...ised with the seat lifter the seat has been tilted or the legrests have been swivelled up Do not reach under the seat during lowering and make sure that there are no objects or other persons in the area between the wheelchair frame and the seat Fig 70 65 66 67 6 4 3 User information applica ble before the lifting movement The seat lifter may only be used when the user is wearing the seat belt Suff...

Страница 26: ...rt both anti tip castor holders with the tube ends pointing to the front and the spring loaded pins pointing down into the tubes below the bumper until the spring loaded pins latch Check that the anti tip castor holders are securely fixed in the tubes 6 5 Suspension adjust able The suspension is adjusted to the weight of the driver This requires the adjusting lever supplied with the wheelchair and...

Страница 27: ...tted tyre pressure Check the tyre pressure regularly see the technical data for the tyre pressure Always protect the tyre valves against dust with the valve caps Tread condition worn tread impairs the driving behaviour Tyre change always change the tyres of an axle in pairs 7 Maintenance 7 1 Cleaning A regular cleaning of the electric wheel chair is necessary for your own safety and the safety of ...

Страница 28: ...n authorised workshop for any necessary repair work It is competent to carry out the repair work and usually has trained personnel 7 3 Customer service Please contact an authorised dealer if you have any questions or need help An authorised dealer has been trained by us in our factory according to our guide lines and can give advice and carry out maintenance servicing and repairs We have a large n...

Страница 29: ...ng can be damaged Note Rinse skin or body parts that have come into contact with acid immediately with running water for several minutes Then see a doctor Immediately remove clothing wetted with acid Wash clothes with soap solution and rinse with much water Always wash your hands after work ing on the batteries 7 5 4 Battery replacement The daily use of the electric wheelchair places a high demand...

Страница 30: ... density of a cell is lower than the scale value of 1 18 kg dm3 The battery is fully charged if the acid level is above the scale value of 1 28 kg dm The acid density difference between the individual cell values should not exceed 0 02 to 0 03 kg dm If it does this can be due to battery damage Seek the as sistance of a specialist workshop 7 5 6 2 Checking the acid level The battery acid level fall...

Страница 31: ...ress the lens downwards and screw into place 7 6 3 Other connections The pulse device with other connec tors is located under the seat Work in this area may only be carried out by an authorised service engineer 7 6 Fuses connections 7 6 1 Replacing fuses Before replacing fuses park the wheel chair on a level surface and move the selection lever to the drive mode posi tion to prevent the wheelchair...

Страница 32: ...g 83 Mount the lens Press in the lens and fasten it with the securing screws Fig 84 7 7 2 2 Fitting Insert the new spherical bulb Push the side pins bayonet catch into the recesses of the bulb holder Fig 82 hold the glass body with a piece of cloth press lightly against the spring and then turn the bulb until the bay onet catch clicks into place Fig 81 Mount the lens First insert the top pins then...

Страница 33: ...Fig 87 hold together the rim halves and must not be screwed undone until the tyre is fully deflated To change the tyre fully deflate the tyre then remove the red caps and screw out the screws Fig 94 Now separate the rim halves Note The valve points to the outside dur ing the assembly Press the red caps Fig 87 on again after the rim halves have been assembled 87 85 86 1 7 7 4 Rear light Festoon bul...

Страница 34: ...he workshop are familiar with the technology of the vehicle and have suitable tools They can identify the start of wear in good time and use only original spare parts Attention The vehicle driver is responsible for the correct functioning and safe con dition of the vehicle when driving on public highways An incorrect or neglected cleaning and maintenance results in a limitation of the product liab...

Страница 35: ...e connection and functioning of electrical legrests backrest seat de pending on equipment fitted Oil Grease Rotating points and bearing points of control levers and moving parts Final check Check the lighting and signalling devices Motor unlocking device push mode Brake steering drive test General functional check Test drive The wheelchair does not start off Motor unlocking device not latched Move...

Страница 36: ...al battery capacity in accordance with DIN standard new batteries with more than 5 charging cycles straight ahead motion with fully au tomatic drive electronics maximum speed nominal load of 75 kg smooth acceleration level road surface The kilometric performance is greatly reduced by frequent uphill travel low battery charging status low ambient temperature e g in winter frequent starting and stop...

Страница 37: ...e relates to the standard version of the stated model Dimensional tolerance is 1 5 cm Model Electric wheelchair Allround 970 Code 9 970 Type plate location Under the seat at the front left on the central frame Class of use as per DIN EN 12184 Class B Electrical system for the drive control 24 Volt 60A max Electrical system for the lighting 24 V Dimensions Length incl foot plates without with anti ...

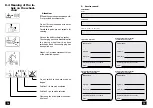
Страница 38: ... in 12 months Date Place date Signature Recommended safety inspection at least every 12 months 8 4 Meaning of the la bels on the wheel chair Attention Read the operating manuals and oth er provided documentation Do not lift the wheelchair at the arm rests or legrests Detachable parts are not suitable for carrying Note on the battery charging socket The charging socket is accessible after the elect...

Страница 39: ...cal improvement and design modification his document corresponds to the status as at September 2001 ORTOPEDIA GmbH Kiel The product conforms with the EC Directive 93 42 EEC MDD for medical products Retailer stamp Next safety inspection in 12 months Date Place date Signature Recommended safety inspection at least every 12 months Retailer stamp Next safety inspection in 12 months Date Place date Sig...

Страница 40: ...roduct information on the following products Wheelchairs Active and universal wheelchairs toilet and shower wheelchairs elec tric wheelchairs electric wheelchairs Scooter accessories Equipment for home care everyday life and the rehabilitation Bathroom and toilet equipment walking aids home care ...

Страница 41: ... 0 431 2003 0 Fax 49 0 431 2003 378 http www ortopedia de Consultancy Sales Service Our products are subject to technical modification Our printed matter may contain printing errors or colour deviations 0801 1 1 ST Ident Nr 8 460 201 5101 QM system certifiedtoDINEN ISO9001andDIN ENISO46001 Sender Name Street Postcode Town Tel Fax Response ORTOPEDIA GmbH Öffentlichkeitsarbeit Postfach 64 09 D 24125...

Отзывы: