5
This level of magnification assumes you have ideal conditions
for viewing, however. The clearest, sharpest views will always
be achieved at lower powers.
Keep in mind that as you increase magnification, the bright-
ness of the object viewed will decrease; this is an inherent
principle of the laws of physics and cannot be avoided. If mag-
nification is doubled, an image appears four times dimmer. If
magnification is tripled, image brightness is reduced by a fac-
tor of nine!
The “F-number” of a telescope stands for the ratio between the
focal length and the diameter of the light-gathering element.
The 8" Schmidt-Cassegrain optical tube has a focal length of
80 inches and a diameter of 8 inches. This makes the system
an f/10 (focal length divided by diameter). An optional focal
reducer is available to reduce the effective focal ratio to f/6.3.
Determining the Field
of View
Determining the field of view is important if you want to get
an idea of the angular size of the object you are observing. To
calculate the actual field of view, divide the apparent field of
the eyepiece (supplied by the eyepiece manufacturer) by the
magnification. In equation format, the formula looks like this:
Apparent Field of Eyepiece
= True Field
Magnification
As you can see, before determining the field of view, you must
calculate the magnification. Using the example in the previous
section, we can determine the field of view using the same
26mm eyepiece. A 26mm Plössl eyepiece has an apparent
field of view of 52°. Divide 52 by the magnification, which is 78.
This yields an actual field of 1.5°.
To convert degrees to feet at 1,000 yards, which is more useful for
terrestrial observing, simply multiply by 52.5. Continuing with our
example, multiply the angular field 1.5° by 52.5. This produces a
linear field width of 78.8 feet at a distance of 1,000 yards.
Care and Cleaning of the
Optics
Occasionally, dust and/or moisture may build up on the correc-
tor plate of your telescope. Special care should be taken when
cleaning any instrument so as not to damage the optics.
If dust has built up on the corrector plate, remove it with a
brush (made of camel’s hair) or a blower bulb. Then, use an
optical cleaning solution and white tissue paper to remove any
remaining debris. Apply the solution to the tissue (
not
to the
glass) and then apply the tissue paper to the lens. Low-pres-
sure strokes should go from the center of the corrector to the
outer portion. Do NOT rub in circles!
You can use a commercially made lens cleaner or mix your
own. A good cleaning solution is isopropyl alcohol mixed with
distilled water. The solution should be 60% isopropyl alcohol
and 40% distilled water. Or, liquid dish soap diluted with water
(a couple of drops per one quart of water) can be used.
Occasionally, you may experience dew build-up on the correc-
tor plate of your telescope during an observing session. If you
want to continue observing, the dew must be removed, either
with a hair dryer (on low setting) or by pointing the telescope at
the ground until the dew has evaporated.
If moisture condenses on the inside of the corrector, remove
the accessories from the rear cell of the telescope. Place the
telescope in a dust-free environment and point it down. This
will remove the moisture from the telescope tube.
To minimize the need to clean your telescope, replace all lens
covers once you have finished using it. Since the rear cell is
NOT sealed, the cover should be placed over the opening
when not in use. This will prevent contaminants from entering
the optical tube.
Internal adjustments and cleaning should be done only by an
authorized repair department. If your telescope is in need of
internal cleaning, please call Orion for a return authorization
number and price quote.
Collimation
The optical performance
of your telescope is directly related to its collimation, that is the
alignment of its optical system. Your telescope was collimated
at the factory after it was completely assembled. However, if the
telescope is dropped or jarred severely during transport, it may
have to be re-collimated. The only optical element that can be
adjusted is the secondary mirror.
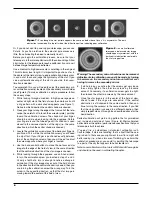
To check the collimation of your telescope you will need a
light source. A bright star near the zenith is ideal since there
is a minimal amount of atmospheric distortion. Make sure that
tracking is on so that you won’t have to manually track the star.
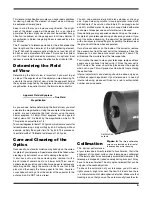
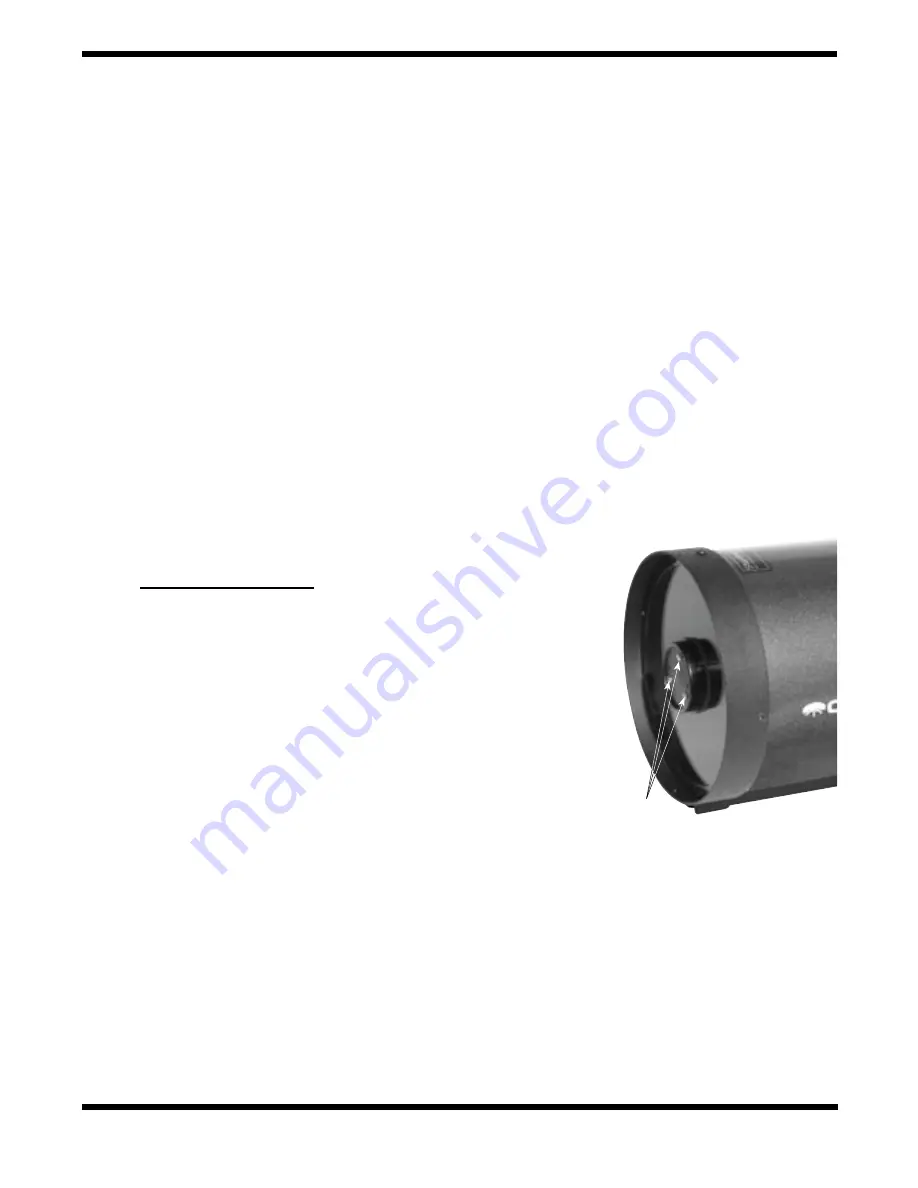
Figure 6.
The three collimation
screws are located on the front of
the secondary mirror housing.
Collimation
screws
Содержание Telescope
Страница 7: ...7 ...


