4
5
your images with the camera
controls.
Camera Field of View
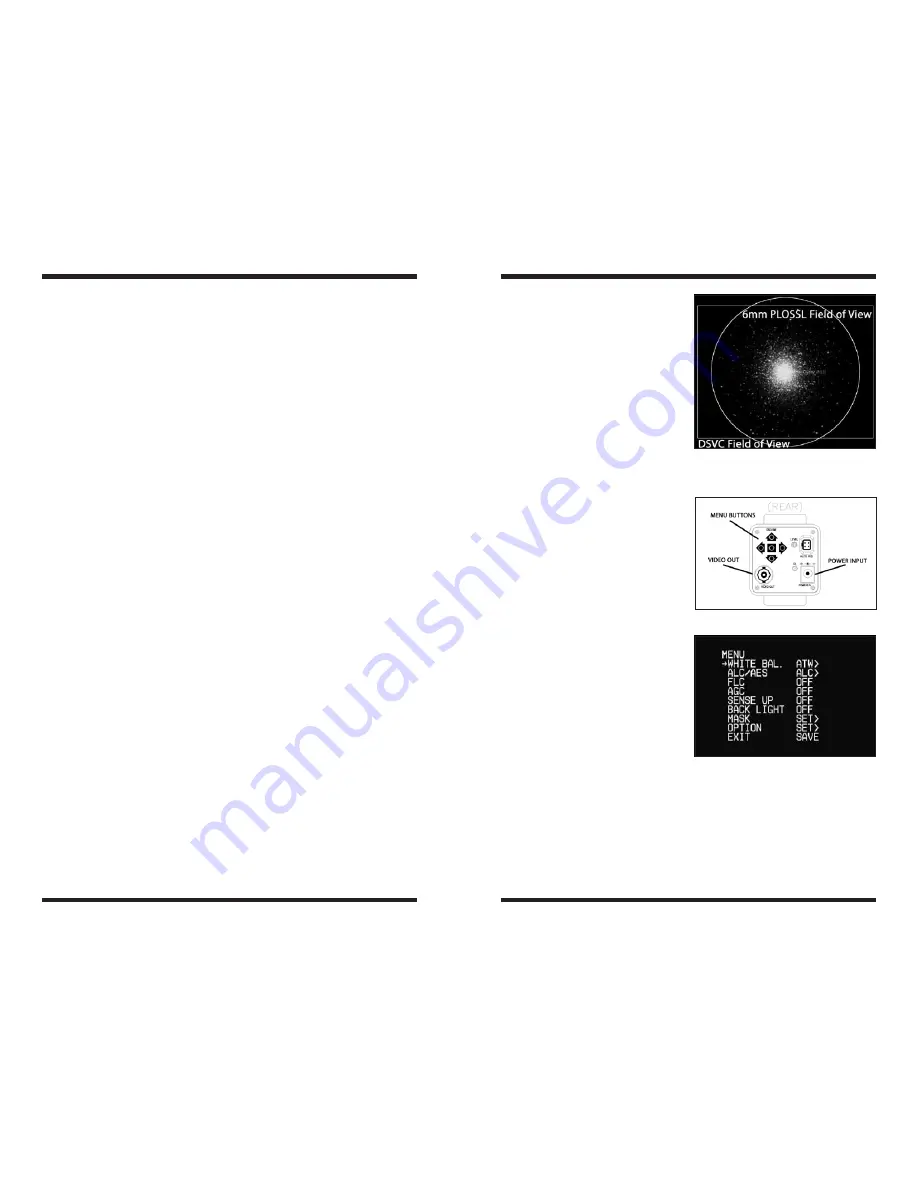
The camera’s field of view is approxi-
mately equivalent to the field of view
through the telescope when looking
through a typical (i.e. not wide-field)
6mm focal length eyepiece (
Figure 4
).
Camera Controls
All camera features are controlled
via the OSD menu (ON SCREEN
DISPLAY). Selections are made using
the navigational Menu buttons (up/
down/left/right) and select button (cen-
ter) (
Figure 5
).
Pressing the center button for a short
period of time will bring up the OSD
menu (
Figure 6
).
Different camera settings are required
depending upon the targets observed.
Daytime Terrestrial, Lunar and plan-
etary imaging requires short expo-
sure times whilst deep space objects
require much longer exposure times.
WHitE Bal. (white balance).
CCD security cameras feature this
adjustment to compensate for ambient
light color. Since there’s a color differ-
ence between standard light bulb light
and sunlight, white balance adjusts to
ensure a more realistic picture.
There are two white balance control
modes, namely Auto tracking white
balance (
ATW
) and Auto White Balance (
AWB
).
aWB – auto White Balance
AWB is a preset type function whereby white color in the scene is detected and
white balance is automatically adjusted, then the setting status is stored. It auto-
matically memorizes the adjusted white balance value every time the AWB but-
• Customizable cross hairs enable the Deep Space Video Camera to be used
with a finder scope and aid in centering objects.
Getting Started During Daylight
We recommend using the DSCV for the first time during the day. This way, you
can become familiar with the camera and its functions without having to stumble
around in the dark. Set up your telescope and mount so the optical tube is point-
ing at an object at least a couple of hundred feet away. Insert an eyepiece and
focus as you normally would.
To obtain first images with the DSCV, follow these step-by-step instructions:
1. Remove the lens cap and unscrew black CS ring mount from camera.
2. Screw the 1.25" nosepiece adapter onto the gold camera lens threads.
3. Connect the BNC/RCA adapter to the BNC Video Out plug on the back of
the camera.
4. Connect one end of the RCA cable to the BNC/RCA adapter.
5. Connect the other end of the RCA video cable directly to your viewing device
such as TV RCA input.
6. To connect the camera to the telescope, simply replace the telescope’s 1.25"
eyepiece with the camera. Make sure the securing thumbscrew on the focuser
drawtube is tightened after the camera is inserted.
7. You will now need to refocus the camera for the centered object. Focusing
will be the hardest thing to learn in the initial stages. If you are starting out
in daylight, as is recommended, you may need to turn the exposure and/
or brightness control of the camera down before attempting to focus. (See
Camera Controls)
8. Look at the
live Video Window
on the viewing device screen and adjust
the focus knob accordingly to determine best image focus.
9. Image orientation can be changed by rotating the camera within the focuser
drawtube. Simply loosen the thumbscrew on the drawtube and rotate
the camera until the desired image orientation is achieved. Retighten the
thumbscrew on the focuser drawtube when done. You may need to slightly
refocus (using the telescope’s focus knob) if the focuser drawtube has moved
a bit inward or outward when the camera was rotated.
10. You have now viewed your first images with the DSVC! This simple method of
imaging is exactly how the camera is used to capture terrestrial subjects during
daylight hours. Close-up images of birds and other wildlife or faraway vistas
can all be obtained in this way with the DSVC. Solar images can also be taken
during the day with a full-aperture solar filter over the front of the telescope.
11. Take some time to use the camera during the day to become familiar and
comfortable with their basic operation. For best results, you can optimize
Figure 4.
Comparison field of view
between DSVC (rectangle) and standard
6mm Plössl eyepiece (circle).
Figure 5.
Camera rear view.
Figure 6.
Main OSD menu screen.


