4
Using the Camera
System Requirements
In order to view and download images from the camera to
your computer, your PC must meet the following system
requirements:
Windows 98SE/2000/ME/XP
Pentium 233MHz or higher
128MB SDRAM
Video (VGA) card with 2MB RAM for minimum 16-bit (high
color) display
CD-ROM
USB port
600MB of free hard drive space
Installing the eView Driver
To install the necessary driver for the computer to acquire
images from the camera, insert the included CD-ROM into
your computer. When the introduction screen appears, choose
“Driver Installation” from the selection menu, and follow the
prompts through the installation process.
Installing Photo Explorer
The CD-ROM also includes Photo Explorer, which is a handy
image processing software program. While you can use many
other software packages to manipulate images on your com-
puter, Photo Explorer has many applications and is very easy
to use.
To install Photo Explorer, insert the CD-ROM into your comput-
er, and choose “Photo Explorer” from the introduction screen
choices. Then follow the prompts to install the software.
We recommend viewing and/or printing Photo Explorer’s
instruction manual before attempting to use the program. To
do this, choose the “User Manual of Photo Explorer” from the
CD-ROM’s introduction screen choices; it will copy a file to
your computer which can then be read or printed. If you do not
have Adobe Reader 5.0 or greater, you must download it from
www.adobe.com in order to read the manual.
The SD Card
To use the camera functions, the included SD card must be
installed in the eView. This allows images to be saved in the
camera for subsequent viewing and downloading later.
To install the SD card:
1. Remove the SD card from its plastic case.
2. Open the rear hatch on the eView (Figure 1). This is the
cover located directly below the binocular focus knob.
3. Insert the SD card into the SD card slot in the eView. The
SD card should be oriented so the printing on the card
faces downward.
4. Close the rear hatch on the eView.
Taking a Picture
Taking a picture with the eView is simple to do. Once you have
identified the object you wish to take a picture of in the bin-
oculars, simply follow these instructions to capture the image
with the camera:
1. Flip up the eView’s LCD screen (Figure 1).
2. Turn the eView on by pressing the ON/MODE button for 3
seconds.
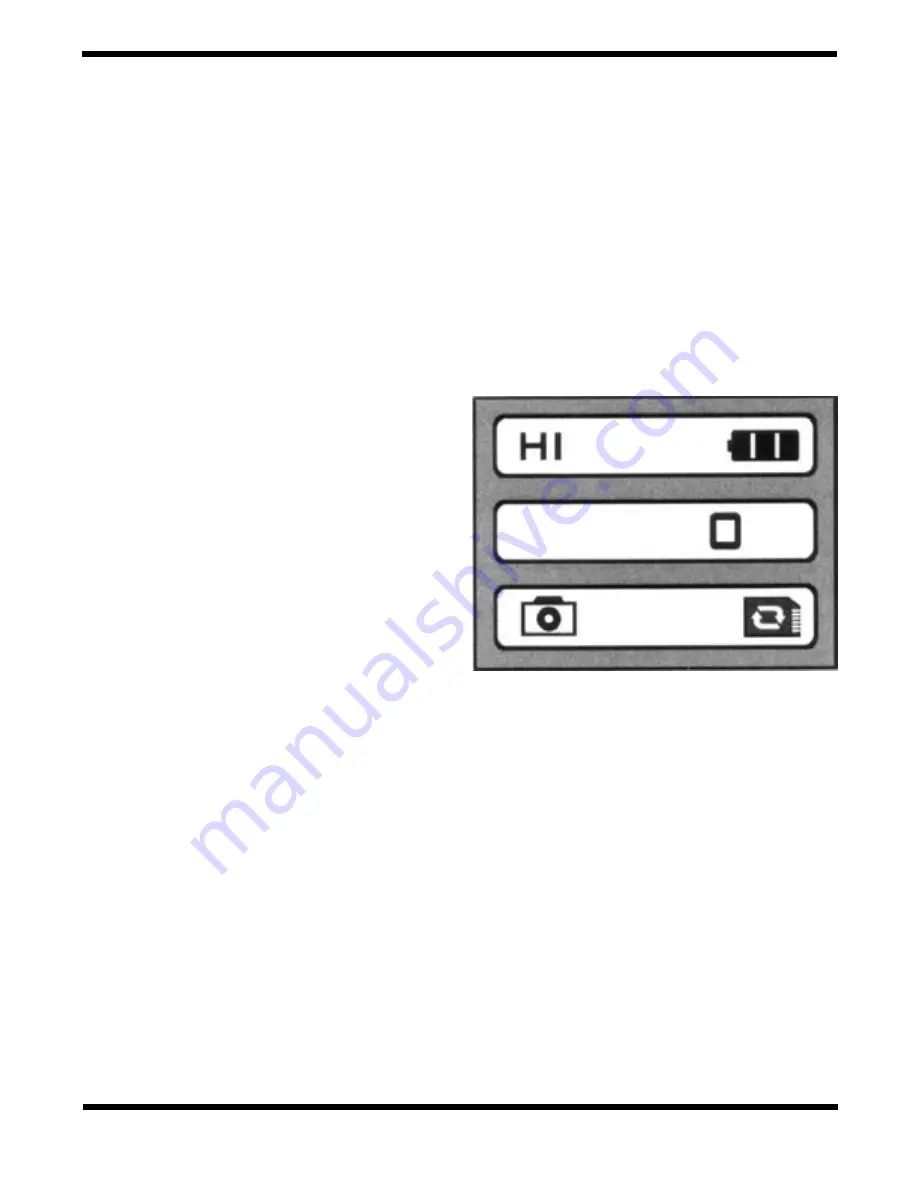
3. You will hear two “beeps”, and the status screen will
appear briefly (Figure 3). On the first line of this screen,
“HI” will indicate the camera is currently set to high resolu-
tion. The full battery icon will show your batteries are fresh.
The second line of the status screen will display the num-
ber of images currently in memory, which should be zero
at this point. The bottom line indicates the camera is ready
to take pictures, and the SD card is installed.
4. After the status screen disappears, you will hear another
“beep”, and the LCD screen is now in preview mode. It
now displays, in “real time”, what is currently within the
camera’s field of view. Frame the picture you wish to take
on LCD screen.
5. Press the CAMERA/SET button. You will hear a “beep”,
and the LCD screen will go blank. The camera is now tak-
ing the picture. It takes a couple of seconds to actually
capture the image, so be sure to hold the eView steady
during this time. When the camera is done taking the pic-
ture, you will hear two “beeps”, and the status screen will
again briefly appear. Note that on the second line of the
status screen, the display now shows “1”, indicating that
one image is currently stored in the SD card.
The eView will now revert back to preview mode. Frame and
take another picture, if you wish. When no action is performed
with the camera functions, the eView will automatically turn
off after 90 seconds. Also, the close focus distance for the
camera is about 50 feet, so make sure the picture you have
Figure 3.
The eView status screen lets you know the resolution
setting, battery life, and number of images currently stored in the
SD card.


