background image

34

7.  The 

ASCOM  Telescope  Chooser 

(Figure 24) will appear. Select your 
telescope model from the provided 
choices.  If  your  model  does  not 
appear,  it  is  not  supported  by  the 
ASCOM platform.

8.  After  you  have  selected  your  tele-

scope  model,  click  the 

Properties


button.

9.  In  the  window  that  pops-up, 

choose  your  specific 

Scope  Type


and desired 

Serial Port

 where the 

computer  will  send  commands  to 
the mount. Click OK when done.

10. Click 

OK

 in the 

ASCOM Telescope Chooser

 window.

11. In the 

Settings

 window, click the 

Close

 button.

Some telescope mounts, such as the Orion Atlas EQ-G and Sirius EQ-G, uti-
lize an “ST-4 compatible” autoguider jack. For easiest autoguiding with these 
mounts,  we  recommend  purchasing  the  optional  USB  Guide  Port  interface 
(GPUSB). This adapter box will translate the autoguiding computer commands 
from MaxIm DL Essentials into ST-4 pulse commands. The GPUSB connects 
to the computer’s USB port instead of the COM port. A cable then connects 
the GPUSB to the mount. In addition to installing the ASCOM platform on your 
computer  (from  the 

Install  ASCOM

  button  in  the 

Launcher

),  you  will  need 

to  install  the  GPUSB  ASCOM  driver  (downloadable  from  the  Orion  website, 
www.OrionTelescopes.com). Then, you can select the GPUSB in the 

ASCOM 

Telescope Chooser

.

Other telescope mounts accept commands in the “LX200 Protocol”. For these 
mounts, it is not necessary to install the ASCOM platform to have the com-
puter  “talk”  to  the  mount.  To  setup  the  autoguider  for  mounts  that  use  the 
LX200 Protocol:
1.  Connect  the  StarShoot  Pro  to  your  computer  and  open  the  Maxim  DL 

Essentials software.

2.  In the 

Camera Control Window

, click on the 

Guide

 tab.

3.  Click on the 

Settings

 button. 

4.  In  the  window  that  pops-up,  select 

LX200  Protocol

  for  the 

Autoguider 

Output Control Via

. Select the 

COM Port

 of the computer you would like 

to use to send commands to the telescope 

5.  Click the 

Apply

 button, then click the 

Close

 button.

Figure 24. 

The 

ASCOM Telescope 

Chooser 

provides an easy way 

to establish a computer-to-mount 
communications link if the mount is 
supported by the ASCOM platform.

Содержание 52084

Страница 1: ...084 instruction Manual Providing Exceptional Consumer Optical Products Since 1975 Customer Support 800 676 1343 E mail support telescope com OrionTelescopes com Corporate Offices 831 763 7000 89 Hanga...

Страница 2: ...camera or install the needed software For the most detailed information on specific camera and software functions consult the Maxim DL Essentials Help menu the tutorials found there are especially use...

Страница 3: ...or Autoguiding 37 5 Other Features of MaxIm DL Essentials 37 Edit Menu 37 View Menu 38 Window Menu 38 Help Menu 39 6 Tips 39 Polar Alignment 39 Choosing a Site for Astro imaging 40 Using Focal Reducer...

Страница 4: ...for mat eyepieces The camera is simply inserted into a focuser in the same way as a standard eyepiece Figure 2a The camera is also compatible with 1 25 focusers that include camera T threads Caution...

Страница 5: ...ves the StarShoot Pro an ample field of view through most telescopes See Appendix B Field of View Quick Reference Guide for a list of the field of view provided by several common telescopes The camera...

Страница 6: ...r has the ability to interface with an autoguider Computer The StarShoot Pro requires a PC to operate the camera For astro imaging in the field at night a laptop computer is highly recommended The inc...

Страница 7: ...r battery starts loosing power Software and Driver Installation Before the camera can be used the software and camera drivers must be installed onto your computer Turn on your computer and allow the W...

Страница 8: ...ble from your camera to the computer before starting Maxim DL Essentials Edition or the software and computer will not recognize the camera To install the camera driver on a Windows XP computer 1 Inse...

Страница 9: ...ition software The camera will auto matically be recognized and the Camera Control Window Figure 6 will appear To install the camera driver on Windows Vista computer 1 Insert the CD ROM into the compu...

Страница 10: ...nsitive to light you will need to stop down your telescope aperture to do any imaging in daylight This can be done by creating a simple aperture mask out of a piece of cardboard The piece of cardboard...

Страница 11: ...s Make sure the Dark Subtract box is unchecked Check the Delay box so you can easily stop the exposures when the cam era is focused 8 Press the Expose button in the Camera Control Window The camera wi...

Страница 12: ...he image is focused and the image looks acceptable press the Stop button in the Camera Control Window 13 Select Single in the pull down menu underneath Mode in the Camera Control Window 14 Click the E...

Страница 13: ...rk Directly viewing the histogram of your image in the Screen Stretch Window provides an easy interface for making decisions on how the screen stretch should be set In Maxim DL Essentials the two para...

Страница 14: ...to a preset setting like Medium or Moon 2 Astronomical Imaging Now that you re familiar with basic camera and software operation it s time to take the StarShoot Pro out at night under the stars to cap...

Страница 15: ...uracy 2 Center your telescope on the star using an eyepiece Make sure the right ascension R A tracking motor is engaged on your mount 3 Replace the eyepiece with the StarShoot Pro 4 Set the Mode to in...

Страница 16: ...cates the diameter of the star The Max Val is the brightness value for the brightest pixel in the star The smaller the FWHM and the larger the Max Pixel the closer you are to focused 14 Adjust the foc...

Страница 17: ...nment is essential for deep sky imaging Stars will streak across the field of view without precise polar alignment and tracking Longer exposures of 60 seconds or more also require autoguiding with a s...

Страница 18: ...ouch shake or otherwise disturb the telescope or a blurred image will result Also make sure no surrounding light shines into the telescope during the exposure Dark Frames Dark frames are images taken...

Страница 19: ...ark_0004 fit and OrionNebula1dark_0005 fit Using the word dark in the Base filename will help you distinguish between light and dark frames when combining later 6 Click Expose and Maxim DL Essentials...

Страница 20: ...facts Very large particles or other artifacts in your telescope can effect your astro images Insufficient telescope baffling or poor collimation can also cause unsymmetrical field illumination in your...

Страница 21: ...ul for some types of astronomical imaging such as capturing faint nebulae It can also be useful for quickly checking the image centering and orientation before using the normal Light Raw 1x1 mode to a...

Страница 22: ...ndow However for best results we recommend manually subtracting the dark frames from each light image to make sure the calibration worked properly If for example your telescope had a light leak when t...

Страница 23: ...rames taken This is why it s very important to label your autosaved images 4 Select Calibrate from the Process menu and the flats will be calibrated If you have taken darks and flats you can calibrate...

Страница 24: ...ease refer to Image Pro cessing Batch Processing as this method allows you to combine an unlimit ed number of images without consuming more memory from your computer 2 Select Combine in the Process me...

Страница 25: ...an reject it by clicking the Reject Image button Use the Next Image and or Previous Image button to continue going through the open images after an image is rejected At least one image must be used as...

Страница 26: ...a Clip combines the best features of Average and Median Sigma Clip is the best choice for removing unwanted noise hot pixels and satel lite trails It works like Average but also calculates the standar...

Страница 27: ...tics Although perfect color rendition is an elusive if not impossible goal all indi viduals see colors slightly differently it is straightforward to get good color balance with simple weightings This...

Страница 28: ...object e g a neutral colored star in the image not the Preview Image with the mouse The Scaling settings will automatically be adjusted to make the selected point appear white If an area of the image...

Страница 29: ...re always taken from the screen stretch settings for the original image These can be adjusted dynami cally using for example Quick Stretch The Max Pixel selection sets the input range from 0 to the br...

Страница 30: ...vels above 255 in the 16 bit image i e the vast majority of the 16 bit brightness levels will be saved at the maximum 8 bit value of 255 So the saved jpg will have very little brightness information f...

Страница 31: ...nt that saving a file will cause it to overwrite an existing file you can select skip save overwrite it or move to subfolder You can specify the subfolder name in the adjacent field Use Size Format to...

Страница 32: ...tar through a telescope guide scope mounted next to the main imaging telescope on the same mount The observer makes manual corrections to the motor drives via a pushbutton hand controller to keep the...

Страница 33: ...ith the main telescope Computer to Mount Connection In order for autoguiding with the StarShoot Pro to work you need a way to send commands from the computer to the telescope mount This is generally d...

Страница 34: ...A cable then connects the GPUSB to the mount In addition to installing the ASCOM platform on your computer from the Install ASCOM button in the Launcher you will need to install the GPUSB ASCOM driver...

Страница 35: ...utoguider commands are issued To do this the software will Calibrate the mount by moving it back and forth on each axis The Calibration Time determines how long it activates the motors each time The u...

Страница 36: ...ayed in the scrolling log 13 If the star bounces back and forth reduce the aggressiveness for that axis If it corrects too slowly increase the aggressiveness Changes to the aggressiveness settings tak...

Страница 37: ...ntials software In the Camera Control Window that appears you will notice the Cam 1 and Cam 2 selection circles are now active in the Expose tab 3 Choose which camera you would like to image with by c...

Страница 38: ...ed open image the size of the currently selected image the zoom factor the coordinates of the mouse on the image the intensity of the pixel under the cursor and for color images the red green and blue...

Страница 39: ...xis finder scope we highly recom mend utilizing it for polar alignment If not a technique known as the drift method of polar alignment has been used for many years and can achieve an extremely accurat...

Страница 40: ...iodic error Choosing a Site for Astro imaging Once you have a focused image you may find your image shifting and washed out This can be caused by many environmental factors Poor seeing move ment of mo...

Страница 41: ...he computer We recommend purchasing a 10 USB exten sion cable if you need more cord length available through Orion check the catalog and or www OrionTelescopes com Care and Maintenance When the StarSh...

Страница 42: ...ired operation Changes of modifications not expressly approved by the party responsible for compliance could void the user s authority to operate the equipment Note This equipment has been tested and...

Страница 43: ...ension USB cables available from Orion should work with the camera But adding length and another connection point between the computer and camera can potentially cause problems If you are using an ext...

Страница 44: ...on There are several short horizontal lines or there is irregular noise throughout the image You are likely experiencing readout noise as a result of running the camera too fast for your computer Figu...

Страница 45: ...ificantly higher than 5000 please consult Orion s Customer Service The camera lost its connection Attempt to re establish the connection The camera can lose connection for several reasons if a cable b...

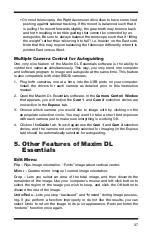
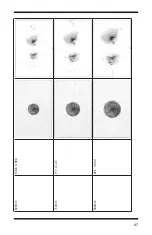
Страница 46: ...corresponding fields of view provided by the StarShoot Pro The angular field of view is shown in arc minutes The image scale shows the relative size of two reference objects the Moon and the Orion Ne...

Страница 47: ...47 600mm 138 8 X 90 6 750mm 111 X 72 5 900mm 92 5 X 60 4...

Страница 48: ...48 Telescope Focal Length Angular Field of View Image Scale of the Moon Image Scale of M42 1000mm 83 3 X 54 4 1250mm 66 6 X 43 5 1800mm 46 3 X 30 2...

Страница 49: ...49 2032mm 41 X 26 8 2540mm 32 8 X 21 4 2800mm 29 7 X 19 4...

Страница 50: ...50 Telescope Focal Length Angular Field of View Image Scale of the Moon Image Scale of M42 3000mm 27 8 X 18 1 3910mm 21 3 X 13 9...

Страница 51: ...deep sky object you want to image Autosave as many images as you would like 5 or more images is recommended to later combine Take some single exposures to ensure the object focus centering and orient...

Страница 52: ...suitable light source Find the exposure which creates a Max Pixel of about 20000 Camera Control Window Mode Light Raw 1x1 Single Expose 0 1 seconds or so Begin taking and autosaving the flat field im...

Страница 53: ...e cursor to select the alignment star s in each image Combine Images window Output Average OK 4 M ake other adjustments if needed such as stretch filter or color balance See Image Processing Various p...

Страница 54: ...______ ________________________________________________________________ ________________________________________________________________ _______________________________________________________________...

Страница 55: ...____________________________________ ________________________________________________________________ ________________________________________________________________ _________________________________...

Страница 56: ...ille CA 95076 If the product is not registered proof of purchase such as a copy of the original invoice is required This warranty does not apply if in Orion s judgment the instrument has been abused m...

Отзывы: