background image


Installation and User’s Guide

http://www.orionimages.com 

7300 Bolsa Avenue, Westminster CA 92683 / Tel: 714-766-6300 / Fax: 714-766-6310 

pg4 

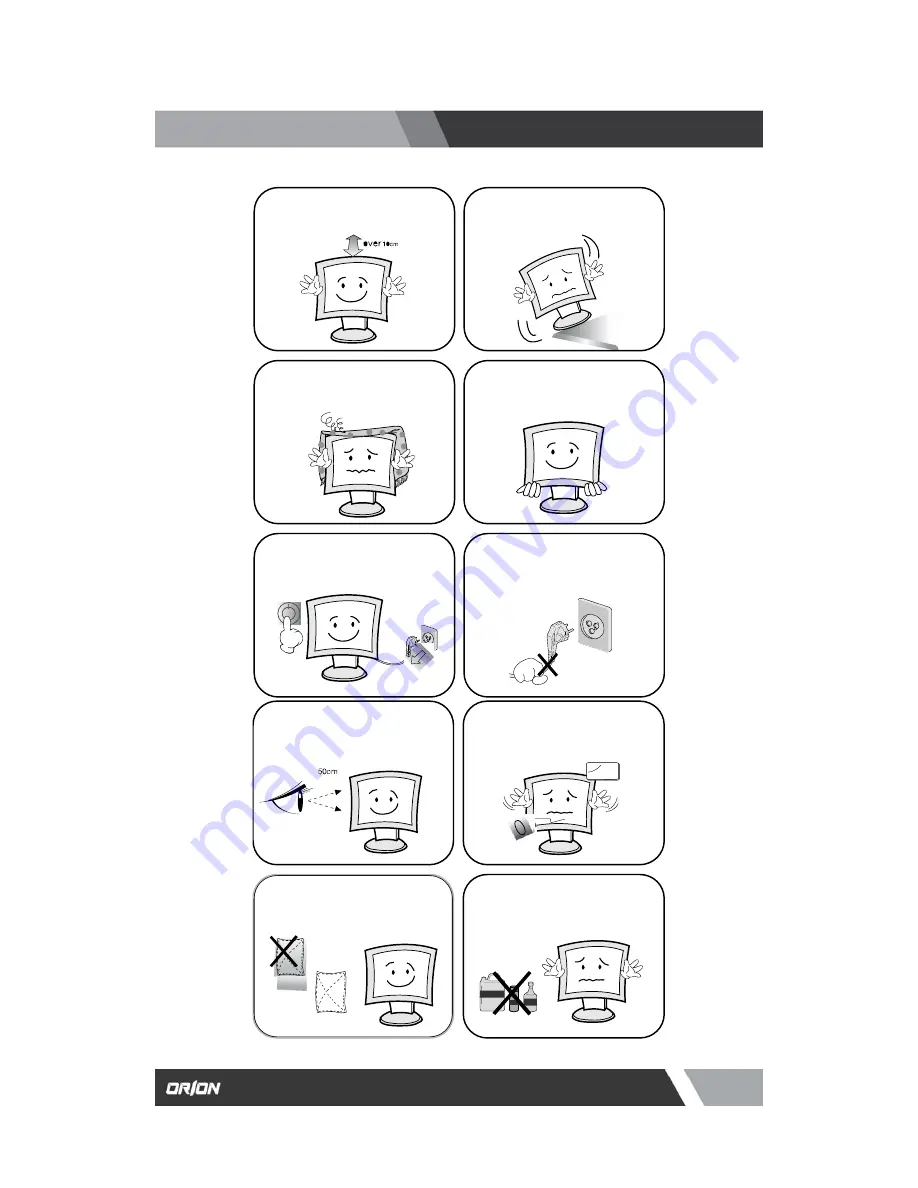
Cautions


Install this monitor some distance 
From the wall and do not install unless 
Proper ventilation is provided. 

Place this product on a stable place. 
If not, it may fall, causing serious 
Damages to the monitor and people.


The openings must not be blocked by 
curtain, rug or other similar surface. 

When carrying this monitor, be careful 
not to damage the panel and drop it 
It may cause some trouble. 

Before carrying the monitor, tum it off 
and Unplug the signal cables and the 
power code From the wall outlet. 

Take the power plug out from the wall 
outlet. Do not pull the cable. It may 
snap the inner wires and cause 
overheating and fire. 

Install this monitor about 50cm far from 
the eyes and an angle of 0~15 degrees 
below eyes. Too close installation may 
cause having weak sight. 

Do not press the LCD panel with hands 
or the sharpened material hardly. 

For cleaning, unplug the monitor from 
the Wall outlet. Do net use the liquid 
cloth. Use the soft cloth. 

Do not use the chemical liquid for 
cleaning. It may cause fading and 
breakage. 

Содержание 17" TFT-LCD MONITOR

Страница 1: ...w orionimages com All contents of this document may change without prior notice and actual product appearance may differ from that depicted herein Installation and User s Guide 17 19 TFT LCD MONITOR S...

Страница 2: ...he serious damage to the user CAUTION If the user does not follow this instruction it may cause the slight damage to the user or cause some damages to the monitor Never remove the back over and touch...

Страница 3: ...et hands When lightning and thundering unplug the monitor from the wall outlet and never touch it Unplug this product from the wall outlet when It does not operate for a long time When smoking and noi...

Страница 4: ...mage the panel and drop it It may cause some trouble Before carrying the monitor tum it off and Unplug the signal cables and the power code From the wall outlet Take the power plug out from the wall o...

Страница 5: ...92683 Tel 714 766 6300 Fax 714 766 6310 pg5 TABLE OF CONTENTS 1 INSTALLATION 1 1 Parts 2 FEATURES 2 1 Specifications 3 OSD SETTING 6 TROUBLESHOOTING 7 LIMITED LIFETIME WARRANTY 4 CONTROL BUTTON 1 2 Ho...

Страница 6: ...stminster CA 92683 Tel 714 766 6300 Fax 714 766 6310 pg6 INSTALLATION 1 1 Parts Remove the package cover and place the product on a flat and secure surface or in the installation location Check whethe...

Страница 7: ...N 6 VIDEO 2 AV2 OUT 7 AUDIO 1 IN 8 AUDIO 2 IN 9 S VIDEO Y C IN 10 S VIDEO Y C OUT 11 PC STEREO IN RGB signal input Composite signal input for AV1 Video looping output for AV1 Composite signal input fo...

Страница 8: ...power ON or OFF There will be a few seconds delay before the display appears Mute the sound Select Video1 source Select Video2 source Select S Video source Select RGB source Auto geometry adjustment...

Страница 9: ...m Brightness 300 cd Contrast Ratio 1000 1 Aspect Ratio 5 4 Viewing Angle H V 160 160 Display Color 16 7 MILLION Response Time 5ms Video System NTSC PAL SECAM Frequency H 31 48KHz Frequency V 55 75Hz P...

Страница 10: ...elect the source 3 Press the MENU EXIT button to exit the INPUT menu 3 1 OSD MENU Description MENU SELECTION 1 Press the MENU key to access the Main menu 2 Use the and arrow key to highlight a selecti...

Страница 11: ...eed 3 Press the OK or button to active the item 4 Press the MENU EXIT button to move the previous menu EX If you select the BRIGHTNESS then the picture below appears on the screen NOTE TINT item is fo...

Страница 12: ...x 714 766 6310 pg12 OSD On Screen Display SETTING D RGB Setup Menu E Function Menu 1 Press the MENU button and then button to select the RGB SETUP menu 2 Press the button and then button to select the...

Страница 13: ...u Continue 5 Press the MENU button and then button to select the FUNCTION menu 6 Press the button and then button to select the adjustment item you need 7 Press the button to active the item 8 Press t...

Страница 14: ...OSD menu and auto adjustment of RGB source VOL Decreases the level of volume and move the previous menu Turns the power ON or OFF There will be a few seconds delay before the display appears The powe...

Страница 15: ...here is no guarantee that interference will not occur in a particular installation If this equipment does cause harmful interference to radio or television reception which can be determined by turning...

Страница 16: ...oting Troubleshooting Tip 1 Make sure if the power supply is connected property 2 Turn on the power The screen doesn t show up 3 Select the input signal right for the connected port The screen is too...

Страница 17: ...defects in materials and workmanship Orion Images is not liable for improper installation that results in damage to mounts adapters display equipment or personal injury In the event of missing and or...

Отзывы: