background image

21

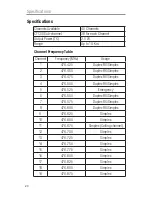
Specifications

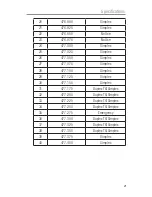
20

476.900

Simplex

21

476.925

Simplex

22

476.950

No Use

23

476.975

No Use

24

477.000

Simplex

25

477.025

Simplex

26

477.050

Simplex

27

477.075

Simplex

28

477.100

Simplex

29

477.125

Simplex

30

477.150

Simplex

31

477.175

Duplex TX/Simplex

32

477.200

Duplex TX/Simplex

33

477.225

Duplex TX/Simplex

34

477.250

Duplex TX/Simplex

35

477.275

Emergency

36

477.300

Duplex TX/Simplex

37

477.325

Duplex TX/Simplex

38

477.350

Duplex TX/Simplex

39

477.375

Simplex

40

477.400

Simplex

Содержание UHF2100

Страница 1: ...Operating Instructions UHF2100 40 Channel UHF 2 Way Citizen Band Radio...

Страница 2: ......

Страница 3: ...3 Table of contents Safety Information and Warnings 4 Getting Started 6 Oricom UHF2100 instructions 10 Operation 11 Specifications 20 Warranty information Australia 22 Customer support 23...

Страница 4: ...particularly when placing it inside a pocket purse or other container with metal objects WARNING For Vehicles with an Air Bag Do not place your radio in the area over an air bag or in the air bag dep...

Страница 5: ...off the two way radio Obey all signs and instructions NOTE Areas with potentially explosive atmospheres are often but not always clearly marked They include fueling areas such as below deck on boats...

Страница 6: ...Belt clip is locked into position Installing the Batteries Figure 3 Figure 4 Caution Observe the proper battery polarity orientation when installing batteries Incorrect positioning can damage both th...

Страница 7: ...tely run down New batteries take up to 14 hours to fully charged Important Read these Safety Warnings before you charge the batteries When placing the radio in the charger use only the power supplies...

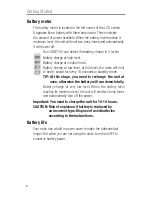
Страница 8: ...the radio will emit a beep sound for every 10 seconds in standby mode TIP At this stage you need to recharge the unit at once otherwise the battery will run down totally Battery charge at very low le...

Страница 9: ...e unit at least 5cm 2 inches away from your face Never use your radio outdoors during a thunderstorm Don t use the radio in the rain If your radio gets wet turn it off and remove the battery Dry the b...

Страница 10: ...r OFF Ear Mic Charge jack LCD Screen Channel Number Changes from 1 to 40 as selected by the user CTCSS Code Changes from 1 to 38 as selected by the user Displays the Battery change level When the bars...

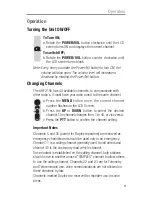
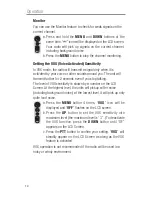
Страница 11: ...t channel number flashes on the LCD Screen b Press the UP or DOWN button to select the desired channel The channel changes from 1 to 40 or vice versa c Press the PTT button to confirm the channel sett...

Страница 12: ...S sub channel Each channel has 38 sub channels to let you set up group of users within the same channel for more private communication If you have set the sub channel you can only communicate with oth...

Страница 13: ...yourself when transmitting on the same channel IMPORTANT Before transmitting on a UHF channel listen to ensure it is not already in use Transmitting sending a speech The unit is continuously in the R...

Страница 14: ...econds even if you stop talking The level of VOX sensitivity is shown by a number on the LCD Screen At the highest level the units will pickup softer noise including background noise at the lowest lev...

Страница 15: ...ing the CTCSS from 1 38 d Press the MENU button seven times DCS flashes on the LCD screen Press the UP or DOWN button to begin scanning DCS code 1 83 e Press the PTT button to confirm your setting Vib...

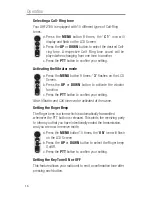
Страница 16: ...DOWN button to activate the vibrator function c Press the PTT button to confirm your setting Note Vibrator and Call tone can be activated at the same Setting the Roger Beep The Roger beep is a tone wh...

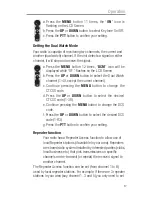
Страница 17: ...g the MENU button to change the CTCSS code d Press the UP or DOWN button to select the desired CTCSS code 1 38 e Continue pressing the MENU button to change the DCS code f Press the UP or DOWN button...

Страница 18: ...r which transmits on channel 2 after setting your radio to allow access of the repeater on that channel you will select channel 2 as normal but during transmit operation your radio will automatically...

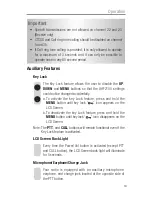
Страница 19: ...could not be changed accidentally a To activate the key Lock feature press and hold the MENU button until key lock icon appears on the LCD Screen b To deactivate the key Lock feature press and hold th...

Страница 20: ...plex 2 476 450 Duplex RX Simplex 3 476 475 Duplex RX Simplex 4 476 500 Duplex RX Simplex 5 476 525 Emergency 6 476 550 Duplex RX Simplex 7 476 575 Duplex RX Simplex 8 476 600 Duplex RX Simplex 9 476 6...

Страница 21: ...mplex 27 477 075 Simplex 28 477 100 Simplex 29 477 125 Simplex 30 477 150 Simplex 31 477 175 Duplex TX Simplex 32 477 200 Duplex TX Simplex 33 477 225 Duplex TX Simplex 34 477 250 Duplex TX Simplex 35...

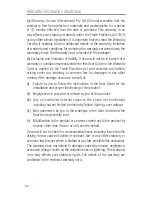
Страница 22: ...ages or any other remedy if the damage occurs as a result of i Failure by you to follow the instructions in the User Guide for the installation and proper functioning of the product ii Negligence on y...

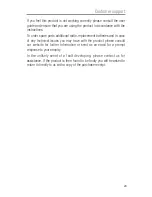
Страница 23: ...al radio replacement batteries and in case of any technical issues you may have with the product please consult our website for further information or send us an email for a prompt response to your en...

Страница 24: ...Support Email support oricom com au Web Australia www oricom com au New Zealand www oricom co nz Phone 02 4574 8888 Fax 02 4574 8898 Australia Oricom International Pty Ltd Locked Bag 658 South Windsor...

Отзывы: