


6
GB To stop the alarm, press [
] or [SNOOZE]. If [SNOOZE]
button is pressed, the alarm sound will be turned off temporarily
and the snooze function will be activated. The alarm will go off
again after approx. 8 minutes until other key is pressed to turn off
the alarm.
RESETTING THE UNIT
In case of malfunction or abnormal display, press the [RESET]
button at the bottom of the unit wth a blunt stylus. All settings will
be cleared and reset to their default values.
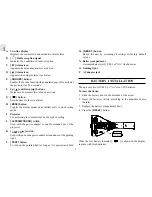
HOW TO USE THE GUIDING LIGHT
RM813P/ RM813PU is equipped with a guiding light. To test the
functionality of the guiding light or to turn it on temporarily, press
the [TEST] button with a blunt stylus at the bottom of the unit. The
light will be on as long as the button is pressed and held.
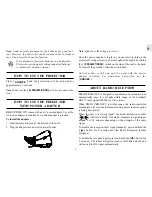
For continuous use of the guiding light, AC Power adapter is
required to be connected. For instructions on how to install the
adapter, please see Section “How to Use the Projector with Power
Adapter”.
Once the power adapter is in place, slide the [LIGHT ON] switch at
the side of the unit to the back to turn on the guiding light for a
longer time. To turn the light off, simply slide the switch to the
opposite direction.
Note that this switch can only be used when the power adapter is
installed. For test or momentary light-on, use the [TEST] instead.
HOW TO CHANGE
THE GUIDING LIGHT BULB
RM813P/ RM813PU is pre-installed with a 3V lightbulb. In case
you want to change the lightbulb follow the instructions below:
1. Un-install the power adapter from the unit to prevent electric
shock. Remove the batteries from the battery compartment as
well.
2. Remove the tail of the unit as shown.
3. Then, remove the lightbulb by rotating it in a anti-clockwise
direction.
4. Replace with new lightbulb with correct specifications. Make
sure the lightbulb is securely fixated.
5. Replace the tail of the unit as shown.


