background image

4

EN

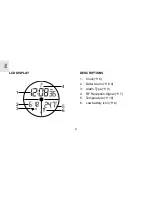
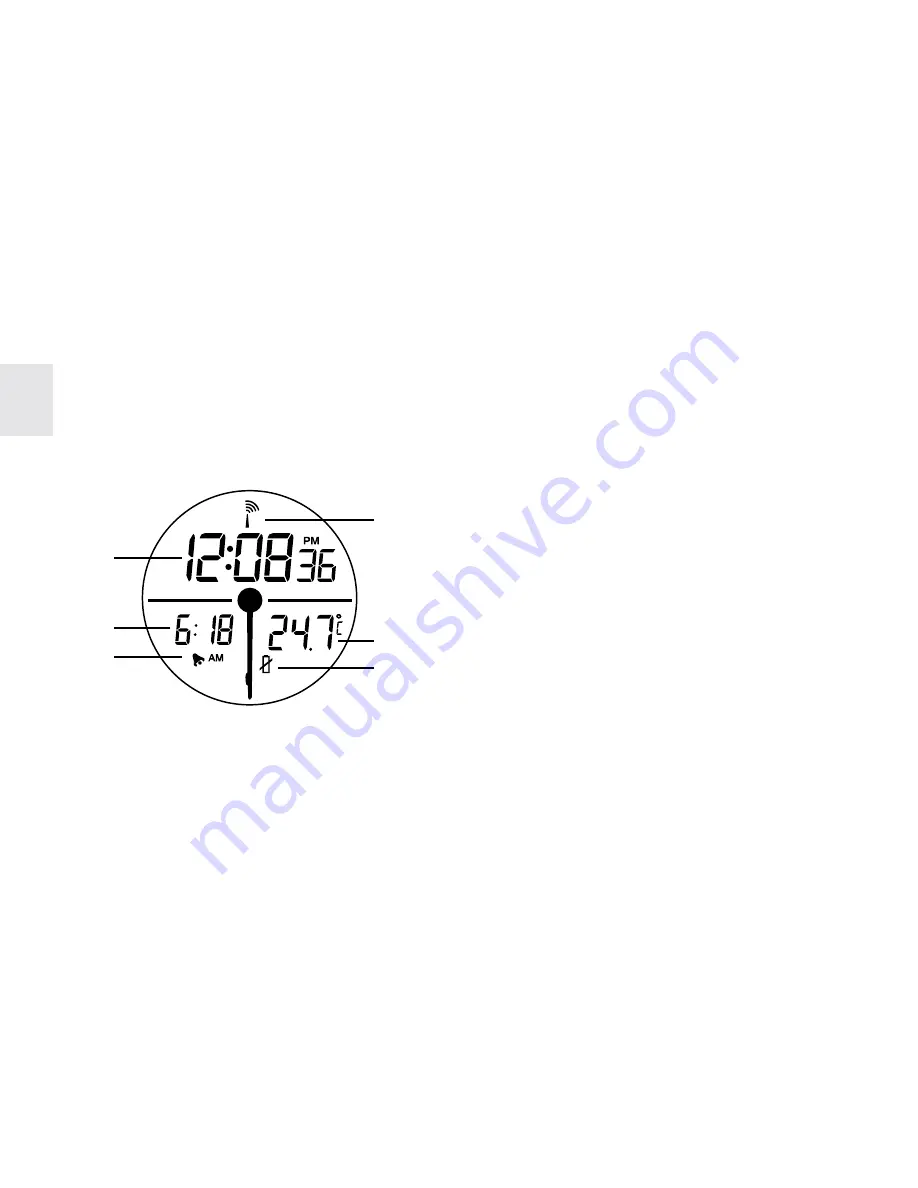
LCD DISPLAY

4

1

2
3

5
6

DESCRIPTIONS

1.

Clock (

 6)

2.

Date/ Alarm (

 8,9)

3.

Alarm Type (

 9)

4.

RF Reception Signal (

 7)

5.

Temperature (

 10)

6.

Low battery icon (

 6)

Содержание Imola FST-301

Страница 1: ...this guide 2 Product overview 3 Getting started 6 Batteries 6 Change settings 6 Clock 6 Alarm 9 Temperature 10 Backlight 10 Reset system 10 Safety and care 11 Warnings 11 Troubleshooting 12 Specifications 13 Additional resources 14 ...

Страница 2: ...01 This powerful device bundles time keeping alarm and indoor temperature measurement to keep you comfortable and on time while you travel Keep this manual handy as you use your new product It contains practical step by step instructions as well as technical specifications and warnings you should know In this box you will find Main unit Batteries ...

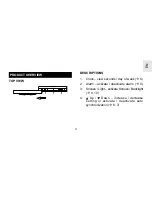
Страница 3: ... VIEW 1 2 3 4 DESCRIPTIONS 1 Clock view seconds day of week 6 2 Alarm activate deactivate alarm 9 3 Snooze Light activate Snooze Backlight 9 10 4 Up Down increase decrease setting or activate deactivate auto synchronization 6 7 ...

Страница 4: ...4 EN LCD DISPLAY 4 1 2 3 5 6 DESCRIPTIONS 1 Clock 6 2 Date Alarm 8 9 3 Alarm Type 9 4 RF Reception Signal 7 5 Temperature 10 6 Low battery icon 6 ...

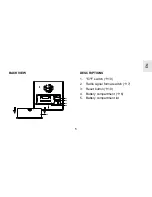
Страница 5: ...5 EN BACK VIEW AAA UM 4 1 5V AAA UM 4 1 5V 3 5 4 2 1 DESCRIPTIONS 1 C F switch 10 2 Radio signal format switch 7 3 Reset button 10 4 Battery compartment 6 5 Battery compartment lid ...

Страница 6: ... the point of a blunt object such as a ball point pen NOTE Do not use rechargeable batteries CHANGE SETTINGS Press and hold CLOCK or ALARM for 2 seconds to enter setting mode Then press UP or DOWN to change each setting Press and hold UP or DOWN to enter fast setting mode Press CLOCK or ALARM to switch between settings CLOCK This product can automatically synchronize the date and time with officia...

Страница 7: ...t EU DCF or UK MSF Then press RESET to reset the unit Reception takes 2 10 minutes to complete Once complete the icon will stop blinking NOTE For best results place the unit away from metal or electrical objects and near a window with a clear view to the sky TO DISABLE OR ENABLE AUTO SYNCHRONIZATION Press DOWN for 2 seconds to disable the auto synchronization The unit will not respond Strong signa...

Страница 8: ...ated before you manually set the clock 1 Press and hold CLOCK for 2 seconds to enter setting mode 2 Select the 12 24 hour format hour minute year date month format month date and display language Press UP or DOWN to change the setting Press CLOCK to confirm NOTE The language options are E English F French D German I Italian and S Spanish VIEW DAY OF WEEK OR SECONDS Press CLOCK ...

Страница 9: ...our minute and alarm type for Beep Alarm or for Ferrari Engine Press UP or DOWN to change the setting Press ALARM to confirm SNOOZE Press the SNOOZE LIGHT button on the top of the unit to temporarily disable the alarm for 8 minutes The alarm icon will blink while Snooze is activated TO TURN THE ALARM OFF OR ON Press CLOCK UP or DOWN To turn the alarm off completely deactivate it for the next day p...

Страница 10: ...stablish radio frequency link with automatic clock This will return all settings to default value and you will lose all stored information alarm and clock settings TEMPERATURE This product measures current indoor temperature SET UNIT Open the battery compartment Set the C F switch to Celsius or Fahrenheit degrees BACKLIGHT Press SNOOZE LIGHT to illuminate the backlight for 5 seconds ...

Страница 11: ...er This can cause electrical shock and damage the unit Do not subject the main unit to extreme force shock or fluctuations in temperature or humidity Do not tamper with the internal components Do not mix new and old batteries or batteries of different types Do not use rechargeable batteries with this product Remove the batteries if storing this product for a long period of time Do not scratch the ...

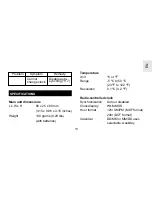
Страница 12: ...LESHOOTING Check here before contacting our customer service department Shows LLL or HHH Temp Out of range Problem Symptom Remedy Problem Symptom Remedy Clock Cannot auto synch Adjust batteries press RESET 10 and manually activate auto synch 7 If it still fails you may be too far from a signal Calendar Strange day of week Change language 8 ...

Страница 13: ...teries Temperature Unit C or F Range 5 C to 50 C 23 F to 122 F Resolution 0 1 C 0 2 F Radio controlled clock Synchronization Auto or disabled Clock display HH MM SS Hour format 12hr AM PM MSF format 24hr DCF format Calendar DD MM or MM DD user selectable weekday Cannot change clock Disable auto synching 7 Problem Symptom Remedy ...

Страница 14: ...lkaline batteries ADDITIONAL RESOURCES Visit our website www oregonscientific com to learn more about your new product and other Oregon Scientific products such as digital cameras hand held organizers health and fitness gear and weather stations The website also includes contact information for our customer service department in case you need to reach us ...

Страница 15: ...the R TTE Directive applied standard s ETS 300 683 1997 Safety of information technology equipment Article 3 1 a of the R TTE directive applied standard s EN 60950 1997 Additional information The product is therefore conform with the Low Voltage Directive 73 23 EC the EMC Directive 89 336 EC and R TTE Directive 1999 5 EC appendix II and carries the respective CE marking VS Villingen Germany August...

Страница 16: ...16 EN Radio Controlled Travel Clock with Indoor Temperature Model FST 301 Imola User Manual ...

Отзывы: