
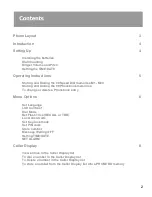

4
INTRODUCTION
Thank you for choosing the Orchid DX800 phone. We hope that you find the following guide
helpful in getting the most out of your purchase.
SETTING UP
Installing the batteries
Unplug the telephone line cord before installing the batteries.
Remove the battery compartment cover located on the underside of the base unit.
Insert the three AA (LR6) batteries supplied, ensuring the correct polarity.
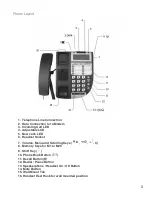
Connect the telephone line cord between the phone socket on the rear panel (1) and the BT
socket.
Connect the handset curly cord to the left hand side socket.
Wall mounting (if required)
Drill 2 holes 9cm apart, be careful to avoid any pipes or wiring.
Using the 2 screws provided wall mount the phone.
Remove the "Wall mount" tab located under Hook switch (15) and replace it in a reverse position.
This will secure the handset when replaced in the cradle.
Ringer Volume and Pitch
On the underside rear there are 2 switches to adjust the Volume and pitch of the ringer for
incoming calls.
Setting the TIME/DATE
Press the ENTER (
) button, use the DOWN/UP (
) buttons to scroll to SET TIME/DATE
and press ENTER (
).
The HOUR will flash, using the DOWN/UP (
) buttons scroll to the correct Hour and press
ENTER (
).
Repeat for MINUTES, MONTH and DAY in that order.
Содержание DX 800
Страница 1: ...Model DX 800 User Guide ...


