background image


10 
 

1.6.7 ALL WINDOW DISPLAY DATA RANGE 

TIME

0:00 

– 99.59(MIN) 

DISTANCE: 0.00 

– 99.9(KM) 

CALORIES: 0.0 

– 999 (kcal) 

SPEED:0.8-18.0(km/h) 

PULSE: 50 

– 200 (BPM) 

INCLINE

– 15 level 

1.7 PULSE FUNCTION


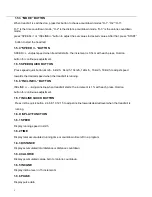
When the treadmill is running, hold on hand pulse pads for about 5 seconds, it will then display your pulse   

reading. A heart-shaped symbol will flash when testing pulse. The heart rate measurement is only good as   

exercise reference and can not be used as medical data. 

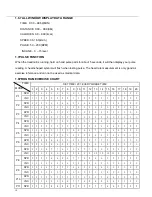
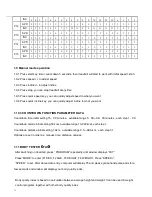
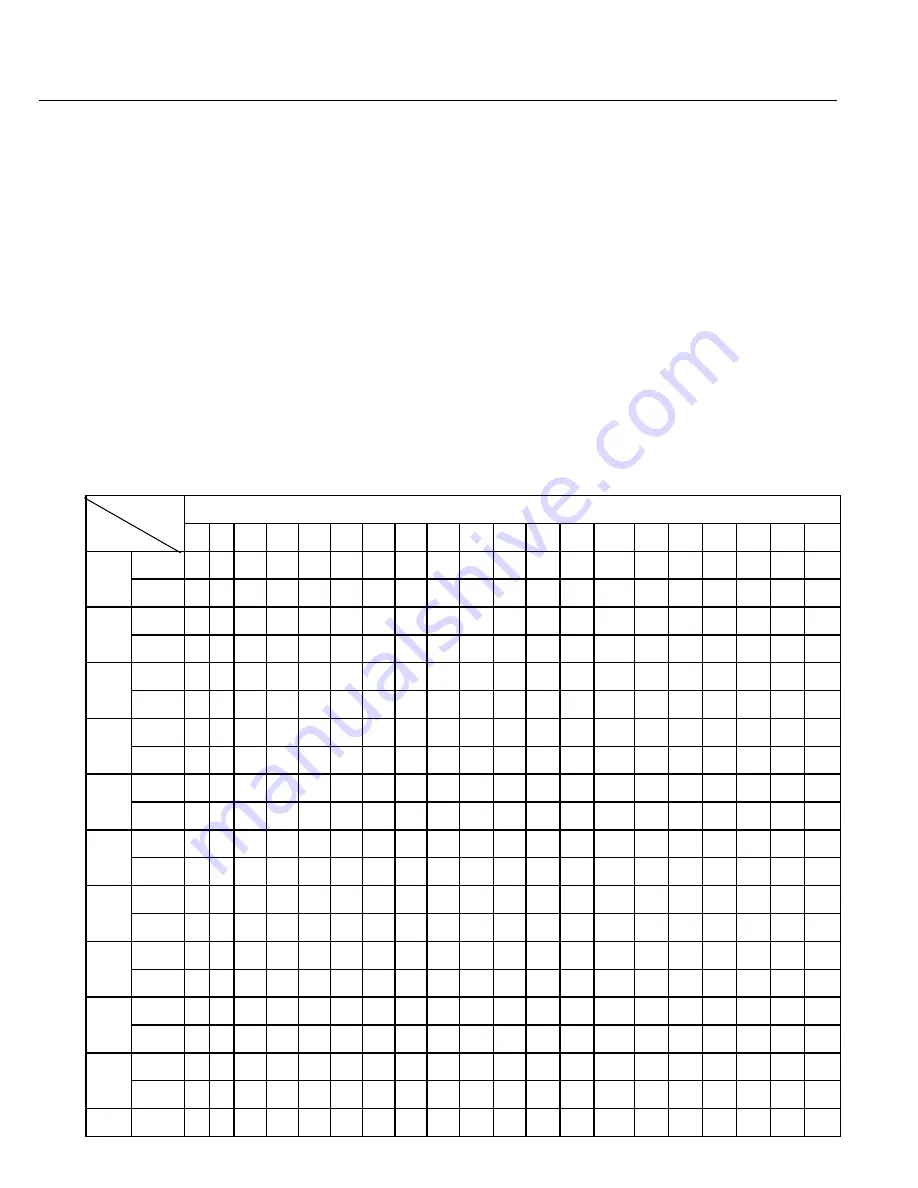
1.8 PROGRAM EXERCISE CHART


      TIME   

MODE 

SET TIME / 20 = EVERY GRADE TIME


1  2 

10  11  12  13 

14 

15  16  17  18  19 

20 

P1 

SPD 

2  2  4 

INC 

1  1  2 

P2 

SPD 

2  2  5 

INC 

1  1  2 

P3 

SPD 

2  2  5 

INC 

1  1  2 

P4 

SPD 

3  3  6 

INC 

2  2  2 

P5 

SPD 

3  3  6 

INC 

1  1  2 

P6 

SPD 

2  2  8 

INC 

2  2  2 

P7 

SPD 

2  2  6 

INC 

4  4  5 

10 

10  12  12 

P8 

SPD 

2  2  4 

INC 

3  3  5 

P9 

SPD 

2  2  4 

INC 

3  3  5 

P10 

SPD 

2  2  3 

INC 

4  4  4 

P11 

SPD 

Содержание ST 35D

Страница 1: ...ST 35D ST 35D ST 35D 110kgs ...

Страница 2: ...CTIONS 3 5 FOLDING UNFOLDING INSTRUCTIONS 6 GROUNDING METHODS 7 OPERATION GUIDE 8 13 GETTING STARTED GUIDE 14 SAFETY EXERCISES 15 WARM UP EXERCISES 16 MAINTENANCE INSTRUCTIONS 17 BELT ADJUSTMENT 18 EXPLODED DRAWING 19 PARTS LIST 21 22 ERROR CODE AND SIGNIFICANCE 23 24 ...

Страница 3: ...ill let go until you are comfortable with its speed 5 Wear appropriate clothing when exercising on the treadmill Do not wear long loose fitting clothing that could be caught in the treadmill Always wear running or aerobic shoes with rubber soles 6 Keep small children and pets away from the treadmill while switched on 7 This treadmill is designed for adult use children intent to use the treadmill m...

Страница 4: ......

Страница 5: ...10 55 D5 and with washer D31 manually take care to avoid cross threading do not tighten up bolts Screw in bolt M10 55 D5 with washer D31 from side of upright post manually If you feel it s too tight shake upright post lightly to make holes and threads line up screw in until threads M10 55 D5 engage threads in the inner side of main frame bracket When all bolts and washers are in position use the A...

Страница 6: ...afety key C26 and MP3 line C33 attach left right side cover B27 28 using bolt ST4 2 25 D33 ATTENTION Check that all nuts and bolts are tightened Before you use this treadmill please read the below instructions carefully ...

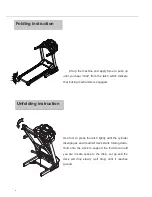
Страница 7: ...anism is engaged Use foot to press the latch lightly until the cylinder disengages and treadmill deck starts folding down Hold onto the deck to support the fold down until you are in safe space to the drop Let go and the deck will drop slowly soft drop until it reaches ground Unfolding instruction Folding instruction ...

Страница 8: ...ments in relate to grounding DANGER Improper connection of the equipment grounding conductor can result in risk of electric shock Check with a qualified electrician or serviceman if you are in doubt as to whether the product is properly grounded Do not modify the plug provided with the product If it does not fit the power outlet please have a proper outlet installed by a qualified electrician No a...

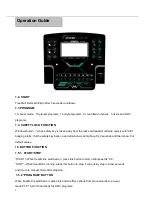
Страница 9: ... Put the safety key back on and all windows will light up for 2 seconds and then show 0 or default values 1 5 BUTTON FUNCTION 1 5 1 START STOP START When treadmill is switched on press this button to start initial speed is 0 8 STOP When treadmill is running press this button to stop it will quickly stop in a few seconds and return to manual mode after stopping 1 5 2 PROGRAM BUTTON When treadmill i...

Страница 10: ...12km h 16km h 18km h to adjust speed towards the desired speed when the treadmill is running 1 5 6 INCLINE BUTTON INCLINE Adjust incline when treadmill starts the increment is 1 with each press Hold on button for continuous adjustment 1 5 7 INCLINE QUICK BUTTON Press incline quick button 2 4 6 8 10 12 15 to adjust incline towards desired level when the treadmill is running 1 6 DISPLAY FUNCTION 1 6...

Страница 11: ...5 5 4 4 6 6 4 4 6 6 4 4 2 2 4 4 2 2 INC 1 1 2 2 3 3 3 3 2 2 2 2 3 3 4 4 2 2 2 2 P3 SPD 2 2 5 5 4 4 5 5 4 4 5 5 4 4 2 2 3 3 2 2 INC 1 1 2 2 2 2 3 3 1 1 2 2 2 2 2 2 2 2 1 1 P4 SPD 3 3 6 6 7 7 5 5 8 8 5 5 9 9 6 6 4 4 3 3 INC 2 2 2 2 3 3 3 3 2 2 2 2 4 4 6 6 2 2 2 2 P5 SPD 3 3 6 6 7 7 5 5 8 8 6 6 7 7 6 6 4 4 3 3 INC 1 1 2 2 4 4 3 3 2 2 2 2 4 4 5 5 2 2 1 1 P6 SPD 2 2 8 8 6 6 4 4 5 5 9 9 7 7 5 5 4 4 3 3 ...

Страница 12: ... to what you want 1 9 6 Press quick incline key you can quickly adjust incline to what you want 1 10 3 COUNTDOWN FUNCTION PARAMETER DATA Countdown time initial setting 15 00 minutes available range 5 00 99 00 minutes each step 1 00 Countdown calorie initial setting 50 kcal available range 10 990 kcal each step 1 Countdown distance initial setting 1 0km available range 0 5 99 9 km each step 0 1 Opt...

Страница 13: ... must complete all 20 segments and then your user program is ready to use Press STOP key to return to last segment setting any time 1 13 Heart rate control HRC program It is recommended that you use a heart rate chest belt transmitter when using HRC Programs hand pulse pads may not be reliable for HRC programs There are 3 HRC programs HR1 HR2 HR3 The related T H R is 220 AGE 60 70 80 The parameter...

Страница 14: ...min 1 14 OTHERS 1 14 1The system will enter into power saving mode automatically if there is no mat movement in 10 minutes under IDLE MODE Display will shut down and backlit windows will switch off on the computer Press any key to resume 1 14 2Countdown time countdown calorie and countdown distance you can only choose one of them at any time While one window will show countdown time distance or ca...

Страница 15: ...w times then adjust to higher speed and or incline and extend to walk run for upto 30 minutes you will have a good workout For your health concern do not over exercise AMOUNT OF EXERCISE SHORTCUT One recommended way is to do 15 20 minutes exercise Warm up for 2 minutes by 4 8 km h and adjust speed to 5 3 km h and 5 8 km h continue to walk by these two speeds Then add 0 3 km h per 2mins speed incre...

Страница 16: ...e if symptoms persist long after stop exercise Below setting is for your reference Speed 1 3 0 km lack of exercise user or under health conditions Speed 3 0 4 5 km not regular exerciser Speed 4 5 6 0 km walker low intensity Speed 6 0 7 5 km fast walker high intensity Speed 7 5 9 0 km jogging Speed 9 0 12 0 km intermediate speed runner More than 12 0 km excellent runner athletics ATTENTION It is be...

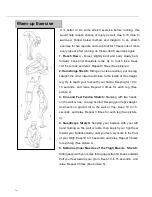
Страница 17: ...r hands Keeping for 10 to 15 seconds and relax Repeat 3 times for each leg See picture 2 3 Crus and Feet Tendon Stretch Standing with two hands on the wall or tree one leg behind Keeping your legs straight and heels on ground tilt to the wall or tree Keep 10 to 15 seconds and relax Repeat 3 times for each leg See picture 3 4 Quadriceps Stretch Keeping your balance with your left hand holding on th...

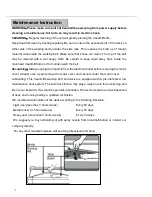
Страница 18: ...dmill from the electrical outlet before removing the motor cover At least once a year remove the motor cover and vacuum under the motor cover Lubricating This treadmill s walking belt and deck are equipped with a pre lubricated low maintenance deck system The belt deck friction may play a major role in the functioning and life of your treadmill thus requires periodic lubrication We recommend an an...

Страница 19: ...he left adjusting bolt clockwise by 1 4 laps a re start treadmill and make it run at above speed observe the running belt deviate condition for 1 2 minutes Repeat above steps until the running belt moves back to middle and remains centered See picture B Treadmill belt will slightly stretch after a period of use depends on the frequency it being used user body weight and woven structure of the belt...

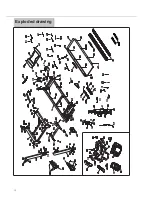
Страница 20: ...19 Exploded drawing ...

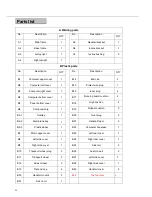
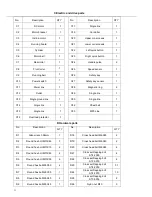
Страница 21: ...r bottom cover 1 B20 Oval plug 2 B5 Panel bottom cover 1 B21 Handrail foam 2 B6 1 B22 Computer bookcase 1 B7 Motor upper cover 1 B23 Left rear cover 1 B8 Left side cover 1 B24 Right rear cover 1 B9 Right side cover 1 B25 Side rail 2 B10 Transport wheel plug 2 B26 Cushion belt 2 B11 Transport wheel 2 B27 Left side cover 1 B12 Adjust wheel 2 B28 Right side cover 1 B13 Flat end cap 4 B29 Handrail cov...

Страница 22: ... 1 C32 Chest belt 1 C16 Overload protector 1 C33 MP3 Line Single line D Hardware parts No Description QTY No Description QTY D1 Allen wrench S6mm 1 D18 Cross head bolt M6X25 2 D2 Round hex bolt M10X45 3 D19 Cross head bolt M6X40 2 D3 Round hex bolt M10X15 4 D20 Cross head bolt M6X65 4 D4 Round hex bolt M10X65 2 D21 Cross self tapping bolt ST4 2X65 4 D5 Round hex bolt M10X55 6 D22 Cross self tappin...

Страница 23: ... M8 4 D13 Hex round head bolt M10X20 2 D31 Flat washer M10 17 D14 Hex round head bolt M8X20 4 D32 Flat washer M8 13 D15 Hex round head bolt M8X55 1 D33 Cross self tapping bolt ST4 2X25 6 D16 Hex round head bolt M8X60 2 D35 Screw driver 13 15 17 1 D17 Cross head bolt M5X8 4 Remark If the customer want the upper controller they should buy it seperately ...

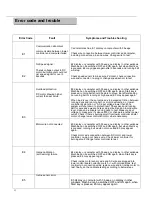
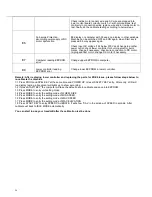
Страница 24: ...age lower than 200v system will shut down to protect itself Check deck and running belt for excessive wear and tear adjust belt tension to moderate level clean and lubricate running deck to test Measure input voltage to make sure it s above 200V or change to another power outlet Check if there s burning smell from lower controller and or motor change lower controller motor where necessary Motor wi...

Страница 25: ...ibrate will back to IDLE MODE automatically You can start to use your treadmill after the calibration test be done Check incline motor sensor wire and AC wire are plugged into lower control board correctly match with colored wires test continuity in connection wires replace wire and or incline motor to test finally do the calibrate testing according to below steps E6 Anti surge Protection abnormal...

Отзывы: