


10
ORBILOC SERVICE KIT
The
Orbiloc Service Kit
makes maintaining
your
Orbiloc Outdoor Dual
quick and easy.
The
Orbiloc Service Kit
contains a Lithium
Battery Pack (6)
(2 x CR2032) and an
O-ring
(3)
lubricated with silicone.
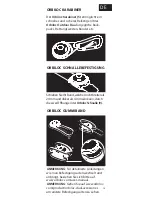
CHANGE BATTERY & MAINTENANCE
Unscrew the
Base (7)
of the
Orbiloc Outdoor
Dual
and replace the old
O-ring (3)
with a
new from the
Orbiloc Service Kit
. Replace
the old
Battery Pack (6)
with a new
Battery
Pack (6)
(with the
+
symbol facing down) in
the
Base (7)
of the
Orbiloc Outdoor Dual
.
Make sure that the
Mode Selector Ring (2)
is clicked firmly to the
Lens (1)
. Please note
that the part with the small magnet has to
be placed in one of the four semicircles on
the
Lens (1)
, and that the
Orbiloc Carabiner
Mount (5)
is placed in the designated guide
pins on the
Lens (1)
. Screw the
Lens (1)
and
Base (7)
of the
Orbiloc Outdoor Dual
together again.
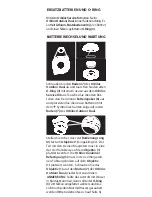
NOTE
; Should the light be in and out of wa
ter often, the
O-ring (3)
should be lubricated
with silicone and the light should be rinsed
after each time (please refer to page 6).


