


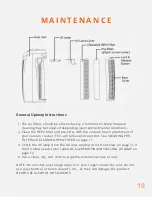


Turn off and unplug the unit
Press the Lock & Release Button and remove the Rear Cover from the unit
Remove the HEPA filter.
Use the brush attachment with your vacuum cleaner to clean the filter. CAUTION: Do not
use water or any household cleaner to clean the HEPA filter.
The HEPA Filter will only fit in one way. Install the rear cover back to the unit and securely
latch in place.
1.
2.
3.
4.
5.
NOTE: The HEPA filter can be used continuously for up to two years. When the HEPA filter
turns from white to dark grey, it should be replaced with a new one. If the HEPA filter is still
white, it does NOT need to be replaced. Both the filter and rear cover must be installed
otherwise the purifier will not power on.
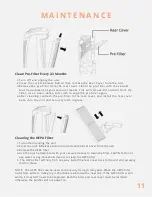
Cleaning the HEPA Filter
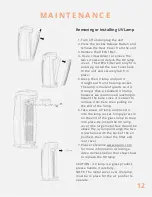
M A I N T E N A N C E
11
Turn Off and unplug the unit.
Press the Lock & Release Button then remove the Rear Cover from the Unit.
Remove the pre-filter from the rear cover. Clean the pre-filter with the vacuum
brush attachment of your vacuum cleaner. This will remove lint and dirt from the
filter. Use a clean, damp, soft cloth to wipe the pre-filter again.
After cleaning, reattach the pre-filter to the rear cover, and install the rear cover
back onto the unit and securely latch in place.
1.
2.
3.
4.
Clean Pre-Filter Every 2-3 Months