background image

22

21

Managing files

: User - customize the equalizer settings to user preferences. 

3. Press the 

button to select the EQ menu option. 

: The User option includes equalizer settings. If you select the User menu 

option, push the navi stick toward 

or 

to adjust the equalizer tone

settings up or down (from -10 to +10) and push the navi stick toward 

◀◀ / ▶▶

to navigate across the equalizer frequency band settings

(5 bands). Press the " button to complete the equalizer settings.

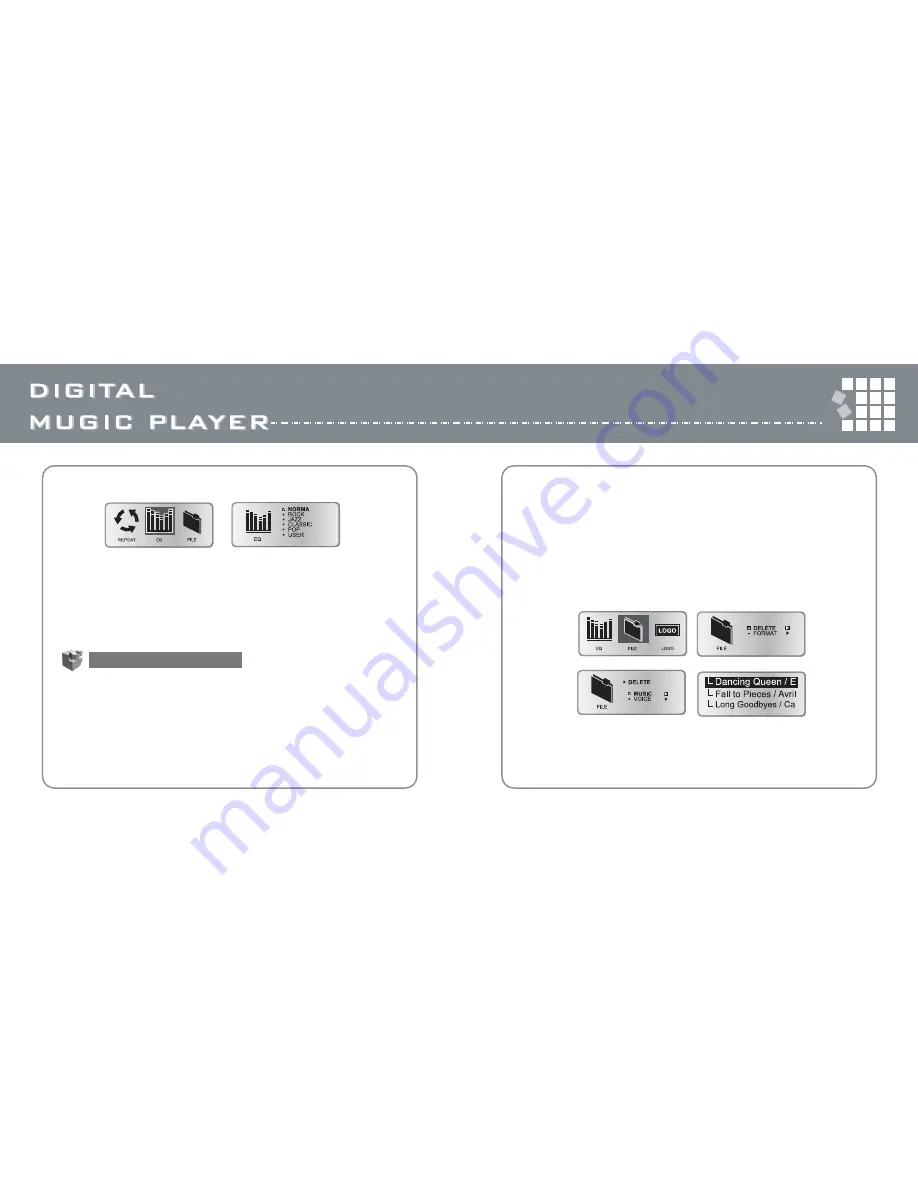
• To use the File menu

1. Use the Menu mode to select the File menu. 
2. Push the navi stick toward 

or 

to scroll through the File menu 

options and highlight an option
: Delete - delete music tracks or voice files.
: Format - format the memory space. All files are deleted in this process.

3. Press the 

button to select the highlighted File menu option.

: The Delete option includes music and voice file options. 

Press the 

button to select the music or voice option. Push the navi 

stick toward 

or 

to scroll through the files and highlight the file 

you want to delete. Press the 

button to delete the file.

: The Format option deletes all files on the player. Push the navi stick

toward  

or 

to highlight OK or Cancel to format. Press the 

button to select the format option.

Caution! The Format option deletes all files on the player. Make sure that  

you have saved all important files before using the Format option.

Содержание ORC-350

Страница 1: ...www oracom co kr...

Страница 2: ...tracks or voice files 13 Setting the section repeat play function 13 Recording voice 14 Line in encoding 15 Menu table 17 Using the Menu mode 19 Setting the repeat mode 19 Setting the equalizer EQ fu...

Страница 3: ...mmable preset stations FM recording Line in encoding 5 band equalizer Menu selection system Multi language support Custom logos Blue backlight Voice recording Folder directory High speed USB communica...

Страница 4: ...6 5 Button function table...

Страница 5: ...king the green arrow on the system tray 4 Press and hold the button to turn on the player 5 Press the button to play music Note When Hold switch is on the buttons on the player will not function If yo...

Страница 6: ...riefly and push the navi stick toward or and press the button to select one of the modes To play music tracks or voice files Push the button toward or to select file in the file list and press the but...

Страница 7: ...ck toward to turn the volume level down Press the mode button briefly and select FM radio mode by pushing the navi stick toward or Then SCN SCAN or MEM MEMORY will be shown on the right of the LCD dis...

Страница 8: ...page 19 FM radio recording Navigating music tracks or voice files To change to another music track or voice file Press button while music track or voice file is playing Then the play will be stopped...

Страница 9: ...de Recorded voice file can playback in voice mode Line In encoding 1 Press Mode button and select Line in by pushing navi stick 2 Press button briefly then Ready Line in appears 3 Press button to star...

Страница 10: ...Format Format 1 Cancel 2 OK Logo 1 Default 2 User 3 Display logo 1 Logo 1 2 Logo 2 Display logo Display logo 1 On 2 Off Display Display 1 Backlight 2 Contrast 3 Scroll speed Contrast Contrast Scroll s...

Страница 11: ...repeat menu options and highlight an option Normal play each music track or voice file one time in sequence Repeat one listen to one music track or voice file repeatedly Repeat all listen to all music...

Страница 12: ...he File menu options and highlight an option Delete delete music tracks or voice files Format format the memory space All files are deleted in this process 3 Press the button to select the highlighted...

Страница 13: ...ght the file you want to display Press the button to select the file Note For more information on creating custom logos see Using the Logo Editor program on page 34 Setting the display options To use...

Страница 14: ...o select a Language option Installing software When you connect your player to your computer s USB port the player appears as a removable drive on your computer If your computer uses Windows XP Window...

Страница 15: ...28 27 2 Insert the player s programs driver CD into the computer s CD drive 3 Click Next The What do you want Windows to do screen opens...

Страница 16: ...the best driver for your device then click Next The drivers search screen opens 5 Click to select the CD ROM drive check box then click Next The Windows driver file search results screen opens 6 Click...

Страница 17: ...to and from the digital audio player Removing the drive while files are transferring will cause transfer failure The player displays an animated arrow when files are transferring and it displays flas...

Страница 18: ...be displayed To use the digital music player as a data drive 1 Connect the player to your computer For more information see Connecting to your computer on page 31 2 Create a data folder on the player...

Страница 19: ...files on the digital music player on page 10 To use the Logo Editor frame function You can use the Logo Editor program to creat an animated logo with the frame function 1 Click Start All Programs Digi...

Страница 20: ...ayer software install program opens 2 Click Voice File Converter then follow the program installation instructions To use the VoiceConverter program 1 Copy voice files from the digital audio player s...

Страница 21: ...e Support File form MPEG 1 2 2 5 layer3 WMA Bitrate 8Kbps 320Kbps Tag ID3 Tag V1 V2 USB Support Connection type USB 1 1 Plug Play OS Windows 98SE ME 2000 XP Linux kernel 2 4 0 or higher version Mac OS...

Отзывы: