background image

exempts


de


licence.


L’exploitation


est


autorisée


aux


deux


conditions


suivantes


:


(1)


le


dispositif


ne


doit


pas


produire


de


brouillage


préjudiciable,


et


(2)


ce


dispositif


doit


accepter


tout


brouillage


reçu,


y


compris


un


brouillage


susceptible


de


provoquer


un


fonctionnement


indésirable.


Radiation


Exposure


Statement:


This


equipment


complies


with


ISED


radiation


exposure


limits


set


forth


for


an


uncontrolled


environment.


This


equipment


should


be


installed


and


operated


with


minimum


distance


20cm


between


the


radiator


&


your


body.


Déclaration


d'exposition


aux


radiations:


Cet


équipement


est


conforme


aux


limites


d'exposition


aux


rayonnements


ISED


établies


pour


un


environnement


non


contrôlé.


Cet


équipement


doit


être


installé


et


utilisé


avec


un


minimum


de


20


cm


de


distance


entre


la


source


de


rayonnement


et


votre


corps


Product


Introduction


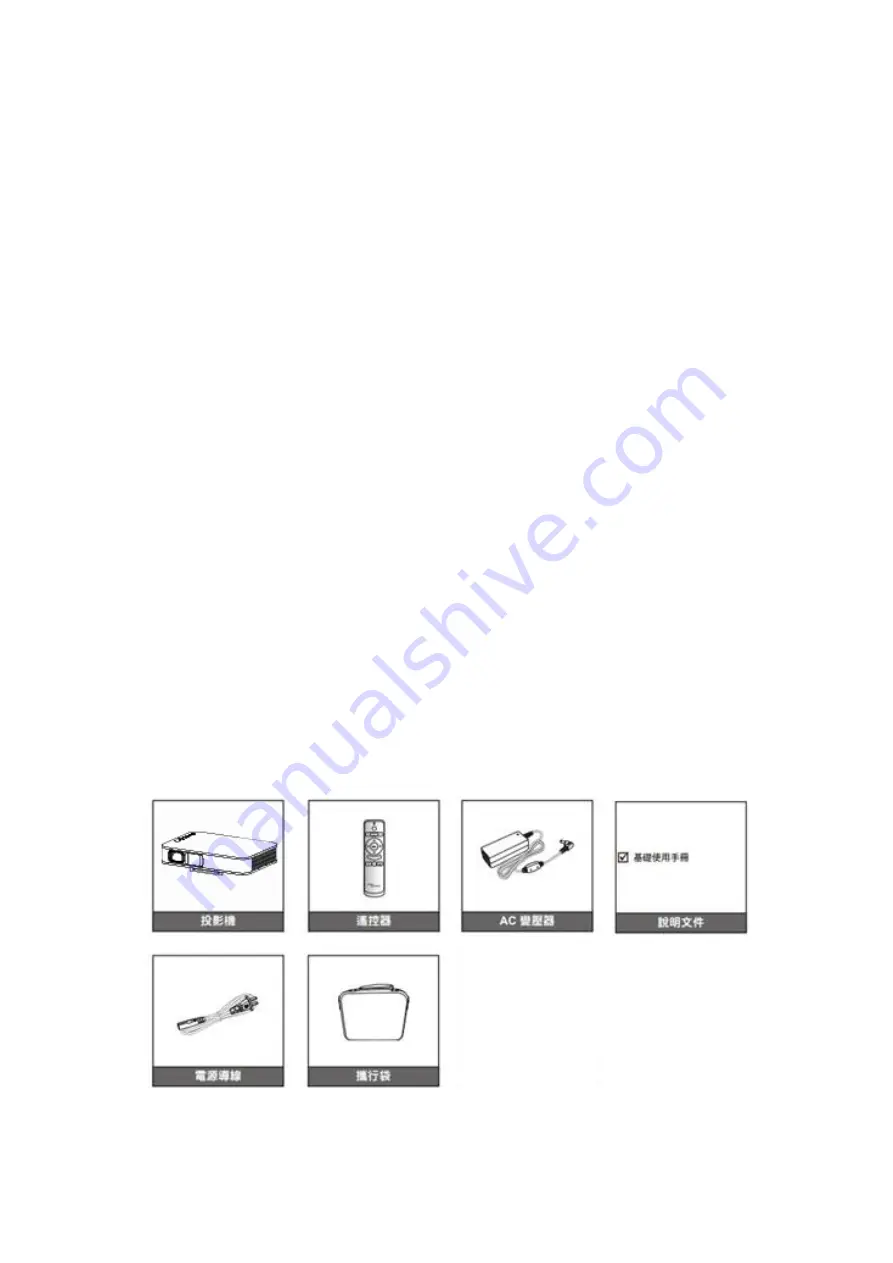
Package


Overview


Carefully


unpack


and


verify


that


you


have


the


items


listed


below


under


standard


accessories.


Some


of


the


items


under


optional


accessories


may


not


be


available


depending


on


the


model,


specification


and


your


region


of


purchase.


Please


check


with


your


place


of


purchase.


Some


accessories


may


vary


from


region


to


region.


Standard


Accessories


Содержание OP1500

Страница 1: ...aged to try to correct the interference by one of the following measures Reorient or relocate the receiving antenna Increase the separation between the equipment and receiver Connect the equipment int...

Страница 2: ...between the radiator your body D claration d exposition aux radiations Cet quipement est conforme aux limites d exposition aux rayonnements ISED tablies pour un environnement non contr l Cet quipement...

Страница 3: ...Product Introduction Overview No Item 1 Lens 2 Lens Cover...

Страница 4: ...No Item No Item 1 Power Key 6 HDMI 2 2 Power Socket 7 Audio Out 1 USB WiFi Dongle 8 Power Off Key 2 USB Wire Connection 9 Air outlet 5 HDMI 1 No Item 1 Air inlet Speaker No Item 1 Focus Wheel...

Страница 5: ...peaker No Item No Item 1 IR Receiver 5 Menu 2 Direction Keys 6 Home 3 Enter 7 Display Mode 4 Return 8 LED LED Indicators Red Green Flashing Off Battery Charging Power on Power on but lens cover is clo...

Страница 6: ...No Item No Item 1 Mounting Hole 5 Projector Stand 2 Screw Hole 3 Anti slip Mat 4 Anti slip Mat...

Страница 7: ...Remote Control No Item No Item 1 Power Key 7 Enter 2 Volume Down 8 Direction Keys 3 Return 9 Menu 4 Display Mode 10 BT 5 Mute 11 Home 6 Volume Up...

Страница 8: ...wireless network Projector Keypad 1 Press the Power key to turn on off the projector 2 Press direction keys to select items or adjust values 3 Press OK to enter the selected item 4 Press Menu to brin...

Страница 9: ...when your turn on the projector In home screen your can switch between different input sources Input Source 1 When input source is connected When input source is connected and selected 2 When input so...

Страница 10: ...connected Input Source Icon Function Description HDMI 1 Select HDMI 1 as the input source HDMI 2 Select HDMI 2 as the input source Wifi Display Select WiFi as the input source USB Display Select USB...

Страница 11: ...e icon to start playing the video How to Connect Smart Phone Connect your smart phone to the projector via charging cable Select the USB icon and you will be directed the page below 1 For iPhone z Sel...

Страница 12: ...z Select USB icon on the home screen...

Страница 13: ...z Turn on USB Tethering on your smart phone z Open the EZCastPro on your phone and select the projector...

Страница 14: ...z Press the top left icon to enter the setting page...

Страница 15: ...2 Select WiFi input source on the home screen 3 Follow the steps below to pair the projector z Turn on WiFi on your phone and select EZProjector_XXXXXXXX z Enter the password 87654321 z Open the EZCa...

Страница 16: ...z Press the top left icon to enter the setting page and turn of Mirror Screen...

Страница 17: ...z Press the top left icon to enter the setting page to connect the projector to the wireless network...

Страница 18: ...z Select Network Setting z Select the wireless network you want to connect and enter the password Home Screen Icon 1 Not selected 2 Selected...

Страница 19: ...nd BT speaker Open setting page Open setting page How to connect Bluetooth 1 Select BT icon on the home screen or press the BT key on the remote 2 When Bluetooth is turned on the projector will scan a...

Страница 20: ......

Страница 21: ...cription Network setting Network setting Setting Languages Auto power off Off 15 30 60 120 minutes Brightness mode Bright Eco USB Power On Off High Altitude On Off Direct Power On On Off LED Projectio...

Страница 22: ...Keystone On Off V Keystone 30 30 H Keystone 20 20 Four Corner Correction Enter Color Space Auto Limited range Full Range Digital Zoom 1 0 1 2 1 4 1 6 1 8 Reset Enter Display Display Mode Cinema Game B...

Страница 23: ...R Gain G Gain B Gain R Bias G Bias B Bias 0 100 Reset Enter Audio Volume 0 40 Bluetooth On Off Mute On Off Reset Enter Troubleshooting If you experience a problem with your projector please refer to t...

Страница 24: ...ts image mirroring only for Android phone Why can t I display the image from my Android phone wirelessly Please ensure your Android phone supports Miracast naming may vary on different brand s phone W...

Страница 25: ...ction Speaker 4W 2 Battery 12000 mAh Specification OP1500 OE Model Anhua F10 47 TRP CPU Actions Micro 8290 HDMI input 2x1 4b MHL not supported USB Port 1 USB A for USB display at least 24 Hz 24 fps ta...

Страница 26: ...projector They may touch dangerous voltage points and short out parts that could result in fire or electric shock Do not use under the following conditions In extremely hot cold or humid environments...

Страница 27: ...en completed before disconnecting power Allow 90 seconds for the projector to cool down Turn off and unplug the power plug from the AC outlet before cleaning the product Use a soft dry cloth with mild...

Отзывы: