background image

47

English

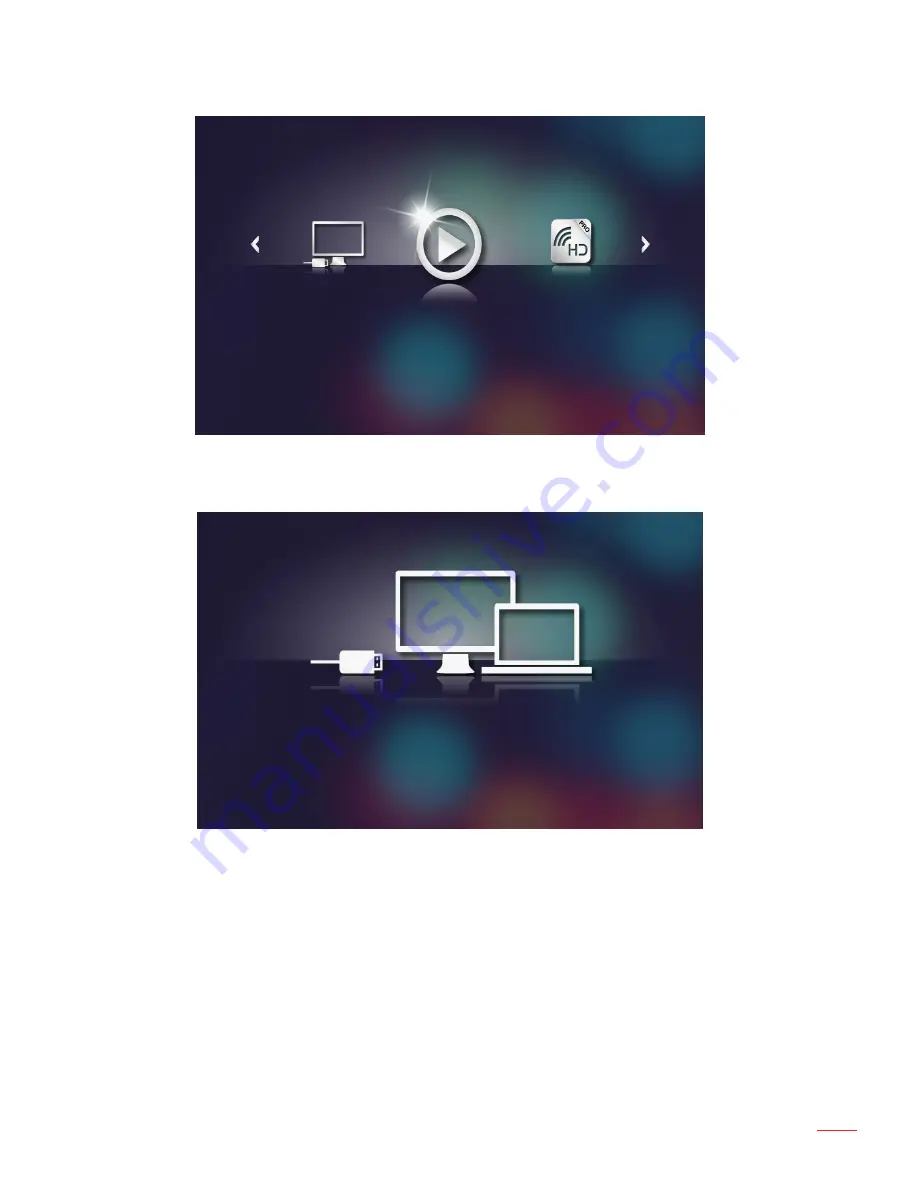
The Multi-Media menu opens. 
 

HD Media

Select the 

3. 

Connect to PC 

menu.


The 

Connect to PC

 menu opens.

Select the file you want to project on the wall.

4. 

Tip: 

In Windows 10 and Mac OS 10.9, you can also save files from your PC directly to the pro-

jector’s internal memory or to the microSD card that has been inserted into the projector. 

Содержание ML750ST-M

Страница 1: ...DLP Projector User manual...

Страница 2: ...Installing the Remote Control Battery 16 Operating Range with Remote Control 16 Installation 17 Connecting to a Computer 17 Connecting to a DVD Player 19 Connecting to Multi Media 20 Turning On Off th...

Страница 3: ...Media with Internal Memory 39 Multi Media Main Menu 41 Multi Media SETTINGS for System USB MicroSD and Internal Memory 41 System Settings 42 Photo Settings 43 Video Setup 44 Music Setup 45 Other Multi...

Страница 4: ...e projector on a crowded coffee table sofa bed etc Do not put the projector in an enclosure such as a book case or a cabinet that restricts air flow 2 Do not use the projector near water or moisture T...

Страница 5: ...uct in adverse conditions will void the product warranty Safety Information Please read understand and follow all safety information contained in these instruc tions prior to the use of this projector...

Страница 6: ...uce the risk associated with hazardous voltage impact tripping and intense visible light Do not use this projector around unsupervised children y y Caution To reduce the risks associated with hearing...

Страница 7: ...ght Do not stare directly into the projector lens y y To reduce the risks associated with tripping and falling Position the charging cord and data cables so that they are not a tripping hazard y y Imp...

Страница 8: ...and commercial uses and licensing may be obtained from mpeg la llc See http www mpegla com AVC VIDEO NOTICE This product is licensed under the avc patent portfolio license for the personal and noncomm...

Страница 9: ...adio TV technician for help y y NOTICE This Class B digital apparatus complies with Canadian ICES 003 Cet appareil num rique de la classe B est conforme la norme NMB 003 du Canada Industry Canada regu...

Страница 10: ...EE Statement The following information is only for EU members States The mark shown to the right is in compliance with Waste Electrical and Electronic Equip ment Directive 2002 96 EC WEEE The mark ind...

Страница 11: ...Ensure that you have all the items and contact your local reseller or service center if anything is missing Projector Lens cap Power cable AC adapter Universal 24 pin to VGA cable Basic user manual an...

Страница 12: ...nit 2 3 6 4 5 8 9 Description 1 Ventilation inlet 2 Control panel 3 Focus ring 4 Lens 5 Input Output connections 6 Lens cap 7 Ventilation outlet 8 Tilt adjusting wheel 9 Screw hole for tripod About Yo...

Страница 13: ...sh Input Output Connections Description 1 MicroSD card slot 2 USB Type A connector 3 DC input connector 4 Headphone connector 5 HDMI MHL connector 6 Universal I O connector 7 Security cable slot 7 1 2...

Страница 14: ...ber indicator is blinking one of the following prob lems could be occurring Internal temperature of the projector is too high y y The fans has failed y y 4 Menu Press to activate the OSD Use the direc...

Страница 15: ...ay Pause Press to play pause media file 8 Volume down Press to decrease the volume 9 LED mode Allows you to select the display mode 10 Aspect ratio Press to change aspect ratio of a displayed image 11...

Страница 16: ...align the polarity 2 correctly according to the marking in the battery holder Replace the battery holder 3 Operating Range with Remote Control 30 3 m 9 84 feet Note When you use the remote control for...

Страница 17: ...17 English Connecting to a Computer Installation Description 1 Power cord 2 AC adapter 3 Audio cable 1 4 USB A to USB A cable 2 5 HDMI cable 2 6 Universal 24 pin to VGA cable 1 3 4 5 6 2...

Страница 18: ...pports only TRS type audio cables without microhpone function with some headsets due to the impedance difference you might notice a slight difference in the volume levels lower volume 2 The accessory...

Страница 19: ...19 English Connecting to a DVD Player Description 1 Power cord 2 AC adapter 3 HDMI cable 2 Note 2 The accessory is not shipped with your projector 2 1 3...

Страница 20: ...20 English Connecting to Multi Media Description 1 Power cord 2 AC adapter 3 Audio cable 1 4 USB flash disk 2 5 MicroSD card 2 6 MHL cable 2 1 3 4 5 6 Smart Phone 2...

Страница 21: ...pports only TRS type audio cables without microhpone function with some headsets due to the impedance difference you might notice a slight difference in the volume levels lower volume 2 The accessory...

Страница 22: ...e last connected input source By default the 6 input source of the projector is set to Multimedia Change the input source of the projector if necessary Turning Your Projector Off Note The Press Power...

Страница 23: ...tune the display angle Front tilt adjustment wheel Angle of tilt 0 to 3 degrees Important Note To avoid damaging the projector ensure that the adjustment wheels are fully retracted before moving the p...

Страница 24: ...Adjusting Projection Image Size 100 254 0 cm 90 228 6 cm 80 203 2 cm 70 177 8 cm 60 152 4 cm 50 127 0 cm 2 83 0 862 m 3 39 1 034 m 3 96 1 206 m 4 52 1 379 m 5 09 1 551 m 5 65 1 723 m Projector to scre...

Страница 25: ...4 cm 50 79 129 cm 31 89 81 cm 3 39 1 034 m 70 177 8 cm 59 45 151 cm 37 01 94 cm 3 96 1 206 m 80 203 2 cm 67 72 172 cm 42 52 108 cm 4 52 1 379 m 90 228 6 cm 76 38 194 cm 47 64 121 cm 5 09 1 551 m 100 2...

Страница 26: ...allows you to select the input source adjust the volume select the dis play mode and configure the brightness contrast image display and setup settings Input Source Main VGA Volume Display Mode Brigh...

Страница 27: ...t source scales to fit the screen and projects a 4 3 image 16 9 y y The input source scales to fit the screen and projects a 16 9 image 16 10 y y The input source scales to fit the screen and projects...

Страница 28: ...stone Select On to automatically adjust image distortion caused by tilting the projector Note The Auto Keystone function can be only used to adjust the image distortion vertically Keystone Adjust imag...

Страница 29: ...e is set to Auto then at each boot up of the projector the input source is always chosen the same as in previous session Direct Power On Choose On to activate Direct Power mode The projector will auto...

Страница 30: ...ry default including computer sources and video source settings After choosing this option a confirmation message appears on the screen Select Yes to confirm or No to cancel reset Reset No Reset Yes V...

Страница 31: ...er set input source to HDMI enable iDevice option Main Setup Advanced and set iDevice as display mode Main Display Mode Mute Select the Mute mode Options are AV Mute mute both audio and video Audio mu...

Страница 32: ...16 000 000 pixel Video Format File Format Video Format Decode Max res Max Bit Rate bps Audio Format Profile MPG MPEG MPEG1 1920x1080 30fps 30M bps MPEG1 L1 3 AVI MOV MP4 MKV H 264 1920x1080 30fps 30M...

Страница 33: ...pages One File Up to 75MB MS Word British Word 95 Because office viewer does not load all pages of MS Word file at the same time there are not abvious limitations of page and line Up to 100MB Word 97...

Страница 34: ...9MB PowerPoint 2000 2002 2003 PowerPoint 2007 pptx PowerPoint 2010 pptx Office XP PowerPoint PowerPoint presentation 2003 and earlier ppx PowerPoint presentation 2007 and 2010 ppsx Note Animations are...

Страница 35: ...ompatibility problem 2 Follow these steps to playback the Photo Video or Music files on your projector Connect the power cable with AC adapter and turn on the projector by pressing the 1 Power button...

Страница 36: ...SD Card USB Settings Access the 4 USB menu and select the multimedia files Photo Video or Music Or select the Settings option to change settings for Photo Video or Music Select the file you want to op...

Страница 37: ...to playback the Photo Video or Music files on your projector Connect the power cable with AC adapter and turn on the projector by pressing the 1 Power button Plug in a 2 MicroSD card to your projector...

Страница 38: ...Card USB Settings Access the 4 SD Card menu and select the multimedia files Photo Video or Music Or select the Settings option to change settings for Photo Video or Music Select the file you want to...

Страница 39: ...nction Follow these steps to playback the Photo Video or Music files on your projector Connect the power cable with AC adapter and turn on the projector by pressing the 1 Power button The Multi Media...

Страница 40: ...d USB Settings Access the 3 Internal Memory menu and select the multimedia files Photo Video or Music Or select the Settings option to change settings for Photo Video or Music Select the file you want...

Страница 41: ...SB MicroSD and Internal Memory The multi media settings menu allows you to change settings for System Photo Video and Music System Internal Memory SD Card USB Settings Photo Video Music Note Multi med...

Страница 42: ...e system settings menu The system settings menu provides the following options System Version Update USB Version View the current projector s firmware Update Update the projector firmware only from th...

Страница 43: ...or Full Screen Slideshow Pattern Select what slideshow effect you want Options are Random Ring Diffusion Middle Enlarge Expand Blink Window Shades Linear Interaction Cross Interleaved Banding Alternat...

Страница 44: ...esolution without scaling If the projected image exceeds the screen size then it will be cropped Full screen y y Regardless the native aspect ratio the video image is stretched non linearly in the hor...

Страница 45: ...glish Music Setup Access the music settings menu The music settings menu provides the following op tion Music Repeat Mode Sequence Repeat Mode Select the music play mode Options are Sequence Single Ra...

Страница 46: ...rtable device Projecting Files from the PC Follow these steps to project files from your PC Connect the power cable with AC adapter and turn on the projector by pressing the 1 Power button To access f...

Страница 47: ...o PC menu The Connect to PC menu opens Select the file you want to project on the wall 4 Tip In Windows 10 and Mac OS 10 9 you can also save files from your PC directly to the pro jector s internal me...

Страница 48: ...Optional USB Wi Fi Dongle Follow these steps to mirror the screen of your portable device Connect the power cable with AC adapter and turn on the projector by pressing the 1 Power button The Multi Me...

Страница 49: ...n instructions to install the HDCast Pro app If you are using a laptop download HDCast Pro app from www optoma com hdcastpro website Plug in a Wi Fi dongle Optional to your projector 4 Connect your po...

Страница 50: ...deo Cloud Storage Split Screen Preference AirView HDMirror Setting Mirror Off Quality Audio Compatible Music Video Web Cloud Video Air View Split Screen Preference Update Setting Select 7 HDMirror And...

Страница 51: ...l the equipment and the projector If images are not displayed properly please upgrade y y the video driver of your computer The screen does not dis play your presentation If you are using a portable c...

Страница 52: ...again after the projector cools down If the problem persists contact Optoma If the projector fan fails the projector will automatically y y shut down Clear the projector mode by pressing and holding t...

Страница 53: ...perational range If the problem persists contact us Amber flashing and Blue ON Amber Flashing Cycling turn off 1sec and turn on 3sec OFF Fan breakdown One of the fans has failed The projector automati...

Страница 54: ...768 60 75 120 SXGA 1280 x 1024 60 75 WXGA 1280 x 768 60 75 WXGA 1280 x 800 60 WXGA 1366 x 768 60 WXGA 1440 x 900 60 75 SXGA 1400 x 1050 60 WSXGA 1680 x 1050 60 HDMI YPbPr via Universal port 480i 720 x...

Страница 55: ...e Projector Screw a standard tripod into the screw hole on the projector Note Please note that damage resulting from incorrect installation will void the warranty Unit mm Insert Nut 1 4 20 UNC Screw h...

Страница 56: ...n rate 24 75 Hz 120Hz for 3D featured projector Built in speaker Yes 1 5W Amplifier Power requirement AC Adapter Input 100 240V AC 50 60Hz Output 19V DC to projector Standby Mode 0 5W Input current AC...

Страница 57: ...www optoma com...

Отзывы: