


Description
Instruction Manual
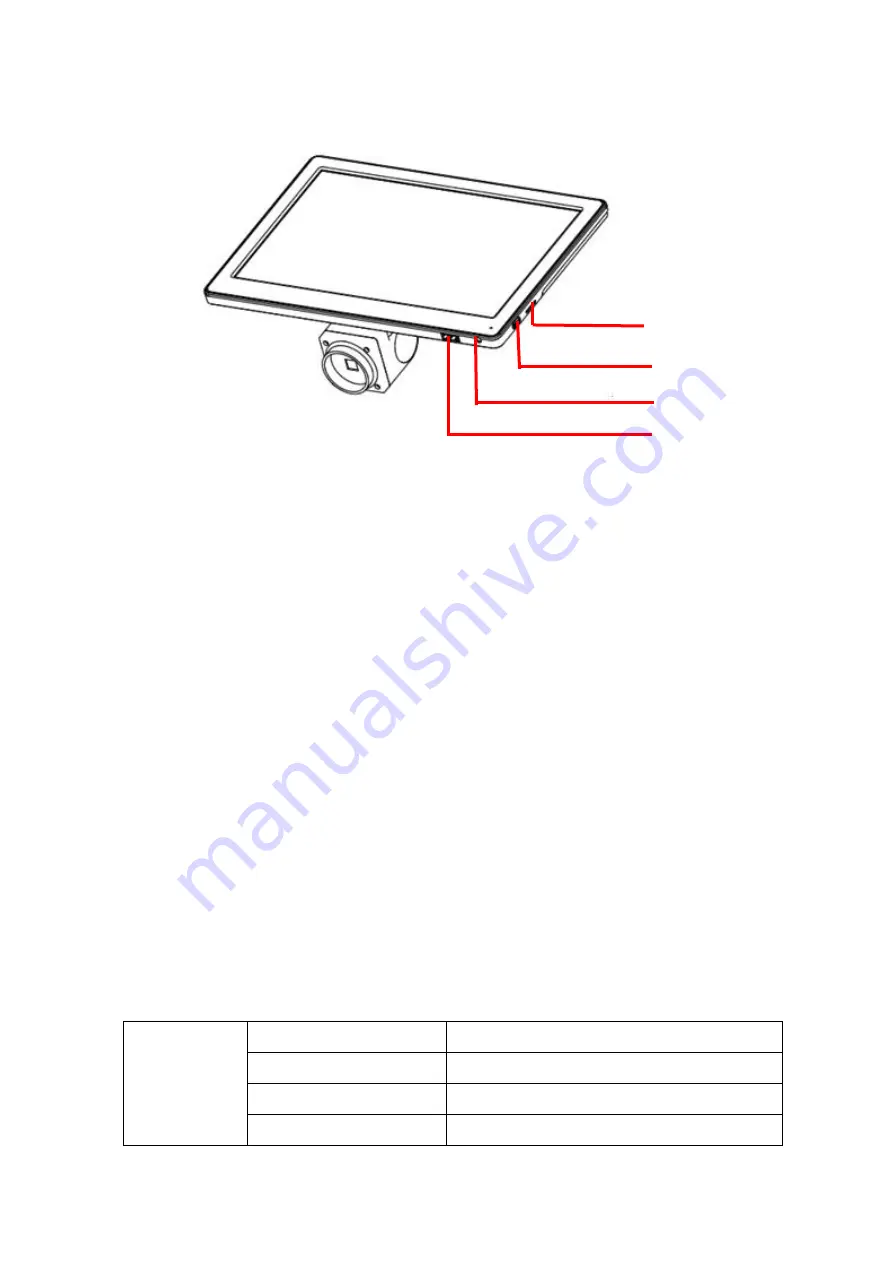
1. Insert the mouse into the camera Type-A USB 2.0 port, connect 12V power
supply to camera.
2. Turn on the power switch, when the camera is running, the LED light turns
blue
3. Move the mouse to the top left corner of the screen to call up the MAIN MENU,
including icon : Take Photo, Record Video, Preview, Measure, Setting.
4. Move the mouse to the middle position at the bottom of the screen to call up
the QUICK MENU, including icon: Zoom In, Zoom Out, Up/Dow Mirror,
Left/Right Mirror, Black/White, HDR, Freeze, Net, Font, 2 Split, 4 Split
5. Click the MEASURE icon to pop up the measure window, which support over
20 kinds of measurement graphics.
6. Click the EDIT button and fill in the name to of new ruler to CALIBRATE. Move
the mouse to the corresponding standard scale in the image display window
and draw a standard length scale line. Then fill in the length column and click
SAVE to complete the calibration setting. If you want to add more ruler, just
repeat above steps.
7. Click mm/PX to open or close the screen scale.
8. If the USB port is directly connected to the computer, the screen and the
computer can be displayed synchronously (the USB cable must be connected
to the computer before the device is powered on)
Specification
Specification.
Model
A59.3509
Category
All in one 9” monitor camera
Sensor
1/2.8” SONY sensor
Effective pixel
5M CMOS
TF
C
C
C
C
a
r
d
C
a
r
d
c
a
r
d
ON/OFF
DC-12V
USB/Mouse


