


Page 16/28
Step 3: Set sensitivity
Move cursor to “Sensitivity”. Five options (level 1-5) are available, lower<low<normal<high<higher. You can customize
the settings. If the sensitivity is low, the motion detection alarm will be activated only when the change of scene is
obvious; if the sensitivity is high, the motion detection alarm will be activated when the scene changes slightly.
Step 4: Set motion detection area
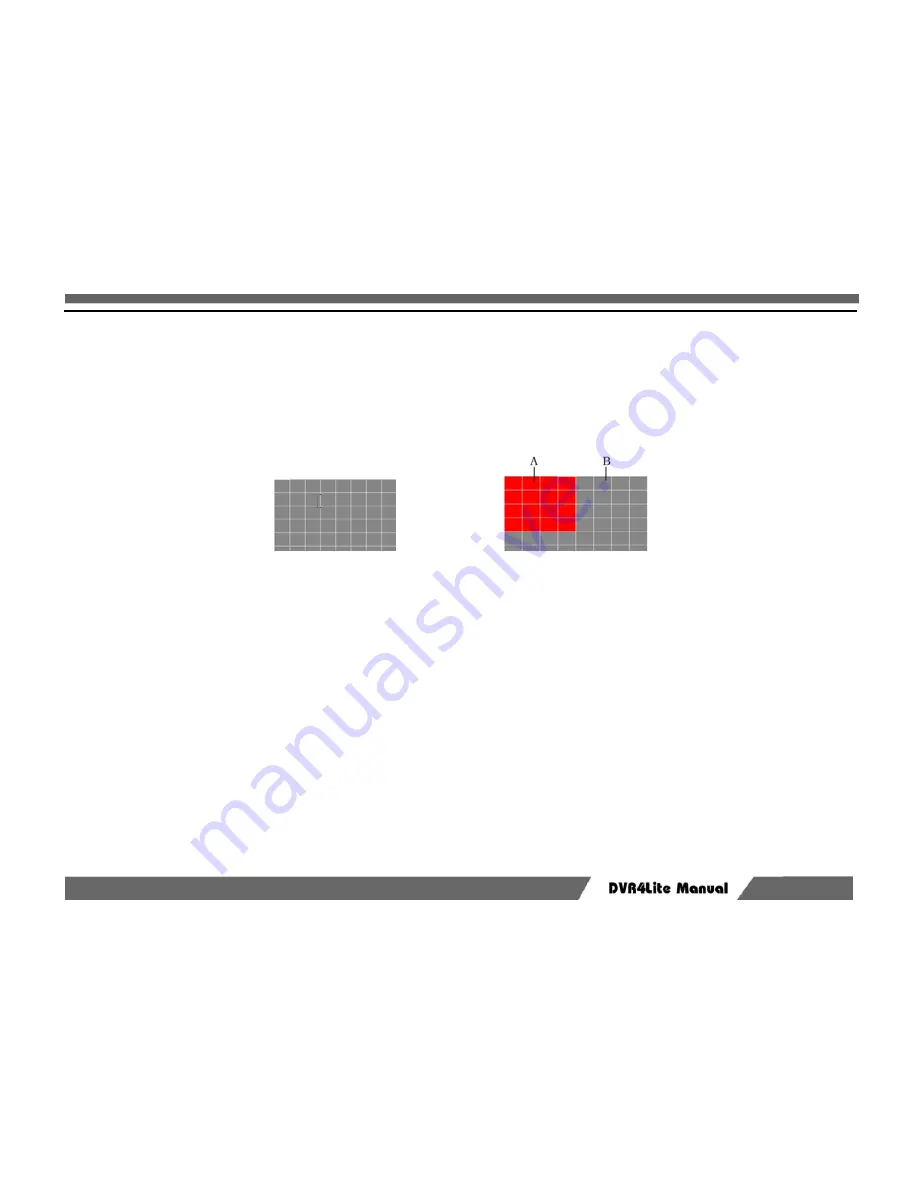
The whole image is divided into 48 (6×8) panes. User can select two neighbor pans or independent pan, and the available
option is 48 panes, that means 48 detection zones. Grey pane indicate that this zone is not under detection; red pans
indicate that these areas are selected; Press [↑]
, [
↓]
, [
←]
,
and
[
→] to move cursor and select area. If the color changes at
selected areas, motion detection will be triggered. If the color changes at areas that are not selected, motion detection
won’t be triggered. As shown in the figure above: motion detection will be triggered in area A (red) instead of area B
(grey). After selection, press “0” to save and exit.
Step 5: Motion Detection Time
It is just used in normal motion detection, refers to the time after motion detection while recording still last. It is not set
too long, usually about 30s
Step 6: Save setting
Save and exit. The motion detection will be activated.
Содержание DVR4Lite
Страница 1: ...Optiview USA DVR4Lite Manual...
Страница 3: ...Page 3 28...


