12
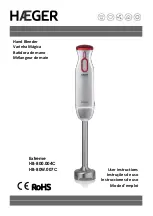
PARTS
1. Cap
2. Lid
3. Glass jar
4. Gasket
5. Blade assembly
6. Blade base
7. Motor housing
8. Power cord
9. Switch
10.Crush ice button - co to jest - nie ma na rysunku!!!!
Note:
Parts 3-6 are initially assembled at the factory.
TO ASSEMBLE
1. Before using the product for the first time, wash all the parts
except the motor housing in warm, soapy water, and then
rinse and dry thoroughly.
CAUTION:
Never immerse the motor housing in
water or other liquids. Never use abrasive cleaners
on any part of the product. Do not place any parts
into a dishwasher or extremely hot water.
2. Place the blade assembly(5) on the blade base(6) and then
screw it tightly.
CAUTION:
Do not forget place the gasket(4).
3. Place the blade base on the jar(3) and the screw it tightly.
4. Place the motor housing on a flat, stable surface, and then
place the assembled pitcher in the top of the motor housing
and turn counterclockwise until it is firmly in place.
5. Place the lid with cap onto the pitcher.
TO USE THE BLENDER
CAUTION:
Do not operate the product until it is
properly assembled.
1. Ensure the product is unplugged from the electrical outlet.
2. Pour liquid ingredients into the pitcher.
3. Wash all solid ingredients and cut them into pieces small
enough to fit into the cap.
CAUTION:
The pitcher has a six cup (48 oz. /1.5
liter) capacity. Do not over-fill it.
CAUTION:
Do not use the product for mashing
or grinding heavy foods (e.g., potatoes or me
-
ats) or to stir thick mixtures (e.g., dough).
4. After filling the pitcher with ingredients, place the lid with
cap securely onto the pitcher.
5. Plug the product into a standard 230 volt ac electrical outlet.
6. Turn the dial to the desired speed 1-2 (lowest to highest) or
hold the dial in the “P” position for pulse.
CAUTION:
Never operate the product empty.
CAUTION:
Never operate the product’s motor
for more than three minutes at a time. Allow the
motor to cool for 120 seconds after three minu-
tes of operation.
Note:
If the blades are not operating smoothly,
stop the product and add some liquid, or reduce
the contents in the pitcher.
7. Crush ice button:press this button to crush the ice. The ap
-
pliance starts crushing according to the pre-set speed profi
-
le. The unit will stop automatically after the end of program.
Press the button again during operation will terminate the
program and back to standby mode.
�
À
Ã
—
Õ
Œ
œ
–
”
“


