Optika Italy C-D Series Скачать руководство пользователя страница 21

Pagina 21

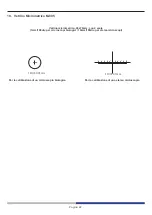
9.  Uso della telecamera

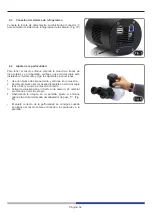
La telecamera viene gestita tramite un software.

I livelli di software disponibili sono due: PROVIEW e LITEVIEW.
All’interno della confezione viene allegata una Tabella Funzioni che indica le varie funzioni dei software. 

Sarà cura dell’utente decidere quale livello di software meglio soddisfa le proprie esigenze.
Il software può essere scaricato dal sito: 

http://www.optikamicroscopes.com/optikamicroscopes/optika-support/download-drivers-softwares/


Si dovrà effettuare una registrazione per poter scaricare il file .zip.
Una volta scaricato il file si dovrà eseguire il file setup.exe. 

Al termine dell’installazione è possibile avviare l’applicazione.

•  NOTA: non è richiesta l’installazione di nessun driver per le telecamere. La procedura di installazione del 

software installa automaticamente tutti i driver necessari al corretto funzionamento della telecamera.


Il manuale di utilizzo del software è disponibile in formato PDF all’interno del software stesso e si può aprire mediante il 

tasto funzione “F1”. 

È

 necessario avere installato Acrobat Reader per visualizzare il manuale.

Il manuale contiene tutte le istruzioni operative per l’utilizzo della telecamera e per le varie funzioni del software.

Содержание C-D Series

Страница 1: ...Model C D Series Camera series C D INSTRUCTION MANUAL Ver 1 1 2022...

Страница 2: ...6 Symbols and conventions 5 7 Instrument description 6 8 Assembling 7 8 1 Assembling on the microscope 7 8 2 Connecting camera to PC 7 8 3 Connect the cooling power supply 8 8 4 Parfocality adjustmen...

Страница 3: ...ty deriving from incorrect instrument use uses that does not comply with this manual 2 Safety Information Avoiding Electrical Shock Before plugging in the power supply make sure that the supplying vol...

Страница 4: ...Page 4 3 Package content Camera USB3 0 cable Micrometric slide Power supply cable Transport box...

Страница 5: ...glasses Traces of grease or other residuals may deteriorate the final image quality and corrode the optics surface in a short time 5 Intended use Standard models For research and teaching use only Not...

Страница 6: ...Page 6 7 Instrument description EXTERNAL POWER SUPPLY SOCKET USB2 0 CABLE SOCKET USB3 0 CABLE SOCKET OPERATION LED...

Страница 7: ...era C mount unit previously assembled Fig 2 4 Tighten the clamping screw firmly Fig 3 8 2 Connecting camera to PC 1 Connect one terminal of the USB cable to the camera con nector and the other termina...

Страница 8: ...perly installed and follow the instruc tions below 1 Use a low power objective and focus the specimen 2 Switch to the highest dry objective available on the micro scope 40x or 60x and focus the specim...

Страница 9: ...gister to download the zip file Once the file has been downloaded you will have to run the setup exe file At the end of the installation it is possible to start the software NOTE no driver installatio...

Страница 10: ...For biological microscopes calibration 1 DIV 0 01mm Micrometric slide 26x76mm with 2 scales 1mm 100div for biological microscopes 10mm 100div for stereomicroscopes For stereo microscopes calibration...

Страница 11: ...te The separate collection of this equipment at the end of its lifetime is organized and managed by the producer The user will have to contact the manufacturer and follow the rules that he adopted for...

Страница 12: ...92 info optikamicroscopes com www optikamicroscopes com OPTIKA Spain spain optikamicroscopes com OPTIKA USA usa optikamicroscopes com OPTIKA China china optikamicroscopes com OPTIKA India india optika...

Страница 13: ...Modello Serie C D Serie telecamere C D MANUALE DI ISTRUZIONI Ver 1 1 2022...

Страница 14: ...zo previsto 17 6 Simboli 17 7 Descrizione dello strumento 18 8 Assemblaggio 19 8 1 Montaggio a microscopio 19 8 2 Connessione a PC della telecamera 19 8 3 Connessione del sistema di raffreddamento 20...

Страница 15: ...t derivante da un utilizzo dello strumento non indicato nel presente manuale 2 Informazioni sulla sicurezza Per evitare shock elettrici Prima di collegare il cavo di alimentazione alla presa elettrica...

Страница 16: ...Pagina 16 3 Contenuto della confezione Telecamera Cavo USB3 0 Vetrino micrometrico Alimentatore Cavo Valigia di trasporto...

Страница 17: ...che come lenti filtri o vetri Tracce di grasso o altri residui possono ridurre la qualit visiva dell immagine finale e corrodere la superficie delle ottiche in breve tempo 5 Utilizzo previsto Modelli...

Страница 18: ...Pagina 18 CONNETTORE ALIMENTATORE ESTERNO CONNETTORI CAVO USB2 0 CONNETTORE CAVO USB3 0 LED OPERATIVI 7 Descrizione dello strumento...

Страница 19: ...denza Fig 2 4 Serrare la vite di fissaggio sull uscita trinoculare del microscopio Fig 3 8 2 Connessione a PC della telecamera 1 Collegare un terminale del cavo USB al connettore della telecamera e l...

Страница 20: ...eguire le istruzioni riportate di seguito 1 Utilizzare un obiettivo a basso ingrandimento e mettere a fuoco il campione 2 Passare all obiettivo a secco pi alto disponibile sul microscopio 40x o 60x e...

Страница 21: ...trazione per poter scaricare il file zip Una volta scaricato il file si dovr eseguire il file setup exe Al termine dell installazione possibile avviare l applicazione NOTA non richiesta l installazion...

Страница 22: ...calibrazione di un microscopio biologico 1 DIV 0 01mm Vetrino micrometrico 26x76mm con 2 scale 1mm 100div per microscopi biologici 10mm 100div per stereomicroscopi Per la calibrazione di uno stereo m...

Страница 23: ...ne vita organizzata e gestita dal produttore L utente che vorr disfarsi della presente apparecchiatura dovr quindi contattare il produttore e seguire il sistema che questo ha adottato per consentire l...

Страница 24: ...92 info optikamicroscopes com www optikamicroscopes com OPTIKA Spain spain optikamicroscopes com OPTIKA USA usa optikamicroscopes com OPTIKA China china optikamicroscopes com OPTIKA India india optika...

Страница 25: ...Modelo Serie C D C maras serie C D MANUAL DE INSTRUCCIONES Ver 1 1 2022...

Страница 26: ...zaci n 29 6 S mbolos 29 7 Descripci n del instrumento 30 8 Montaje 31 8 1 Montaje en microscopio 31 8 2 Conexi n de la c mara a un PC 31 8 3 Conexi n del sistema de refrigeraci n 32 8 4 Ajuste de la p...

Страница 27: ...ellos que utilizan dicho instrumento 2 Informaci n de seguridad Evitar una descarga el ctrica Antes de conectar el microscopio a la toma de corriente asegurarse que la tensi n de entrada del lugar don...

Страница 28: ...P gina 28 3 Contenido del paquete C mara Cable USB3 0 Carro microm trico Fuente de alimentaci n cable Caja de transporte...

Страница 29: ...tros o el cristal Los restos de grasa u otros residuos pueden reducir la calidad visual de la imagen final y corroer la superficie de la ptica en poco tiempo 5 Utilizaci n Modelos est ndar Para uso ex...

Страница 30: ...P gina 30 CONECTOR DE ALIMENTACI N EXTERNA CONECTORES DE CABLE USB 2 0 CONECTOR DE CABLE USB 3 0 LEDS DE OPERACI N 7 Descripci n del instrumento...

Страница 31: ...ra previamente montada Fig 2 4 Apriete el tornillo de fijaci n en la salida triocular del microscopio Fig 3 8 2 Conexi n de la c mara a un PC 1 Conecte un extremo del cable USB al conector de la c mar...

Страница 32: ...nstalado correctamente y siga las siguientes instrucciones 1 Use un objetivo de bajo aumento y enfoque en la muestra 2 Cambie al objetivo seco m s alto disponible en el microscopio 40x o 60x y vuelva...

Страница 33: ...er descargar el archivo zip Una vez descargado el archivo deber ejecutar el archivo setup exe Al final de la instalaci n puede iniciar la aplicaci n NOTA No se requiere la instalaci n del controlador...

Страница 34: ...Para calibrar un microscopio biol gico 1 DIV 0 01mm Carro microm trico 26x76mm con 2 escaleras 1mm 100div para microsc biol gicos 10mm 100div para estereomicroscopios Para calibrar un estereomicroscop...

Страница 35: ...organizada y gestionada por el fabricante Por lo tanto el usuario que desee deshacerse de este equipo debe ponerse en contacto con el fabricante y seguir el sistema que ha adoptado para permitir la r...

Страница 36: ...92 info optikamicroscopes com www optikamicroscopes com OPTIKA Spain spain optikamicroscopes com OPTIKA USA usa optikamicroscopes com OPTIKA China china optikamicroscopes com OPTIKA India india optika...

Страница 37: ...Mod le S rie C D Cam ras s rie C D MANUEL D UTILISATION Ver 1 1 2022...

Страница 38: ...1 6 Symboles 41 7 Description de l instrument 42 8 Assemblage 43 8 1 Montage sur le microscope 43 8 2 Connexion de la cam ra un PC 43 8 3 Raccordement du syst me de refroidissement 44 8 4 R glage de l...

Страница 39: ...t instrument Nous d clinons toute responsabilit quant des utilisations de l instrument non conformes au pr sent manuel 2 Pr cautions viter choc lectrique Avant de connecter le c ble d alimentation au...

Страница 40: ...Page 40 3 Contenu de l emballage Cam ra C ble USB3 0 Glissi re microm trique Alimentation c ble Coffret de transport...

Страница 41: ...les filtres ou les lunettes Des traces de graisse ou d autres r sidus peuvent d t riorer la qualit finale de l image et corroder la surface optique en peu de temps 5 Emploi pr vu Mod les standard R se...

Страница 42: ...Page 42 CONNECTEUR D ALIMENTATION EXTERNE CONNECTEURS DE C BLE USB2 0 CONNECTEUR DE C BLE USB3 0 LEDS DE FONCTIONNEMENT 7 Description de l instrument...

Страница 43: ...lement mont e Fig 2 4 Serrer la vis de fixation sur la sortie trinoculaire du microscope Fig 3 8 2 Connexion de la cam ra un PC 1 Connectez une extr mit du c ble USB au connecteur de la cam ra et l au...

Страница 44: ...t install et suivez les instructions ci dessous 1 Utiliser un objectif faible grossissement et faire la mise au point sur l chantillon 2 Passer l objetif s c le plus haut disponible sur le microscope...

Страница 45: ...pour t l charger le fichier zip Une fois le fichier t l charg vous devrez ex cuter le fichier setup exe A la fin de l installation vous pouvez d marrer l application REMARQUE Aucune installation de pi...

Страница 46: ...talonnage d un microscope biologique 1 DIV 0 01mm Glissi re microm trique 26x76mm avec 2 marches 1mm 100div pour microscopes biologiques 10mm 100div pour st r omicroscopes Pour l talonnage d un st r...

Страница 47: ...instrument sera effectu e par le fabricant Par cons quent l utilisateur qui souhaite liminer l appareil devra se mettre en contact avec le fabricant et suivre le syst me que celui ci a adopt pour perm...

Страница 48: ...92 info optikamicroscopes com www optikamicroscopes com OPTIKA Spain spain optikamicroscopes com OPTIKA USA usa optikamicroscopes com OPTIKA China china optikamicroscopes com OPTIKA India india optika...

Страница 49: ...Modell Serie C D Kameras Serie C D BEDIENUNGSANLEITUNG Ver 1 1 2022...

Страница 50: ...Wartung und Gefahrzeichen 53 7 Beschreibung des Instruments 54 8 Montage 55 8 1 Montage am Mikroskop 55 8 2 Anschlie en der Kamera an einen PC 55 8 3 Anschluss des K hlsystems 56 8 4 Einstellen der Pa...

Страница 51: ...Benutzern zur Verf gung stehen Wir lehnen jede Verantwortung f r eine fehlerhafte in dieser Bedienungsanleitung nicht gezeigten Verwendung Ihrer Produkte ab 2 Sicherheitsinformationen Elektrische Ent...

Страница 52: ...Seite 52 3 Verpackungsinhalt Kamera Kabel USB3 0 Mikrometrischer Objekttr ger Netzteil Kabel Transportkoffer...

Страница 53: ...anderen R ckst nden k nnen die endg ltige Bildqualit t beeintr chtigen und die Optikoberfl che in kurzer Zeit angreifen 5 Verwendung Standardmodelle Nur f r Forschung und Lehre verwenden Nicht f r th...

Страница 54: ...Seite 54 EXTERNER STROMVERSORGUNGSANSCHLUSS LED BETRIEB 7 Beschreibung des Instruments USB2 0 KABELANSCHLUSS USB3 0 KABELANSCHLUSS...

Страница 55: ...ierten Kamera Fig 2 4 Ziehen Sie die Befestigungsschraube am trinokularen Ausgang des Mikroskops an Fig 3 8 2 Anschlie en der Kamera an einen PC 1 Schlie en Sie ein Ende des USB Kabels an den Kameraan...

Страница 56: ...e die folgenden Anweisungen 1 Verwenden Sie eine Objektiv mit niedriger Vergr erung und fokussieren Sie sich auf die Probe 2 Schalten Sie am Mikroskop auf die h chste verf gbare Trockenlinse 40x oder...

Страница 57: ...zip Datei herunterladen zu k nnen Nach dem Herunterladen der Datei m ssen Sie die Datei setup exe ausf hren Nach Abschluss der Installation k nnen Sie die Anwendung starten HINWEIS Es ist keine Instal...

Страница 58: ...alibrierung eines biologischen Mikroskops 1 DIV 0 01mm Mikrometrischer Objekttr ger 26x76mm mit 2 Treppen 1mm 100div f r biologische Mikroskope 10mm 100div f r Stereomikroskope Zur Kalibrierung eines...

Страница 59: ...ennte Sammlung von Ger ten die am Ende Ihrer Lebensdauer sind wird vom Hersteller organisiert Der Benutzer der dieses Ger t entsorgen m chtet muss dann Kontakt mit dem Hersteller aufnehmen und der Vor...

Страница 60: ...92 info optikamicroscopes com www optikamicroscopes com OPTIKA Spain spain optikamicroscopes com OPTIKA USA usa optikamicroscopes com OPTIKA China china optikamicroscopes com OPTIKA India india optika...

Страница 61: ...Modelo Serie C D C meras s rie C D MANUAL DE INSTRU ES Ver 1 1 2022...

Страница 62: ...65 5 Utiliza o prevista 65 6 Simbolos 65 7 Descri o do instrumento 66 8 Montagem 67 8 1 Montagem em microsc pio 67 8 2 Ligar a c mara a um PC 67 8 3 Liga o do sistema de arrefecimento 68 8 4 Ajustar a...

Страница 63: ...responsabilidade em caso de utiliza o do instrumento n o indicada neste manual 2 Informa es sobre a seguran a Para evitar choques el ctricos Antes de ligar o cabo de alimenta o com a tomada el ctrica...

Страница 64: ...P gina 64 3 Conte do da embalagem C mera Cabo USB3 0 L mina microm trica Fonte de alimenta o Cabo Caixa de transporte...

Страница 65: ...s filtros ou culos Vest gios de graxa ou outros res duos podem deteriorar a qualidade final da imagem e corroer a superf cie ptica em pouco tempo 5 Utiliza o prevista Modelos padr o Apenas para uso em...

Страница 66: ...P gina 66 CONECTOR DE FONTE DE ALIMENTA O EXTERNA CONECTORES CABO USB2 0 CONECTOR CABO USB3 0 LEDS OPERACIONAIS 7 Descri o do instrumento...

Страница 67: ...c mara previamente montada Fig 2 4 Aperte o parafuso de fixa o na sa da trinocular do microsc pio Fig 3 8 2 Ligar a c mara a um PC 1 Conecte uma extremidade do cabo USB ao conector da c mara e a outra...

Страница 68: ...icrosc pio est instalado corretamente e siga as instru es abaixo 1 Use uma objetiva de baixa amplia o e focalize a amostra 2 Mude para a objetiva seca mais alta dispon vel no microsc pio 40x ou 60x e...

Страница 69: ...ra fazer o download do arquivo zip Uma vez baixado o arquivo voc ter que executar o arquivo setup exe No final da instala o pode iniciar a aplica o NOTA N o necess ria a instala o do driver da c mara...

Страница 70: ...ara calibrar um microsc pio biol gico 1 DIV 0 01mm L mina microm trica 26x76mm com 2 escadas 1mm 100div para microsc pios biol gicos 10mm 100div para estereomicrosc pios Para calibrar um estereomicros...

Страница 71: ...outros res duos A recolha separada deste equipamento no final da sua vida til organizada e gerida pelo produtor O utilizador ter de contactar o fabricante e seguir as regras que adoptou para a recolh...

Страница 72: ...92 info optikamicroscopes com www optikamicroscopes com OPTIKA Spain spain optikamicroscopes com OPTIKA USA usa optikamicroscopes com OPTIKA China china optikamicroscopes com OPTIKA India india optika...

Отзывы: