background image

20 

Main Menu


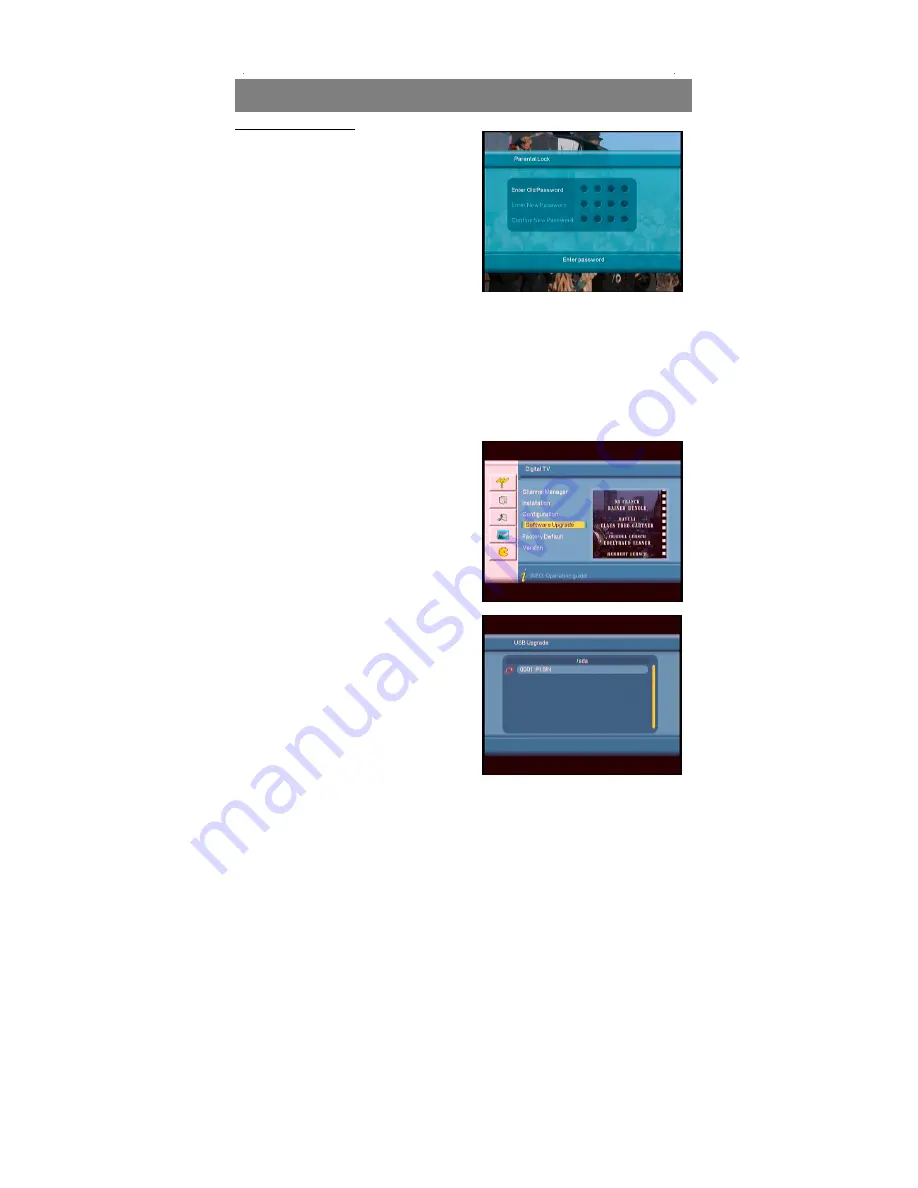
3.6  Parental Lock 


To prevent the unauthorized 

Accessing of your STB, you can set the 
Parental control password to you receiver. 
(Default password: 0000) 


1.  Press the number key 0-9 on 

the RCU to input Old password. 

 
2.  If the password is input correctly, 

the cursor can move onto Input 
New password option, press number key 0-9 to input new 4-digit 
password; 


3.  The cursor move Confirm New Password option, press number key 

0-9 again to confirm the new password 


4. Software 

Upgrade 


This STB provide you an easy way 

for updating the STB software through 
USB stick. 
 

Contact your dealer if there is new 

software for your STB available, then you 
can update it easily with your USB stick 
through the USB input of this STB. 
 

1.  Copy the bin code file (such as 

p1.bin) from PC to your USB 
device, such as USB stick. 


2.  Power on the STB, plug in the 

USB disk properly. 

 
3.  Enter the main menu and select 

the Software Upgrade item. 

 
4.  Select Download from USB 

item, Select the USB device, 

Содержание BTR-5030

Страница 1: ...1 BTR 5030 Digital Terrestrial Receiver User Manual...

Страница 2: ...Unit 8 S T B Connection 11 Main Menu 13 Digital TV Part 13 1 Installation 13 2 Channel Manager 15 3 Configuration 17 4 Software Upgrading 20 5 Factory default 21 6 Version 21 USB PVR 22 PVR Instructio...

Страница 3: ...ore cleaning Do not use any kind of solvents to clean the STB only use a soft dry cloth VENTILATION The slots on top of the STB must be left uncovered to allow proper airflow to the unit Ensure a mini...

Страница 4: ...nnecting the cable from TV FAILURE TO DO SO CAN DAMAGE THE TV LOCATION Place the STB indoor in order not to expose to lightening rain or Sunlight Use the apparatus only in moderate climates not in tro...

Страница 5: ...nication cable The remote control is designed for easy access to all the functions at once and for comfortable grab for your hand It is programmed to control all functions and to easily watch TV and R...

Страница 6: ...unit and check to make sure that all of the following Items are included in the packaging 1 x Remote Control Unit RCU 1 x User Manual 2 x AAA batteries 1 x Digital Terrestrial Receiver We hope you en...

Страница 7: ...panel and rear panel Dimension 220 x 125x 32 W x D x H Rear Panel 1 TV ANT IN Use to connect an antenna 2 LOOP OUT Use it when connecting to another STB 3 TV VCR SCART For the Video Audio input of the...

Страница 8: ...8 Remote Control Unit...

Страница 9: ...iew the Teletext information of the current channel 10 EPG Electronic Program Guide button displays the TV Radio program guide broadcasting by the TV provider 11 TV AV Press to switch between TV and A...

Страница 10: ...rmation of Buttons in current menu 25 TV RADIO Switch between TV and Radio mode 26 PVR LIST Press to show recorded file list 27 RECALL Press to jump to previous channel 28 REC Start recording 29 STOP...

Страница 11: ...t to the equipment If you experience any problem please contact your sales agency 1 How to connect the STB to a TV set 1 Connect one end of the SCART cable to the TV SCART socket on the back of the ST...

Страница 12: ...io system Connect the AUDIO R L socket of the STB to the Audio System like HI FI Amplifier etc Audio System must capable of stereo audio ability If Digital Audio or S PDIF Optical output are available...

Страница 13: ...e remote control default lock code 0000 The installation menu allows you to set and various functions and customizes service Use the CH buttons on the remote control to select an option and press the...

Страница 14: ...z while you can set it to 6MHz 7MHz and 8MHz 3 Press ENTER key after configuration of parameters to start manual scan 3 If any program is detected and the scanning process is finished system will exit...

Страница 15: ...annel Delete Channel Skip Channel Lock Channel Rename Channel 1 Press INFO button to show function guide to related button of RCU 2 Press RED button to set and cancel Favorite Channel 3 Press GREEN bu...

Страница 16: ...Channel This function enables you to do such operations as Add Delete and Rename to channels 1 Press the RED button to enter Add Channel menu 2 Under Add Channel menu there are 6 parameters for addin...

Страница 17: ...e the cursor to ALL Radio Channels option press ENTER key to delete 3 Configuration Configuration provides individualized system setup function you can configure the system according to your own hobby...

Страница 18: ...situation of you receiving equipment 3 Video Output Video Output mode can change the mode of video output CVBS RGB YUV S Video you can adjust TV mode according to the actual situation of you receivin...

Страница 19: ...et To set the GMT time zone 5 Summer Time To select ON or OFF for Summer time 3 5 Wakeup Timer If you want to set channel playing at certain time or giving some hint information such as Birthday You c...

Страница 20: ...nfirm New Password option press number key 0 9 again to confirm the new password 4 Software Upgrade This STB provide you an easy way for updating the STB software through USB stick Contact your dealer...

Страница 21: ...f 7 After being upgraded system will restart itself you will see the new software interface 5 Factory Default The factory default enable you re set your STB as factory settings mode WARNING You will l...

Страница 22: ...this menu you will see all the recorded files in a list and preview it before you would like to watch in full screen also it enables you to delete these video you do not like 3 Recorded Video Playback...

Страница 23: ...an 120Gb 2 Each recorded video file will not bigger than 3 8Gb Approx 4 hours the STB will automatically create new video file to continue recording your TV program if the recorded video file is bigge...

Страница 24: ...edia documents to USB device 2 Plug in USB device 3 Enter device in main menu 1 Movie 1 In main menu press UP DOWN to choose Movie option Press ENTER key to confirm 1 Press ENTER key to enter next dir...

Страница 25: ...creen play state 1 Press Left Right key to rotate the photo clockwise counterclockwise by 90 degrees 2 Press UP key to view lens photo vertically 3 Press DOWN key to view lend photo horizontally GAMES...

Страница 26: ...ut is not connect Connect the antenna cable input The transmit station turns off Attempt until the signal coming again The sky wave disturbs the device Attempt again later The program setups are incor...

Страница 27: ...file Lever MPEG 2 MP ML Bit rate Max 15Mbps Aspect Ratio 4 3 16 9 Auto Output PAL NTSC Video Resolution 720 x 576 PAL 720 x 480 NTSC 4 Audio decoder Decoding MPEG 2 1 Layer 2 1 Mode Mono Dual Stereo J...

Отзывы: