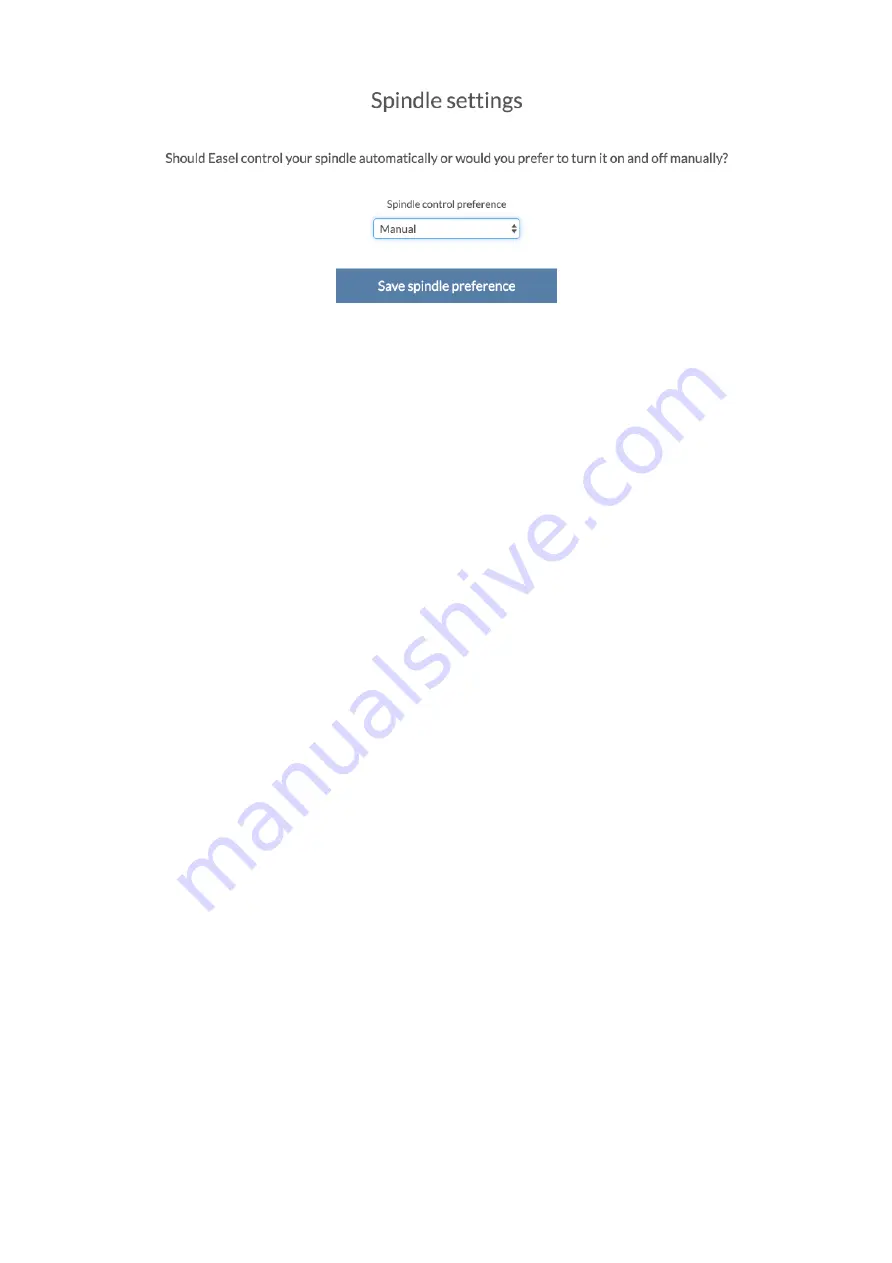
Opt Lasers PLH3D 6W Скачать руководство пользователя страница 11


Set "

Spindle control preference

" to "

Automatic

" and click "Save spindle 

preference". Proceed to the end of the setup procedure. The spindle control is now 
enabled and X-Controller can control the laser head. 
 
Keep in mind that Easel software is not meant to work with laser heads and it will not 
work properly. You need to prepare your g-code using Opt Laser’s G-Code Generator 
software (or other software). Once you have your G-Code ready you may use Easel, 
Universal Gcode Sender or Chillipeppr to send it to your X-Carve. 
 

First engraving


Finally, it’s time to fire up the laser and engrave something. G-Code commands to 
operate the laser are: 
 

1)


M3 S<value> - this command turns the laser on and expects a value between 0 
and 12000 (or 255 – depends on the RPM value entered during the setup). This 
value defines the power of the laser, for example M3 S6000 (M3 S127) Will turn 
the laser on with 50% power. 

2)


M5 (or M3 S0) – this command turns the laser off. 

 
Keep in mind that when the laser is in use, Z-axis should remain stationary to preserve 
laser’s focus. 


Let’s start with a simple logo: 
 

Содержание PLH3D 6W

Страница 1: ...your parts to engraving The PLH3D engraving laser head allows you to engrave or cut your designs in a wide variety of materials such as wood plastic rubber foam cardboard leather and many more Bill of...

Страница 2: ...swap X Carve s spindle and replace it with a laser for the laser engraving tasks It is really easy to do and takes almost no time at all By doing so you will minimize the risk of dust getting into yo...

Страница 3: ...ere http easel inventables com projects 187_79JZ3KFSCd5ZsAub4A Here s how the laser head looks with the mount To mount the laser head in the spindle holder loosen 3 spindle clamp screws and take the s...

Страница 4: ......

Страница 5: ...reen and white wires are going to X Controller Recommended wiring Laser Head 4 core wire Brown 12V Red Green Ground Black Yellow Analog PWM Ground White White Analog PWM In Green Wire up the power sup...

Страница 6: ...Connect green and white wires from the 4 core wire to the X Controller Green wire goes to Spindle PWM and white wire goes to GND...

Страница 7: ...with PLH3D laser head The nozzle will direct the air stream much better in cases where the laser head is position more than 50 mm from material surface Here s how the nozzle looks like Nozzle attache...

Страница 8: ...r you ll have to either use the mount described Getting started chapter of this guide or cut another one that fits the nozzle only just like the one on picture below Easel project for this mount can b...

Страница 9: ......

Страница 10: ...PWM signal has to be enabled There is few ways to do that but we will focus on the most user friendly one Go to Easel s setup http easel inventables com setup and choose the correct settings for your...

Страница 11: ...u may use Easel Universal Gcode Sender or Chillipeppr to send it to your X Carve First engraving Finally it s time to fire up the laser and engrave something G Code commands to operate the laser are 1...

Страница 12: ...G Code for this logo is available here LINK to PLH3D_logo g Here s the result on scrap piece of MDF...

Страница 13: ...Congratulations...

Страница 14: ...with the laser head and want to swap it with the spindle remember to unplug the Spindle PWM connector from X Controller to avoid shorts Safety Note Looking at the laser beam may irreversibly damage y...

Отзывы: