


User Manual
To Connect Camera
Connect the USB cable into a free USB slot on the computer (Requires
USB 2.0
interface).
“New Hardware Found” displays at the bottom right of your PC screen. The camera is recognized.
NOTE:
1.Plug the USB connector to board USB2.0 port directly on the back of the PC is recommend,
2.Do NOT use anything to extend the USB cable.
Using the camera
There are 2 ways to get video from the camera.
A. Using Microsoft Windows Viewer
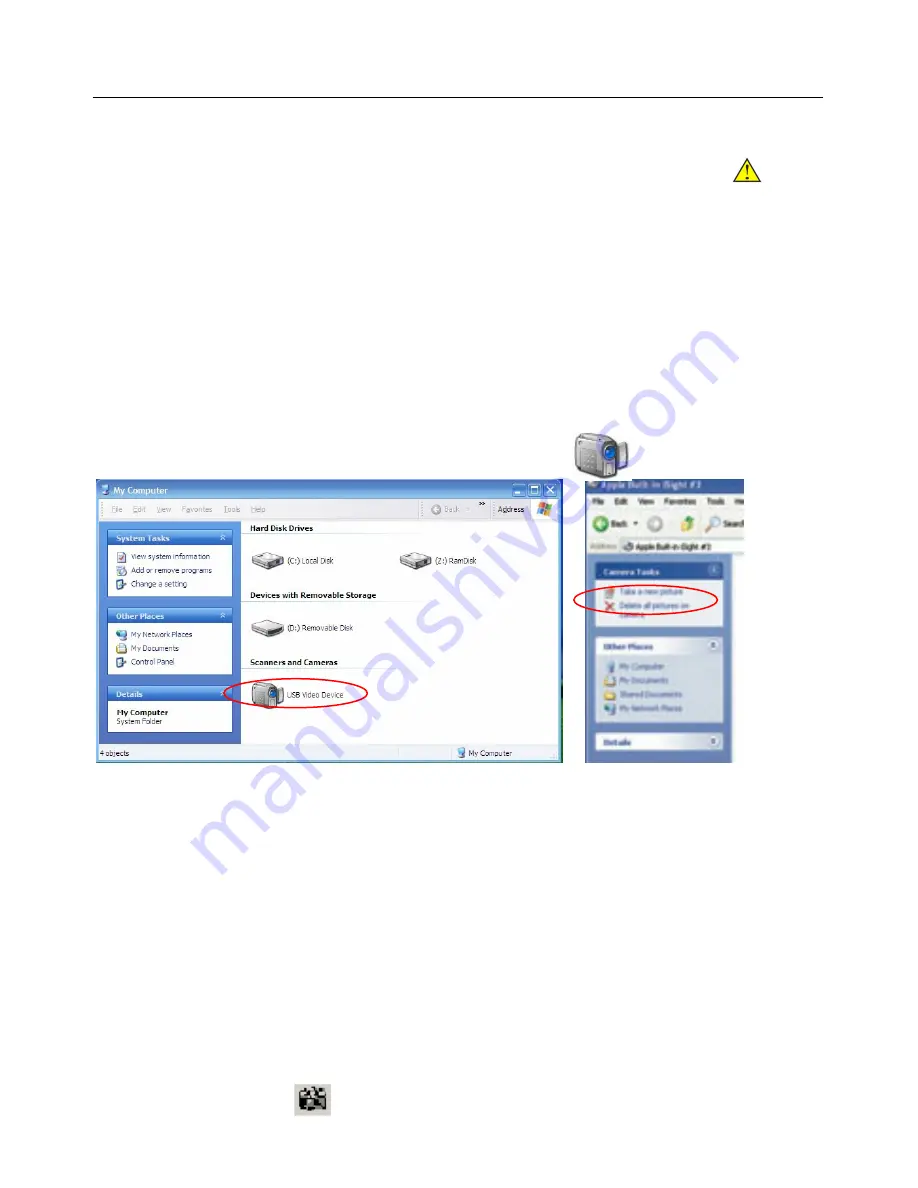
1.Open “My Computer”, you will find the “USB Video Device” with icon.
2.Double Click the “USB Video Device” icon to start video.
3.Capture and delete…
B Using video image software
1. Start the MiniSee
2. Start video
MiniSee--Click on the camera name below “Video” button.
3. Connect the camera to the microscope and turn on the light.
(Please make sure your light system has the option of a BLUE LIGHT FILTER. For the CCD to view
properly, you would need light color temperatures around 5600K-6000K.)
4. Setting the Video source property
5. Capture the image Press to capture image


