7
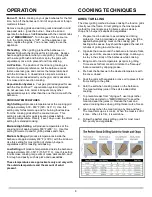
LIGHTING
A.
MAIN BURNER CONTROLS
F.
HANDLE
B.
SIDE BURNER CONTROL
G.
SIDE BURNER
C.
REAR BURNER CONTROL
H.
CYLINDER VALVE
D.
IGNITOR
I.
REGULATOR
E.
MANUAL LIGHTING HOLE
1. The appliance must be assembled as per the assembly
instructions.
2. Check that your gas cylinder is full and properly
connected to the regulator.
3. Check that there are no gas leaks in the gas supply
system. See Leak Testing.
4. Check that the venturi tubes are properly located over
the gas valve orifices.
5. Check that both Main Burner and Side Burner ignition
wires are connected.
6. Read carefully all instructions contained on the
information plate attached to the barbecue.
7.
WARNING: Open lid before lighting.
8. Set control knobs to "OFF" and turn on the gas supply.
9a.
For Main Burner:
Check that the battery has been installed into the
electronic ignition.
Push and turn one main burner control knob to "Hi".
Push and hold down the ignitor button or match light.
Burner should ignite within 5 seconds.
N
ote: To light burner with a match
follow steps 1
thru 8 above.
Insert lighted match through lighting hole located at the
bottom right of the grill housing.
Push and turn right main burner control knob to "Hi".
Burner should ignite within 5 seconds.
After the first burner is lit, push and turn the center main
burner control knob to "Hi". Other burners will ignite
automatically. After center burner(s) is lit, push and
rotate left main burner control knob to “Hi”.
9b.
For Side Burner:
Push and turn side burner control knob to "Hi."
Push and hold the ignitor button.
Burner should ignite within 5 seconds.
Note: To light burner with a match
follow steps 1
thru 8 above.
Apply lighted match to burner ports.
Push in the side burner control knob and turn to "Hi".
Burner should ignite within 5 seconds.
9c.
For Rear Burner Rotisserie:
Warning -
Do not operate the main burner
simultaneously with the rear burner.
Caution:
Rear burner must be in place before
operating the control knob.
REMOVE THE WARMING RACK.
Follow steps 1 thru 8.
Place lighted match near rear burner ports.
Push and turn rear burner control knob to "Hi".
Burner should ignite within 5 seconds.
It is important to have lighted match near burner ports
BEFORE turning the control knob.
10.
Caution - Check your barbecue after lighting
All the ports on the burner should show a 2.5cm / 1” flame
on "Hi" setting.
If any of the following symptoms occur there is probably
a blockage in the venturi tubes. Shut off gas at once
and clean the venturi tubes. See "Venturi Tubes".
1. You smell gas.
2. If a flashback fire occurs.
3. Your barbecue heats unevenly.
4. The burners make popping noises.
IF BURNER DOES NOT IGNITE:
1. Push and turn control knob to "OFF".
Wait 5 minutes, then try again with control knob set at
medium.
2. If any burner will not light, consult "Trouble Shooting
Guide". If problem cannot be resolved, do not attempt
to operate the appliance; contact your dealer or
approved service centre.
SHUT DOWN
1. Turn off cylinder valve.
2. Turn control knobs to "OFF".


