HOBO U-Shuttle (U-DT-x) Manual
1-800-LOGGERS 2
Specifications (continued)
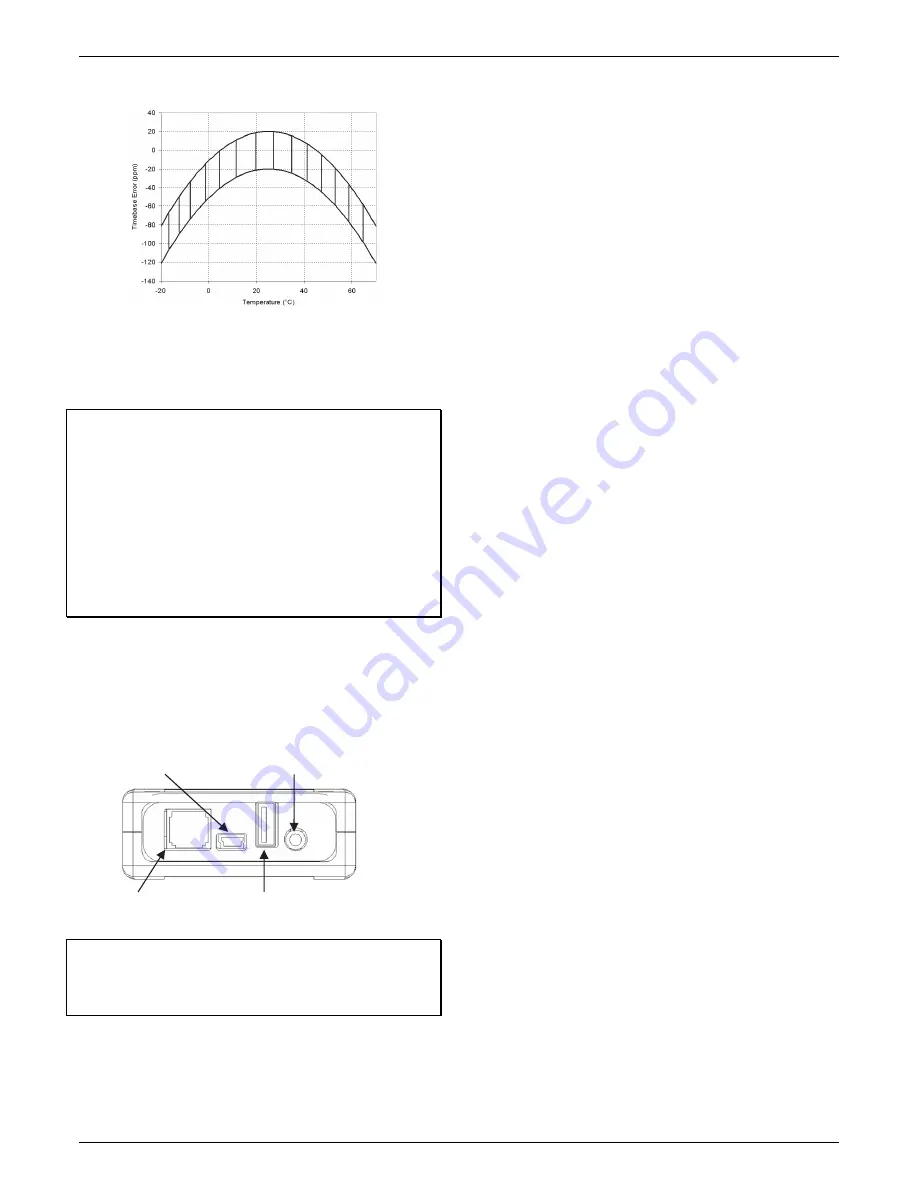
Plot A
Onset strongly recommends that you spend a few minutes
reading this manual and trying out the procedures described
here before taking the shuttle into the field.
Important note when using the HOBO U-Shuttle (U-DT-1) with
a HOBO 4-Channel Thermocouple logger (UX120-014M):
If the
HOBO 4-Channel Thermocouple logger is configured to log
multiple channels with several statistics selected or with burst
logging enabled, the HOBO U-Shuttle can report erroneous
battery readings and may result in unexpected behavior. Only
use the shuttle with the HOBO 4-Channel Thermocouple logger
if you plan on minimal logging (such as logging thermocouple
channels only or two channels plus statistics logging). It is highly
recommended that you test your logger configuration with the
shuttle before deploying it to be sure the battery readings are
as expected and the offload works properly.
Ports on the HOBO U-Shuttle
The shuttle communicates with only one device at a time. It can
detect the host computer automatically. When actively
searching for devices, it first looks for a host computer, then for
a U-Series logger, then for a serial logger, and last for a smart
sensor.
Important:
Never use these ports to attach the shuttle to
devices that are not supported by the U-Shuttle. Doing so may
void the warranty, drain the shuttle’s batteries prematurely,
and damage the electronics.
Control Buttons
The U-Shuttle has three dual-function buttons, labeled
esc (on/off)
,
yes (next)
, and
no (alt)
.
When the shuttle asks a question, press the
yes
or
no
button to
answer the question.
If the shuttle displays something other than a question, press
the
next
button to advance to the next screen, or the
alt
button
to view an alternative screen (if available).
Press the
esc (on/off)
button to return to the main menu (
Find
Device/Shuttle Info
). Press the
esc (on/off)
button again to
power the shuttle off.
Before Using the Shuttle for the First Time
1.
Make sure the host computer’s clock and time zone are
correct. If they are not, correct them before starting
HOBOware. This information will be loaded into the shuttle,
and will be the basis for all logger relaunches in the field.
2.
Use a compatible version of HOBOware to launch the U-
Shuttle and each logger you will use with the shuttle.
•
U-DT-1: HOBOware 2.2 or greater
•
U-DT-2: HOBOware 2.6 or greater
3.
Plug the large end of the USB interface cable into a USB
port on the computer.
4.
Plug the small end of the USB interface cable into the small
USB port in the shuttle.
5.
Press the
on/off
button to power on the shuttle. (It may
take a few seconds for the new hardware to be detected.)
The shuttle display should read “PC/Host Connected.”
6.
Follow the instructions in the
HOBOware User’s Guide
to
access the
Manage Shuttle
dialog.
7.
Launch the shuttle as described in the
HOBOware User’s
Guide
. Launching synchronizes the shuttle’s clock to the
host computer, deletes all data from the shuttle’s memory,
and initializes the shuttle’s control information.
8.
Disconnect the USB cable from the shuttle and press the
on/off
button to turn the shuttle off.
Preparing to Go on Location
Before you go into the field to read out and relaunch loggers
with the shuttle, take the following steps:
1.
Make sure the host computer’s clock and time zone are
correct. If they are not, correct them before starting
HOBOware.
2.
Press the
on/off
button to turn the shuttle on, and connect
it to a host computer running HOBOware. The shuttle
display should read “PC/Host Connected.”
3.
Follow the instructions in the
HOBOware User’s Guide
to
access the
Manage Shuttle
dialog. Make sure the battery
level is good (the battery gauges should be green), and
change the batteries after you complete this procedure if
they are weak.
Second: USB port
(to U-Series loggers & base stations)
Last: RJ-12 jack
(to smart sensors)
First: Mini-B USB
(from host computer)
Third: Serial port (to serial loggers)
Shop for Data Logging products online at:
www.
DataLoggerStore
.com
1.888.610.7664


