background image

CONTENTS

Features.............................................................................................................................................. 2
Important safeguards ......................................................................................................................... 3
Precautions......................................................................................................................................... 3
Before using this unit......................................................................................................................... 4
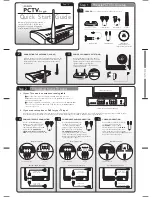
System connections ........................................................................................................................... 5
Antenna connections.......................................................................................................................... 6
Control positions and names.............................................................................................................. 8
Connecting the power ........................................................................................................................ 9
Receiving stations ............................................................................................................................ 10
Receiving RDS ................................................................................................................................ 13
Entering characters .......................................................................................................................... 15
Setting the clock  ............................................................................................................................. 16
Using the timer (for remote control only)........................................................................................ 18
Specifications................................................................................................................................... 20
Troubleshooting guide ..................................................................................................................... 20

T-4711

Instruction Manual

FM Stereo / AM Tuner

All models except European models

(FM Stereo / AM Tuner)

European model

(FM Stereo Tuner)

T-4711

T-4711

FM Stereo Tuner

Содержание T-4711

Страница 1: ... 8 Connecting the power 9 Receiving stations 10 Receiving RDS 13 Entering characters 15 Setting the clock 16 Using the timer for remote control only 18 Specifications 20 Troubleshooting guide 20 T 4711 Instruction Manual FM Stereo AM Tuner All models except European models FM Stereo AM Tuner European model FM Stereo Tuner T 4711 T 4711 FM Stereo Tuner ...

Страница 2: ... SHOCK MATCH WIDE BLADE OF PLUG TO WIDE SLOT FULLY INSERT Sur les modèles dont la fiche est polarisée ATTENTION POUR ÉVITER LES CHOCS ÉLECTRIQUES INTRODUIRE LA LAME LA PLUS LARGE DE LA FICHE DANS LA BORNE CORRESPONDANTE DE LA PRISE ET POUSSER JUSQU AU FOND FOR CANADIAN MODEL POUR LE MODELE CANADIEN Memory Preservation This unit does not require memory preservation batteries A built in memory power...

Страница 3: ...ervice The appliance should be serviced by qualified service personnel when A The power supply cord or the plug has been damaged or B Objects have fallen or liquid has been spilled into the appliance or C The appliance has been exposed to rain or D The appliance does not appear to operate normally or exhibits a marked change in performance or E The appliance has been dropped or the enclosure damag...

Страница 4: ...ths depending on fre quency of usage This unit comes equipped with R6 UM 3 AA manganese batteries but we rec ommend that long life alkaline batteries LR6 AM 3 AA be used when replacing the batteries The following information will help you get optimum use from the remote control Place this unit away from direct bright light which can prevent proper operation of the remote control Make sure audio ra...

Страница 5: ...instruction manual for connections 2 AC outlets SWITCHED The shape orientation the number and total capacity of the AC outlets may differ according to the model and the area where the unit is pur chased Be careful that other components connected to this unit do not exceed the capacity that is printed on the rear panel below under the AC outlets When connecting other Integra series components such ...

Страница 6: ...eception since the FM and TV or VCR signals can interfere with each other If you must use a common FM TV or VCR antenna use a directional linkage type splitter Assemble the loop antenna as shown in the illustration 1 Press down the lever 2 Insert wire 3 Return the lever Connecting the 300 ohm ribbon wire to the 75 300 ohm adaptor for models other than European models Connecting the coaxial cable t...

Страница 7: ...t as far as pos sible away from the main unit TV set speaker cables and power cord When reception is not satisfactory by the use of the attached AM loop antenna alone con nection of the external antenna is recom mended Do not remove the AM loop antenna The external antenna will be more effective if you stretch it horizontally in a high place above a window or outside Connecting the enclosed T shap...

Страница 8: ...TP TA SIGNAL STRENGTH ANTENNA RDS TUNED STEREO MONO NORMAL NARROW HI BLEND AUTO FINE MEMORY a b c d e f g h i j k l 1 Power Indicator 2 Power Button POWER 9 18 3 Remote Control Sensor 4 4 Display Button DISPLAY 12 14 5 Group Button GROUP 10 11 6 Scan Button SCAN 13 14 7 Preset Tuning Dial PRESET TUNING 10 11 15 8 RDS Button RDS 13 14 9 Band Selector Button BAND 10 Not available on the European mod...

Страница 9: ... preset Buttons TIMER PRESET 16 17 18 5 Antenna Selector Button ANTENNA 10 12 6 Dimmer Button DIMMER 11 7 Group Button GROUP 10 11 8 Preset memory up down Buttons PRESET a b 11 9 Scan Button SCAN 13 14 10 Tunning up down Buttons TUNING a b 10 11 Adjust Button ADJUST 16 17 12 Display Button DISPLAY 12 14 Remote control 1 Insert the AC power supply cord into a wall outlet 0 00 flashes 2 When you pre...

Страница 10: ...ill be tuned in If the station s frequency is weak and auto tuning is not be able to tune it in refer to page 12 To tune in a station by directly entering the station s fre quency Use the number buttons to enter the station s frequency For example if the station frequency is 88 10 MHz press 8 twice then press 1 and then 0 If no radio station can be received at the entered frequency the unit will d...

Страница 11: ...nels are played one after another for a few seconds each Once you have found a station that you wish to continue listening to press the SCAN button again to stop scanning If only one station has been stored in the selected group the channels are not scanned The part of the display that is lit up changes with each press of the DIMMER button in the following sequence Entire display lights up Section...

Страница 12: ... FM station with a very weak and noisy signal is received improve the situation by switching to monaural even if it is a ste reo broadcast At this time the MONO indicator will light up When it is noisy turning ON HI BLEND is also effective The three settings that can be selected with the MODE button can be used to improve the reception of FM stations with weak signals Auto tuning setting AUTO ligh...

Страница 13: ...ed station will be shown on the display If the station you are receiving is not broadcasting RDS Prog Type will be shown on the display 2 Use the PRESET TUNING dial to select your favorite program type PTY for example Sport See the PTY description below 3 Press the SCAN button to start searching for the chosen PTY When a station is received with the desired PTY the scanning stops for approximately...

Страница 14: ...istening to some items are not displayed When RT is received it can sometimes take between a few seconds and 15 seconds more or less to show RT on the display Sometimes the following messages will be shown on the display Wait Radio Text indicates that it requires more time to receive the RT information When the information is received the characters will scroll across the display No Radio Text thi...

Страница 15: ...se the procedure mentioned above to change characters that have already been entered Changing the characters while they are being entered Before pressing the MEMORY button to finish entering the charac ters press the PRESET TUNING button to change the flashing _ within the brackets to Turn the PRESET TUNING dial to move until it is at the character that you wish to change then press the PRESET TUN...

Страница 16: ...A B buttons to tune in a station It is recommended to tune in a station with a clear reception 4 Press the ENTER button The day and time appear on the display and AUTO flashes After a short while AUTO lights up After the clock is initially set it will be adjusted periodically NOTE Even if an RDS signal is present the signal may not be strong enough to allow the ACCUCLOCK to automatically set the t...

Страница 17: ...y 4 Wednesday 5 Thursday 6 Friday 7 Saturday 4 Set the desired time by using the A or B button The time can also be entered using the number buttons For example to enter 17 05 press 1 then 7 then 0 10 and then 5 5 Press the ENTER button The clock will start operating NOTE If ACCUCLOCK mode is turned on even if the clock is set manually ACCUCLOCK will continue adjusting the clock automatically Refe...

Страница 18: ...continue to step 4 4 Press the a b buttons to set the ON time then press the ENTER button The initial ON time is 0 00 Enter your desired ON time Continued on page 19 Starting playing at a selected time 1 2 3 4 TIMER W DAY MODE Remote control TIMER TIMER PRESET Remote control ENTER TIMER W DAY TIMER W DAY S M T W T F S Sunday Monday Tuesday Wednesday Thursday Friday Saturday Remote control TIMER TI...

Страница 19: ...er the specified length of time the power will be switched off automatically To confirm the remaining time Press the ENTER button To cancel the sleep setting Press the ENTER button until the sleep setting is turned off the sleep time is not displayed Make sure that the clock has been set correctly before setting the time After setting the timer be sure to set the power off When the power is on the...

Страница 20: ...d AM loop antenna to the AM antenna terminals TUNED indicators and stereo indicator light but sound is distorted and separation is bad Cause Station is too strong Remedy Change to T shaped antenna Cause Multiple reflection of the radio waves because of tall buildings or mountains Remedy Use antenna which has better directivity and select a point with the least distortion TUNED indicators and stere...

Отзывы: