background image

14

EN

 OPERATION

CAUTION

Risk of injury! : To be operated by an adult.Any children in the 
vicinity of the BBQ must be supervised at all times. The BBQ is 
very hot during operation and will cause burns if touched.

1   Remove the grills.

2   Load the charcoal tray with heat beads and ignite with fi re lighters.
3   Refi t the grills.

4   Once the meat has been prepared,place centrally on the Rotisserie 

Skewer.Placing the meat exactly in the center of the skewer will reduce 
the stain on the motor.

5   If cooking a whole roast fi x to tail clamp and leg clamps and lock onto the 

skewer. Insert the Meat spike onto the skewer and into roast.When the 
whole roast is secure,lock the meat spike to the skewer.

6   If cooking meat/s,insert the meat spikes on both ends of the meat and lock 

the Meat Spikes onto the Skewer.

7   Insert Skewer into Rotisserie Motor and place Skewer on the support as 

the other end.

8   Plug the power cord into a 10 A power outlet and switch on the Rotisserie 

Motor.If necessary, add more coals by lifting the grills with the grills with 

the tool supplied When fi nished cooking,carefully remove the Rotisseries 

Skewer with oven mitts or heat proof gloves.

  HINTS  ON  DISPOSAL

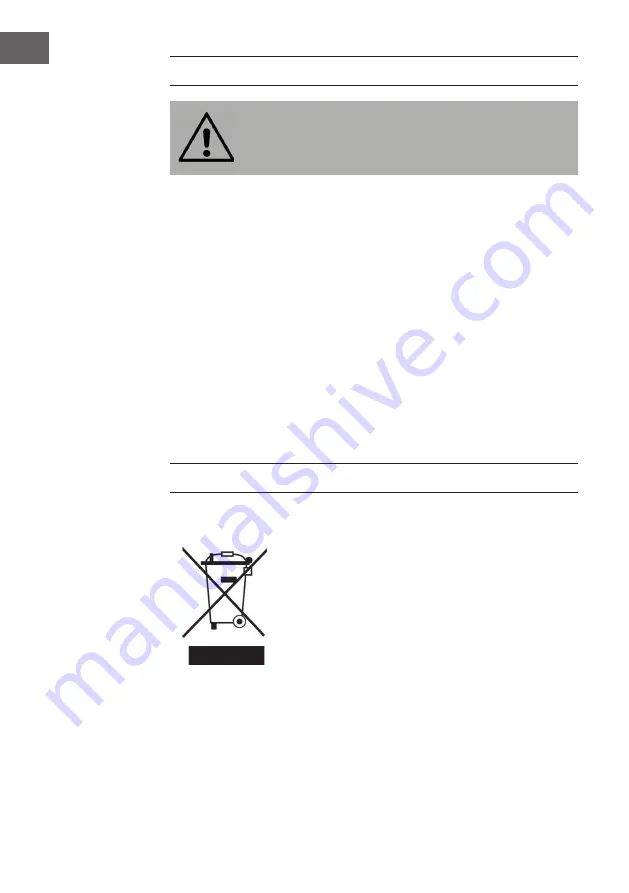
According to the European waste regulation 2012/19/EU 
this symbol on the product or on its packaging indicates 
that this product may not be treated as household waste. 
Instead it should be taken to the appropriate collection 
point for the recycling of electrical and electronic 
equipment. By ensuring this product is disposed of 
correctly, you will help prevent potential negative 
consequences for the environment and human health, 
which could otherwise be caused by inappropriate waste 
handling of this product. For more detailled information 
about recycling of this product, please contact your local 
council or your household waste disposal service.

Содержание 10026798

Страница 1: ...Spanferkelgrill Suckling Pig BBQ Grill Parrilla para lechón Barbecue de cochon de lait Griglia per maialino 10026798 ...

Страница 2: ......

Страница 3: ...hgemäßen Gebrauch entstehen übernehmen wir keine Haftung INHALTSVERZEICHNIS Sicherheitshinweise 4 Einzelteile 4 Zusammenbau 5 Bedienung 8 Hinweise zur Entsorgung 8 TECHNISCHE DATEN Artikelnummer 10026798 Stromversorgung 220 240 V 50 60 Hz Motorleistung 15 W Grillfläche 83 cm x 43 cm KONFORMITÄTSERKLÄRUNG Hersteller Chal Tec GmbH Wallstraße 16 10179 Berlin Deutschland Dieses Produkt entspricht den ...

Страница 4: ...eträgt 40 kg Überladen Sie den Spieß nicht da dies den Motor beschädigen und die Garantie unwirksam machen könnte Löschen Sie heiße Kohle nicht mit Wasser da dies die Kohle Schale beschädigen könnte Der Grill hat eine 12 monatige Garantie Setzen Sie den Motor niemals nassem Wetter aus Das Kabel sollte regelmäßig auf Schäden überprüft werden Verwenden Sie den Motor nicht wenn das Kabel beschädigt i...

Страница 5: ... Beinhalterung L 1 Beinhalterung R 1 Bein 2 ZUSAMMENBAU 1 2 Befestigen Sie die Beinhalterung L mit 6 x M6 15 Schrauben und M6 Muttern an der Grillschale Wiederholen Sie diesen Schritt auf der anderen Seite der Grillschale mit der Beinhalterung R ...

Страница 6: ...gen Sie sie 5 6 Befestigen Sie den Motor an der Motor Halterung Befestigen Sie die Halterung am oberen Teil eines Beins und Motor Halterung am oberen Teil des anderen Beins Stecken Sie die Bolzen durch die Löcher um die Höhe festzulegen Achten Sie darauf dass Halterung und Motor Halterung auf der gleichen Höhe befestigt sind ...

Страница 7: ...e auf der Grill Schale 9 10 Stecken Sie die Gabel die Schwanzklammer und oder die Beinklammer auf den Spieß Stecken Sie den vollständig zusammengebauten Spieß auf die Halterungen und verbinden Sie den Motor mit dem Stromnetz Ihr Grill ist nun fertig zusammengebaut und zur Verwendung bereit ...

Страница 8: ...das andere Ende auf die Spieß Halterung 8 Stecken Sie den Stecker in die Steckdose und schalten Sie den Motor ein Fügen Sie wenn nötig noch mehr Kohl hinzu indem Sie den Rost mit dem beiliegenden Werkzeug anheben 9 Entfernen Sie den Spieß vorsichtig mit Ofenhandschuhen wenn Sie fertig mit dem Garen sind HINWEISE ZUR ENTSORGUNG Befindet sich die linke Abbildung durchgestrichene Mülltonne auf Rädern...

Страница 9: ...nual are not covered by our warranty and any liability CONTENT Safety Instructions 10 Parts List 10 Assembly 11 Operation 14 Hints on Disposal 14 TECHNICAL DATA Item number 10026798 Power supply 220 240 V 50 60 Hz Motor power 15 W Barbecue area 83 cm x 43 cm DECLARATION OF CONFORMITY Producer Chal Tec GmbH Wallstraße 16 10179 Berlin Germany This product is conform to the following European Directi...

Страница 10: ...ranty DO NOT extinguish hot coals with water as it can damage the Charcoal Pan DO NOT expose the Rotisserie Motor to wet weather It is recommended that the Rotisserie Motor be supplied through a Residual Current Device RCD having a rated residual operating current not exceeding 30mA The supply cord should be regularly examined for signs of damage and the Rotisserie Motor is not to be used if the c...

Страница 11: ...N Item Picture Qty Fork 1 Wheel 4 Leg bracket L 1 Leg bracket R 1 Leg 2 ASSEMBLY 1 2 Attech the leg bracket L to the BBQ pit with 6 pcs M6 15 screws and M6 nuts Repeat this step on other side of the BBQ pit ...

Страница 12: ...Q Pit Insert assembled legs into base of legs 5 6 Attach Motor Mounting Bracket to adjust Fasten pins though eye holes in leg to Motor uprights and then adjust Attach Mounting Bracket and Motor Mount Bracket to leg uprights and then determine height required for both Bracket and make sure they are level ...

Страница 13: ...lace 3 Grill elements onto BBQ Pit top 9 10 Mount the Meat Spikes Tail Clamp and or Leg Clamp to the Rotisserie Skewer Place fully assembled Rotisserie skewer onto mounting brackets and plug in the motor Your BBQ is now fully assembled and ready for use ...

Страница 14: ...er into Rotisserie Motor and place Skewer on the support as the other end 8 Plug the power cord into a 10 A power outlet and switch on the Rotisserie Motor If necessary add more coals by lifting the grills with the grills with the tool supplied When finished cooking carefully remove the Rotisseries Skewer with oven mitts or heat proof gloves HINTS ON DISPOSAL According to the European waste regula...

Страница 15: ...ndicaciones de seguridad ÍNDICE DE CONTENIDOS Indicaciones de seguridad 16 Piezas individuales 16 Montaje 17 Funcionamiento 20 Retirada del aparato 20 DATOS TÉCNICOS Número de artículo 10026798 Fuente de alimentación 220 240 V 50 60 Hz Potencia del motor 15 W Superficie de la parrilla 83 cm x 43 cm DECLARACIÓN DE CONFORMIDAD Fabricante Chal Tec GmbH Wallstraße 16 10179 Berlín Alemania Este product...

Страница 16: ...n ya que podría dañar el motor e invalidar la garantía No apague el carbón caliente con agua ya que podría dañar la bandeja para carbón La parrilla cuenta con una garantía de 2 años No exponga el motor a un clima húmedo Compruebe el cable de alimentación regularmente para detectar posibles defectos No utilice el motor si el cable de alimentación está dañado PIEZAS INDIVIDUALES Descripción Imagen C...

Страница 17: ...da 4 Soporte de pata I 1 Soporte de pata D 1 Pata 2 MONTAJE 1 2 Fije el soporte de pata I a la bandeja de asador con la ayuda de 6 tornillos M6 15 y tuercas M6 Repita este paso para fijar el soporte de pata D en el otro extremo de la bandeja de asador ...

Страница 18: ... y fíjelas 5 6 Monte el motor en el soporte de motor Fije el soporte en la parte superior de una pata y el soporte de motor en la parte superior de otra pata Elija la atura deseada con la ayuda de los pernos Asegúrese de que el soporte y el soporte de motor están a la misma altura ...

Страница 19: ...n la bandeja de asador 9 10 Monte las horquillas las abrazaderas para la parte de atrás y o las abrazaderas para las patas en el espetón Coloque el espetón completamente montado en el soporte y conecte el motor a la toma de corriente La parrilla está completamente montada y lista para usarse ...

Страница 20: ...oporte de espetón 8 A continuación conecte el enchufe a la toma de corriente y encienda el motor En caso necesario añada más carbón retirando la rejilla con la herramienta correspondiente 9 Una vez terminado el asado retire el espetón con cuidado utilizando guantes de cocina RETIRADA DEL APARATO Si el aparato lleva adherida la ilustración de la izquierda el contenedor de basura tachado entonces ri...

Страница 21: ...ignes de sécurité et à la mauvaise utilisation de l appareil SOMMAIRE Consignes de sécurité 22 Pièces détachées 22 Assemblage 23 Utilisation 26 Conseils pour le recyclage 26 FICHE TECHNIQUE Numéro d article 10026798 Alimentation 220 240 V 50 60 Hz Puissance du moteur 15 W Surface de cuisson 83 cm x 43 cm DÉCLARATION DE CONFORMITÉ Fabricant Chal Tec GmbH Wallstraße 16 10179 Berlin Allemagne Ce prod...

Страница 22: ...as la brochette car cela pourrait endommager le moteur et annuler la garantie N éteignez pas le charbon chaud avec de l eau car cela pourrait endommager la coque en carbone Le gril bénéficie d une garantie de 12 mois N exposez jamais le moteur aux intempéries Le câble doit être vérifié régulièrement pour détecter tout dommage Ne pas utiliser le moteur si le câble est endommagé PIÈCES DÉTACHÉES Des...

Страница 23: ... Fourche 1 Roulettes 4 Support de montant G 1 Support de montant D 1 Pieds 2 ASSEMBLAGE 1 2 Fixez le support de pied G à la coque du gril avec 6 vis M6 15 et des écrous M6 Répétez cette étape de l autre côté du gril avec le support de pied D ...

Страница 24: ...ecue et fixez les 5 6 Fixez le moteur sur son support Fixez le support à la partie supérieure d un pied et le support du moteur au sommet de l autre pied Insérez les boulons à travers les trous pour définir la hauteur Veillez à ce que le support et le support du moteur soient montés à la même hauteur ...

Страница 25: ...s du gril sur la cuve du gril 9 10 Mettez la fourche la pince de queue et ou la pince de pied sur la brochette Insérez la brochette entièrement assemblée sur les supports et branchez le moteur sur le secteur Votre barbecue est maintenant entièrement assemblé et prêt à l emploi ...

Страница 26: ...l autre extrémité sur le porte broche 8 Insérez la fiche dans la prise et allumez le moteur Ajoutez plus de charbon si nécessaire en soulevant la grille avec l outil fourni 9 Retirez délicatement la broche avec des gants de cuisine en fin de cuisson CONSEILS POUR LE RECYCLAGE Le pictogramme ci contre apposé sur le produit signifie que la directive européenne 2012 19 UE s applique poubelle à roues ...

Страница 27: ... di sicurezza e da un uso improprio del dispositivo INDICE Istruzioni di sicurezza 28 Tabella componenti 28 Assemblaggio 29 Funzionamento 32 Smaltimento 32 DATI TECNICI Codice Articolo 10026798 Alimentazione 220 240 V 50 60 H Potenza motore 15 W Dimensioni Barbecue 83cm x 43 cm DICHIARAZIONE DI CONFORMITÀ Produttore Chal Tec GmbH Wallstraße 16 10179 Berlino Germania Questo prodotto è conforme alle...

Страница 28: ...Grill ha 12 mesi di garanzia Non spegnere i carboni ardenti con l acqua Non esporre il motore a condizioni atmosferiche umide Si consiglia di alimentare il motore attraverso un dispositivo per correnti residue alternate RCD con una corrente differenziale non superiore a 30 mA Il cavo di alimentazione deve essere regolarmente esaminato per rilevare la presenza di eventuali segni di danneggiamento I...

Страница 29: ...ne Quantità Forcone 1 Ruote 4 Supporto gambe L 1 Supporto Gambe R 1 Gambe 2 ASSEMBLAGGIO 1 2 Fissare il supporto per le gambe L alla griglia con 6 viti M6 15 e dadi M6 Ripetere questa operazione sull altro lato del barbecue ...

Страница 30: ...arle 5 6 Fissare il motore sul supporto per il motore Fissare il supporto sulla parte superiore di una delle gambe e il supporto per il motore sulla parte superiore dell altra gamba Inserire i bulloni nei fori per stabilire l altezza Assicurarsi che il supporto e il supporto del motore siano montati alla stessa altezza ...

Страница 31: ...griglia sul vassoio della griglia 9 10 Porre il forcone il morsetto posteriore e o il morsetto per le gambe sullo spiedo Posizionare lo spiedo completamente assemblato sui supporti e collegare il motore alla corrente elettrica Adesso il barbecue è completamente assemblato e pronto per l uso ...

Страница 32: ...i 7 Inserire lo spiedo nella braciera e sistemarne gli estremi di entrambi i lati sui rispettivi supporti 8 Inserire la spina nella presa di corrente e azionare il dispositivo Se necessario aggiungere una dose ulteriore di carbone sollevando il braciere con l attrezzo in dotazione 9 Al termine della cottura rimuovere con cautela lo spiedo utilizzando guanti da forno SMALTIMENTO Se sul prodotto è p...

Страница 33: ......

Страница 34: ......

Страница 35: ......

Страница 36: ......

Отзывы: