background image

10

 ‐


Play Video/Photo                                     


When working mode selected to “

”, it’s in the mode of play video & photo. Press “

”/“

” to 

select “Photo” or “Video”. Press “

” to exit and back to main menu. 

1

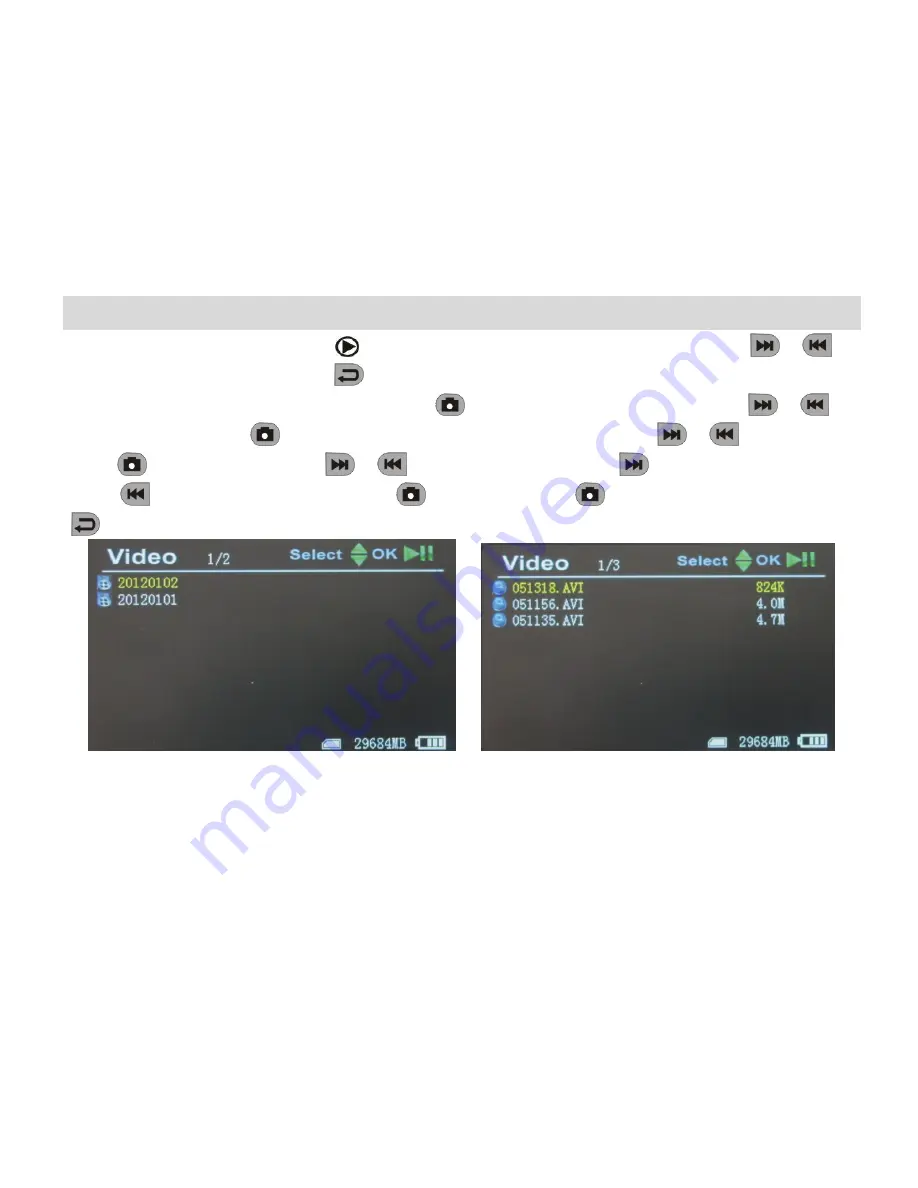
Play Video

: When select “Video”, press “

” to enter into date folder. Press “

”/“

” to 

select date, and press “

” to enter into time phased video files. Press “

”/“

” to select, and 

press “

” to play video. Press“

”/“

” to adjust volume. Press “

” long time to fast forward; 

press “

” long time to rewind; press“

” to pause; press“

” again to release pause; press 

” to exit.   


Содержание TP-TE968H

Страница 1: ...2 4G 5 8GWirelessMiniDVR User Manual...

Страница 2: ...istake and omit of the introduction 2 Our company is only responsible for maintaining and repairing the problem of itself existing We aren t responsible for personal data deleted and lost caused by wr...

Страница 3: ...tion 1 Notes 2 Buttons Interface 3 How to Charge 4 Basic Operation 5 Recording Photo 6 Motion Detect 9 Play Video Pictures 10 Function Settings 12 System Settings 18 Trouble Shooting 25 Specification...

Страница 4: ...e Please don t dismantle the DVR without authorization If any query please contact with the distributor or our company Please don t change or poke the battery If put the battery into fire it will expl...

Страница 5: ...ts seamless cycle and continuous video from wired wireless cameras z Photo Supports function of taking pictures either from wired or wireless cameras z AV IN TV IN NTSC PAL z AV OUT NTSC PAL z Battery...

Страница 6: ...3 Buttons Interface Tips for symbols...

Страница 7: ...ce A This charger is for this machine use only Do not leave the charger in humid place Unplug the charger and keep it well after charging Do not repair break down or remake the charger B For better pe...

Страница 8: ...2 4G 5 8G 3 Working mode switch switcher located at the left corner When it switches to DVR is in state of receiving record photo When it switches to DVR is in the sate of play When it switches to DVR...

Страница 9: ...hes once and get one picture 2 Record Under mode press for 3 seconds DVR start to record and screen shows REC Press again to pause screen shows press one more time it continue to record Press to end i...

Страница 10: ...ystem will automatically save video in segments And when the card is full it will overwrite the earliest recording and save the latest one keep cycle recording 3 Channel Switch Under wireless receivin...

Страница 11: ...8 Record Photo 3 Mute Under mode press to enter state of mute Screen displays MUTE Speaker no sound press again to recover sound Note Mute setting will not affect earphone...

Страница 12: ...automatically end recording and save to exit waiting next motion To end motion detect recording press it will save automatically and exit 3 If not press to end recording the system will automatically...

Страница 13: ...and back to main menu 1 Play Video When select Video press to enter into date folder Press to select date and press to enter into time phased video files Press to select and press to play video Press...

Страница 14: ...r into photo files Press to select pictures then press to view Press to view next one press to view previous one Press to exit 3 Delete Photo Video Under working mode press to select files Press to ge...

Страница 15: ...er DVR on working mode switched to press to enter into function and system setting menu Press to select Function then press to enter into function menu 1 Channel Setting Press to select Channel Settin...

Страница 16: ...ect Press to select Channel Switch Select and press to enter Press to select channel and press to turn it off on Press to exit 2 Auto Switch Press to select Auto Switch and press to enter Press to sel...

Страница 17: ...ess to select Dwell Time and press to enter Press to adjust dwell time Then press to confirm and exit 2 Recorder Resolution Press to select Recorder Resolution and press to enter Press to select 720X5...

Страница 18: ...ress to select Frame Rate and press to enter Press to select 30 FPS 25 FPS and press to confirm exit 4 Video Segment Sizes Press to select Video Segment Sizes then press to enter Press to select 10 MI...

Страница 19: ...select Off On and press to confirm exit If Overwrite is on DVR will cycle record and save the latest video 6 Time Stamp Press to select Time Stamp and press to enter Press to select Off On and press...

Страница 20: ...it s on screen will display information of working frequency channel audio state date time etc If select Off all the information will not be displayed 8 Video Setting Press to select Video Setting and...

Страница 21: ...witched to press to enter into function system setting Press to select System then press to enter into system menu 1 Date time Press to select Date Time and press to enter Press again to move the curs...

Страница 22: ...age and press to enter Press to choose your language And press to confirm and exit 3 AV Out Press to choose AV Out and press to enter Press to choose PAL NTSC Press to confirm video displayed on TV sc...

Страница 23: ...20 System Settings 4 Format Press to select Format and press to enter Press to choose Yes Press to confirm exit 5 Power Save Press to select Power Save and press to enter...

Страница 24: ...t If turn on Auto LCD Off LCD screen will automatically shut off when the set time is due Press any key to recover screen display 2 Auto Power Off Press to select Auto Power Off and press to enter Pre...

Страница 25: ...and press to enter Press to select Yes and press to start update Please remember to save update file zburnT_C11 run elf at root directory of SD card 7 Default Setup Press to select Default Setup and...

Страница 26: ...23 System Settings 8 Memory Info Press to select Memory Info and press to view capacity of SD card Press to exit 9 Version Press to select Version and press to view version information Press to exit...

Страница 27: ...24 System Settings 10 Display Mode Press to choose Display Mode Press to choose 16 9 4 3 Then press to confirm Press to exit...

Страница 28: ...supported by this DVR please convert it into the supported format 4 The text is in messy code Make sure the correct language is selected 5 It can t upload download files or can t find the disk in PC R...

Страница 29: ...71MHz CH4 5790MHz CH5 5809MHz CH6 5828MHz CH7 5847MHz CH8 5866MHz Within 5 8G D 7channels for FPV CH1 5740MHz CH2 5760MHz CH3 5780MHz CH4 5800MHz CH5 5820MHz CH6 5840MHz CH7 5860MHz CH8 SPI Wireless f...

Страница 30: ...2GB recording time 10 32 hours Storage 1GB photos 15625pcs PC Windows Mac OS Port USB 2 0 Operating system Language Multiple Voltage DC 5V Current receiving mode 660MA Current recording mode 680MA Cur...

Страница 31: ...g items are all in box Please check DVR main body 1unit User manual 1 PC Stereo earphone 1unit USB Cable 1 PC AV IN Cable 1 PC AV OUT Cable 1 PC AC adapter 1 unit Back holder for installation 1 pc Ant...

Отзывы: