3
4
Familiarize yourself with the
product.
Configuring the nanoCUBE:
Opening the nanoCUBE
1.
Remove all items from their packaging including:
a.
nanoCUBE enclosure (includes chassis, sled
with backplane and target cable adapter)
b.
(1) PCIe Host cable adapter card and cable
or Thunderbolt adapter and cable
c.
(1) External power supply
2.
Remove the top panel.
a.
Unscrew the thumb screw on the rear of
the unit, then slide the top cover towards
the rear of the chassis and remove.
3.
Remove the Riser Stabilizer.
a.
Simply lift the front edge and slide
towards the back of chassis then lift.
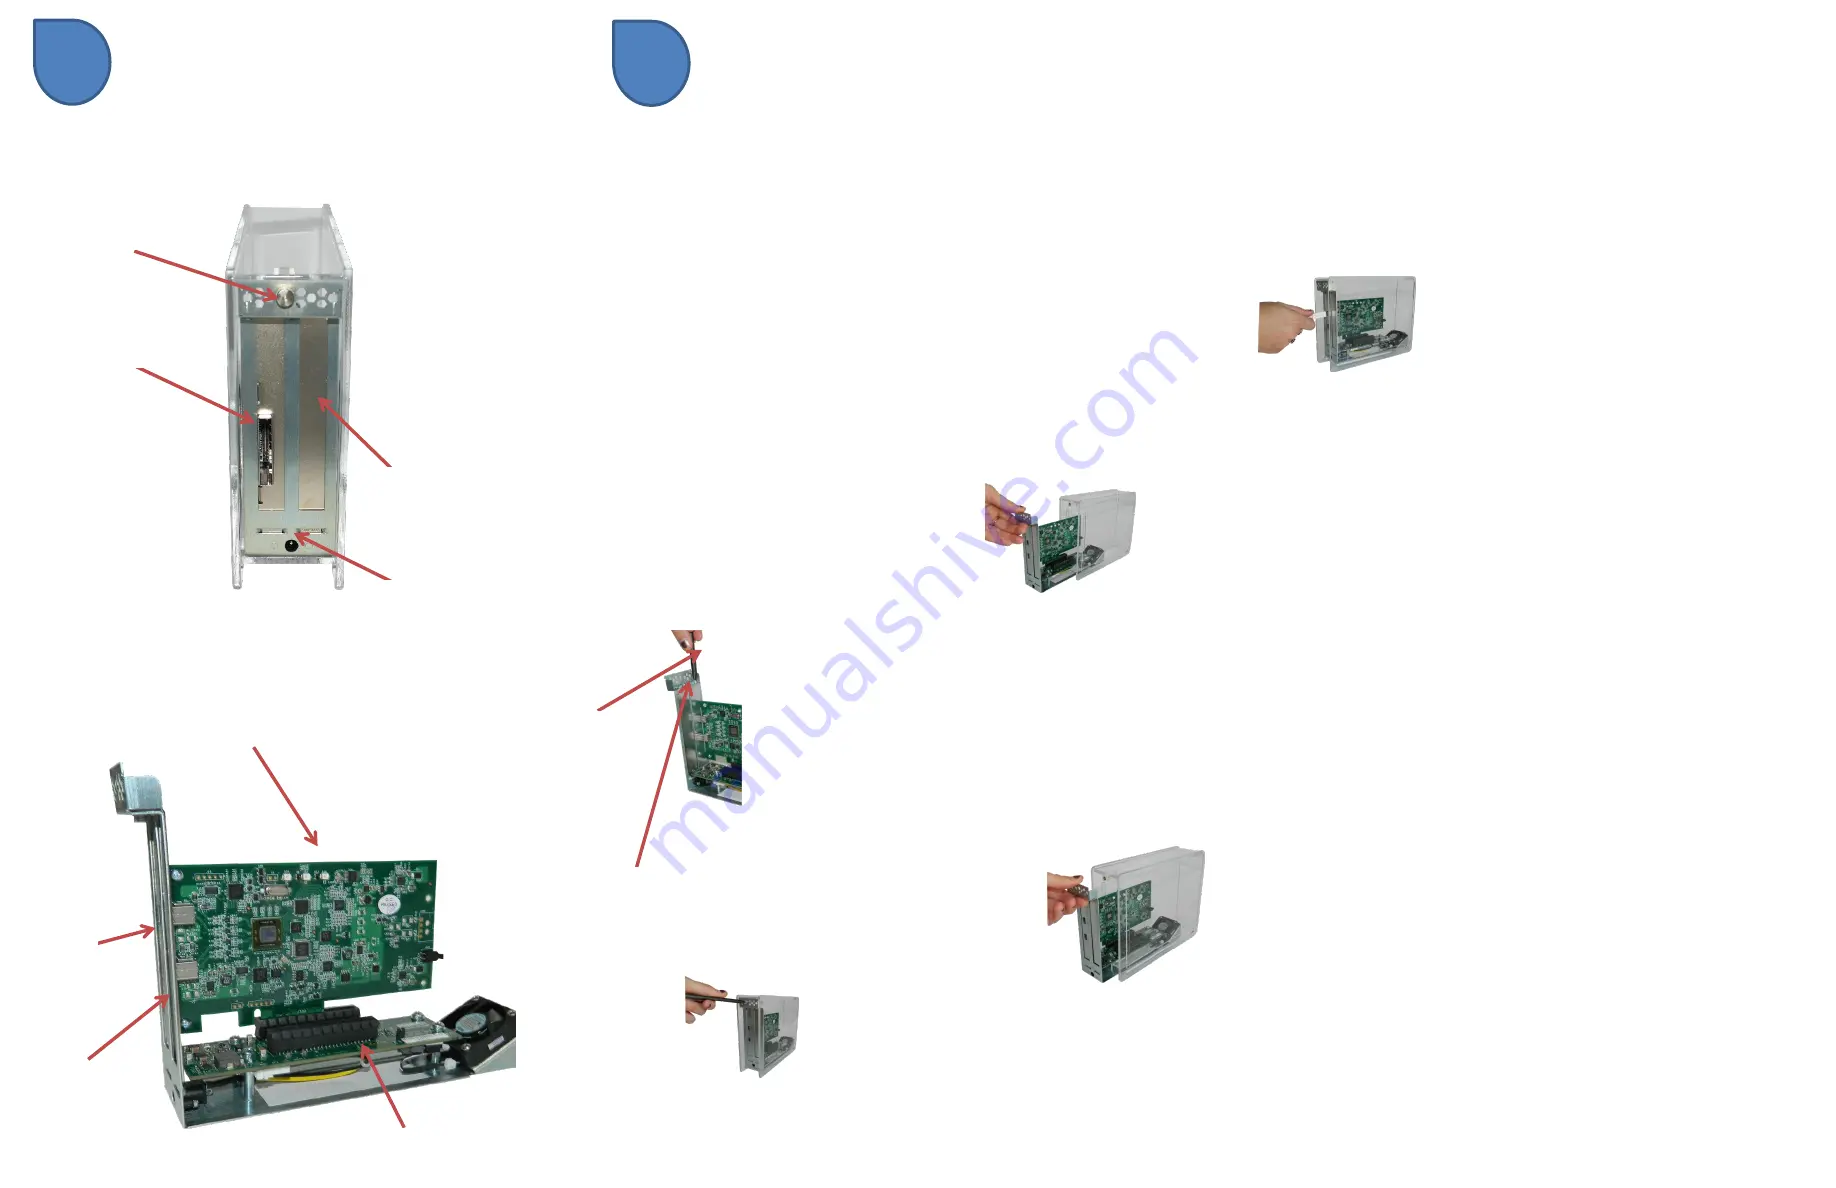
Add-in Card Installation
2.
2. Remove the sled from the nanoCUBE
enclosure
a.
Rear View:
Inner Components:
3.
Install your add-in card
a.
Carefully align the add-in board connector
with the PCIe connector on the backplane
and press firmly into place.
b.
Replace the screw on top of the card
bracket, securing the newly-installed
board into place in the tray.
c.
Always use a slot cover for any unused
slots on the rear panel
a.
Slide the sled back into the chassis.
b.
Replace the access screw at the top of the
sled.
Cabling the nanoCUBE to your computer
5. For PCIe connection to your PC or workstation
a.
To insert the PCIe cable, line up the
keyed side of the cable connector with
the keyed side of the connector on the
board and insert.
i.
Pull back the green tab on the
retractor to allow the cable to lock
into place.
ii.
The teeth of the cable connector
must be completely seated.
b.
Install the cable adapter in a PCIe slot in
your PC or workstation.
i.
Place the cable adapter card in an
open slot in your computer (the
cable adapter will only operate at
the base speed of the slot. Ex: a x8
card in a x16 slot operates at x8
speeds.)
ii.
Fasten the adapter card in the slot
by tightening the screw on the slot
cover.
6.
For Thunderbolt Connection
a.
Connect the Thunderbolt cable to the
Thunderbolt connector in your workstation
or laptop.
i.
The cable can be connected to
either of the Thunderbolt
connectors on the nanoCUBE.
7. Insert the power cable and turn on your computer
to power up the nanoCUBE.
8. Install any driver required for the add-in card(s) on
your computer.
a.
Unscrew the access screw located at
the top of the sled.
b.
Slide the sled out of the chassis.
4. Replace the sled
Cable Adapter Board
Sled
PCIe x8 Slot
Backplane
Access screw
Add-in card slot
Power Supply Connector
PCIe or Thunderbolt
cable connector
Screw
Screwdriver
x


