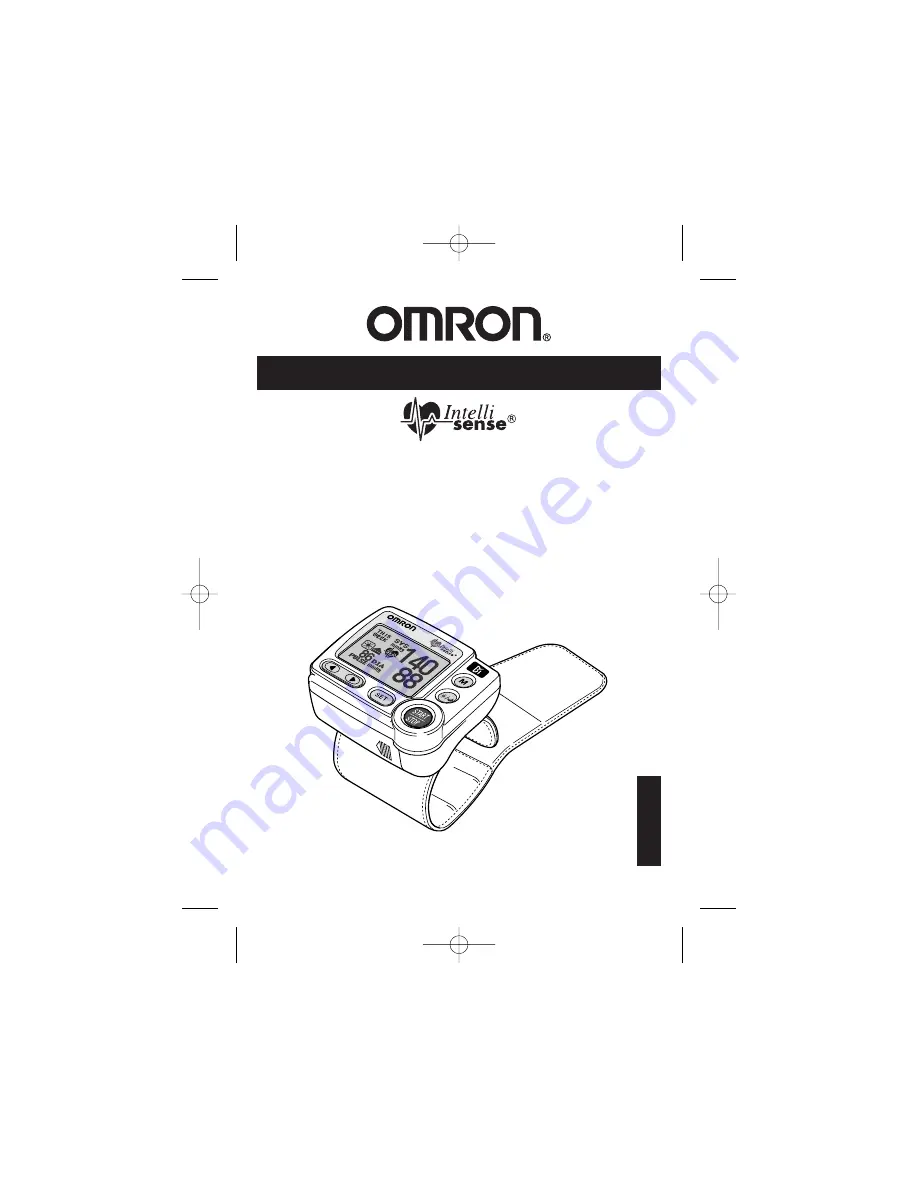
Ultra Premium
Wrist Blood Pressure Monitor
with Advanced Positioning Sensor (APS
®
)
and Omron Health Management Software
Model
HEM-670ITCAN
HEM-670IT
Instruction Manual
ENGLISH
HEM-670ITCAN_EN_FR_Q6_r2.qxd 5/13/09 10:44 PM Page 1
Страница 1: ...m Wrist Blood Pressure Monitor with Advanced Positioning Sensor APS and Omron Health Management Software Model HEM 670ITCAN HEM 670IT Instruction Manual ENGLISH HEM 670ITCAN_EN_FR_Q6_r2 qxd 5 13 09 10 44 PM Page 1 ...
Страница 2: ... 13 Morning Average Symbol 13 Evening Average Symbol 13 Battery Installation 14 Adjusting Settings 16 Setting the Memory Function 17 Setting the TruRead Function 18 Setting the Advanced Positioning Sensor 20 Setting the Measurement Wrist 22 Setting the Alarm 23 Setting the Date and Time 25 Setting the Contrast 27 Resetting the Monitor 28 Applying the Wrist Cuff 30 Taking a Measurement 33 Using the...
Страница 3: ...olic Values above 170 mmHg 47 Display Combinations 48 To Delete All Values Stored in the Memory 50 Downloading Instructions Installing the Software 52 Using the Software 63 Transferring Data to a Personal Computer 65 Software Troubleshooting Tips 67 Care and Maintenance Care and Maintenance 68 Error Indicators and Troubleshooting Tips 69 FCC Statement 71 Warranty 72 Specifications 73 HEM 670ITCAN_...
Страница 4: ... changes in arm blood pressure because the arteries in the arm and wrist connect The software included with this monitor can help you provide important trending information for your physician of changes in your blood pressure The HEM 670ITCAN comes with the following components Main Unit 2 AAA Batteries Storage Case Warranty Card Serial USB Cable CD ROM Instruction Manual printed in English and Fr...
Страница 5: ...re in the box before operating the unit This device is intended for use in measuring blood pressure and pulse rate in the adult population Do not use this device on infants or persons who cannot express their intentions SAFETY INFORMATION To assure the correct use of the product basic safety measures should always be followed including the warnings and cautions listed in this instruction manual WA...
Страница 6: ...V alkaline batteries with this device Do not use other types of batteries This may damage the unit Do not play the CD ROM disc included with this monitor on general audio players DVD players or personal game devices It may damage the speaker of the device and may harm your eardrums CARE AND MAINTENANCE Do not subject the monitor to strong shocks such as dropping the unit on the floor Do not submer...
Страница 7: ...ff can be applied to your left or right wrist 4 Measurements should be taken in a quiet place and you should be in a relaxed seated position 5 Remain still and do not talk during the measurements 6 Keep a record of your blood pressure and pulse for your physician A single measurement may not provide an accurate indication of your true blood pressure You need to take and record several readings ove...
Страница 8: ...ist Cuff Main Unit Button SET Button MORNING EVENING AVERAGE Button MEMORY Button Serial Port Cover START STOP Button Operating Instructions Fabric fastener hook Fabric fastener loop Inner surface of wrist cuff HEM 670ITCAN_EN_FR_Q6_r2 qxd 5 13 09 10 45 PM Page 8 ...
Страница 9: ...ent ADVANCED POSITIONING SENSOR APS ENSURES A RELIABLE MEASUREMENT Correct cuff positioning is critical when monitoring blood pressure The Omron Wrist Blood Pressure Monitor with APS has a unique positioning sensor that confirms the cuff is level with the user s heart This helps ensure that each reading is accurate and reliable KNOW YOUR UNIT Components Two AAA Batteries Storage Case Serial USB Ca...
Страница 10: ...T DISPLAY Systolic Blood Pressure Diastolic Blood Pressure Morning Hypertension Symbol Morning Average Symbol Pulse Display Week Display Heartbeat Symbol HEM 670ITCAN_EN_FR_Q6_r2 qxd 5 13 09 10 45 PM Page 10 ...
Страница 11: ...ore than 25 slower or 25 faster from the average rhythm detected while the monitor is measuring the systolic blood pressure and the diastolic blood pressure If the irregular heartbeat symbol displays with your measurement results we recommend you consult your physician Follow the directions of your doctor Normal Heartbeat Irregular Heartbeat Pulse Blood pressure Pulse Blood pressure Short Long DIS...
Страница 12: ...ic information about your blood pressure Self diagnosis and treatment using measured results may be dangerous Follow the instructions of your physician or licensed healthcare provider Omron Healthcare recommends you contact your physician if the MORNING HYPERTENSION SYMBOL and or the HEARTBEAT SYMBOL appear on the display with your measurement values MORNING HYPERTENSION SYMBOL The Morning Hyperte...
Страница 13: ...N The Heartbeat Symbol flashes when the blood pressure reading stored in the memory is above 135 for the Systolic Blood Pressure value and or 85 for the Diastolic Blood Pressure value AVERAGE VALUE SYMBOL The Average Value Symbol is displayed when you press the MEMORY button The most recent average reading appears on the display screen MORNING AVERAGE SYMBOL The Morning Average symbol is displayed...
Страница 14: ...arrow 2 Install 2 AAA size batteries so the positive and negative polarities match the polarities of the battery compartment as indicated 3 Replace the Battery Cover by sliding the cover as illustrated until the cover clicks securely over the battery compartment HEM 670ITCAN_EN_FR_Q6_r2 qxd 5 13 09 10 45 PM Page 14 ...
Страница 15: ...g the batteries Measurement values stored in the memory are not deleted during battery replacement When the batteries are replaced you may need to reset the date and time If the year is flashing on the display screen refer to Setting the Date and Time Section The supplied batteries may have a shorter life CAUTION Dispose of the device components and optional accessories according to applicable loc...
Страница 16: ... THE MONITOR CAN BE ADJUSTED Automatic Memory Alarm TruRead Interval Time Position Sensor Wrist Time Contrast Delete Data refer to p50 Reset Setting ADJUSTING SETTINGS HEM 670ITCAN_EN_FR_Q6_r2 qxd 5 13 09 10 45 PM Page 16 ...
Страница 17: ...TO CHANGE THE SETTING Press the START STOP button to turn the power off then press the SET button The Auto Memory Screen is displayed with the current setting The unit is set to ON at the time of purchase 2 SELECTING ON OR OFF Press the button to change the setting to OFF Press the button to change the setting to ON 3 CONFIRM THE SETTING To continue to change other settings press the SET button to...
Страница 18: ...e set to 15 30 60 or 120 seconds Note When the Automatic Memory Function is set to OFF the TruRead function can not be set to ON 1 TO CHANGE THE SETTING Press the START STOP button to turn the power off then press the SET button Press the SET button again The TruRead Screen is displayed with the current setting The TruRead is set to OFF at the time of purchase 2 SELECTING ON OR OFF Press the butto...
Страница 19: ...ed time interval between measurements The INTERVAL TIME is set to 60 at the time of purchase 5 CONFIRM THE INTERVAL SETTING To continue to change other settings press the SET button to confirm the Interval setting The Position Sensor Screen is displayed If no other changes are needed press the START STOP button to store your setting and turn the power off Interval Time Screen HEM 670ITCAN_EN_FR_Q6...
Страница 20: ...rn the power off then press the SET button Continue to press the SET button until the Position Sensor Screen is displayed The Position Sensor Screen is displayed with the current setting The Position Sensor and the SIGNAL are set to ON at the time of purchase 2 SELECTING ON OR OFF Press the button to change the setting to OFF Press the button to change the setting to ON To set the SIGNAL press ON ...
Страница 21: ...NG To continue to change other settings press the SET button to confirm the APS Function you selected The Wrist Screen is displayed If no other changes are needed press the START STOP button to turn the power off HEM 670ITCAN_EN_FR_Q6_r2 qxd 5 13 09 10 45 PM Page 21 ...
Страница 22: ...een displays The Wrist Screen displays with the current setting 2 SELECTING LEFT WRIST OR RIGHT WRIST Press the button to change the wrist setting to RIGHT Press the button to change the wrist setting to LEFT 3 CONFIRM THE SETTING To continue to change other settings press the SET button to confirm the Measurement Wrist you selected The Alarm Set Screen is displayed If no other changes are needed ...
Страница 23: ...g a measurement using the memory or using the graph function 1 TO CHANGE THE SETTING Press the START STOP button to turn the power off then press the SET button Continue to press the SET button until the Alarm Set Screen displays The Alarm Set Screen displays with the current setting 2 SETTING THE ALARM Set the time on the alarm using the button to advance or the button to move back NOTE Press and...
Страница 24: ...the sound on or off Press the SET button to confirm the setting Setting the Second Alarm Follow the same instructions for setting the first alarm To continue to change other settings press the SET button to confirm the setting for the Second Alarm The Time Set Screen is displayed If no changes are needed press the START STOP button to turn the power off Display Screen when alarm is sounding Screen...
Страница 25: ...r 1 TO CHANGE THE SETTING Press the START STOP button to turn the power off then press the SET button Continue to press the SET button until the Time Set Screen displays The year flashes on the display with the current setting 2 SETTING THE YEAR Press the button to set the year to the current year Press the SET button to confirm the setting The month flashes on the display 3 SETTING THE MONTH Pres...
Страница 26: ...elect AM or PM and the hour Press the SET button to confirm the setting The minute flashes on the display 6 SETTING THE MINUTE Press the button to set the minute To continue to change other settings press the SET button to confirm the setting for minute The CONTRAST Screen is displayed If no changes are needed press the START STOP button to turn the power off Set to 8 a m on October 5 2007 HEM 670...
Страница 27: ...ys with the current setting 2 SELECTING DARKER OR LIGHTER Press the button to darken the display Press the button to lighten the display 3 CONFIRM THE SETTING To continue to change other settings press the SET button to confirm the Contrast setting The Delete Data Screen is displayed Refer to Page 50 If no other changes are needed press the START STOP button to store your setting and turn the powe...
Страница 28: ...ues stored in the memory refer to page 50 1 TO CHANGE THE SETTING Press the START STOP button to turn the power off then press the SET button Continue to press the SET button until the Reset Setting Screen displays 2 SELECT YES OR NO NOTE The RESET SETTING automatically defaults to NO after resetting the monitor Press the button to change the Reset Setting to YES Reset Setting YES Screen Reset Set...
Страница 29: ...e button to select YES then press the SET button To cancel this change press the button to select NO then press the SET button The Auto Memory screen displays Press the START STOP button to turn the power off Are You Sure YES Screen Automatic Memory ON Screen HEM 670ITCAN_EN_FR_Q6_r2 qxd 5 13 09 10 45 PM Page 29 ...
Страница 30: ...e of purchase CAUTION Read all of the information in the instruction manual and any other literature in the box before operating the unit CAUTION This device is intended for use in measuring blood pressure and pulse rate in the adult population Do not use this device on infants or persons who cannot express their intentions HEM 670ITCAN_EN_FR_Q6_r2 qxd 5 13 09 10 45 PM Page 30 ...
Страница 31: ...t thumb facing upward 3 Position the cuff leaving a clearance of approximately 1 2 to 1 inch between the cuff and the bottom of your palm as illustrated 4 Hold the bottom part of the cuff and wrap it around the wrist so it fits comfortably and securely around your wrist 5 Fold the remaining part of the wrist cuff back out of the way Lightly press the cloth closure with your finger so the cuff is s...
Страница 32: ...wrist cuff any tighter it will not affect the measurement Fold and fasten the extra portion of wrist cuff as shown to the right If the extra portion of wrist cuff is not fastened it will not affect the measurement APPLYING THE WRIST CUFF ON THE RIGHT WRIST When taking a measurement using the right wrist position the cuff as shown in the illustration Make sure the right wrist measurement symbol is ...
Страница 33: ... and SIGNAL are set to ON and the TruRead is set to OFF 1 Press the START STOP button The Position Sensor Screen is displayed NOTE If the date and time is not set the Time Screen is displayed Be sure to set the date and time before using the monitor Hold your elbow firmly to avoid body movement Remain still and do not talk during measurement TAKING A MEASUREMENT Time Screen HEM 670ITCAN_EN_FR_Q6_r...
Страница 34: ...ist up and down so that the wrist comes to the level of your heart mark Please be careful not to raise your wrist too high If your wrist is raised higher than the level of your heart the monitor will let it know with the display of a mark Slowly lower your wrist so that the mark aligns with the level of your heart mark using your elbow as the axis HEM 670ITCAN_EN_FR_Q6_r2 qxd 5 13 09 10 45 PM Page...
Страница 35: ...f you move your wrist higher or lower than your heart during the measurement the measurement will stop An error will display on the screen Turn the monitor off Take another measurement and do not move your arm When your wrist reaches the proper position the monitor beeps and automatically starts inflation and measurement Inflation Start Screen Inflation in Progress Screen Mark Indicating Inflation...
Страница 36: ...displayed NOTE To stop the inflation or measurement press the START STOP button The monitor will stop inflating start deflating and will turn off 4 Press the START STOP button to turn the monitor off NOTE The monitor will automatically turn off after 2 minutes Deflation Start Screen Measurement Results Display Screen Deflation Mark HEM 670ITCAN_EN_FR_Q6_r2 qxd 5 13 09 10 45 PM Page 36 ...
Страница 37: ...on The Position Sensor Screen is displayed NOTE If the date and time is not set the Time Screen is displayed Be sure to set the date and time before using the monitor Hold your elbow firmly to avoid body movement Remain still and do not talk during measurement Time Screen HEM 670ITCAN_EN_FR_Q6_r2 qxd 5 13 09 10 45 PM Page 37 ...
Страница 38: ...ist up and down so that the wrist comes to the level of your heart mark Please be careful not to raise your wrist too high If your wrist is raised higher than the level of your heart the monitor will let it know with the display of a mark Slowly lower your wrist so that the mark aligns with the level of your heart mark using your elbow as the axis HEM 670ITCAN_EN_FR_Q6_r2 qxd 5 13 09 10 45 PM Page...
Страница 39: ...ymbol Hold your wrist in this position Do not move until the measurement is complete NOTE If you move your wrist higher or lower than your heart during the measurement the measurement will stop An error will display on the screen When your wrist reaches the proper position the monitor beeps and automatically starts inflation and measurement Inflation Start Screen Inflation in Progress Screen Mark ...
Страница 40: ...rt the next measurement The interval of time set between each measurement will appear on the display The second measurement is complete waiting to start the next measurement The consecutive measurements are complete The average for three measurements appears on the display HEM 670ITCAN_EN_FR_Q6_r2 qxd 5 13 09 10 45 PM Page 40 ...
Страница 41: ...s are not displayed during the consecutive measurements However the results for each individual measurement can be displayed after all the measurements are completed During the consecutive measurements the unit will repeat the measurement in case of an error After 3 errors the unit will stop taking further measurements If only two measurements are successful the average of these two measurements w...
Страница 42: ...ent values are not stored in the memory AVERAGING FUNCTION The monitor calculates the average reading based on the three most recent sets of measurement values taken within 10 minutes of the most recent reading NOTE If two sets of measurement values are stored in the memory for the 10 minutes period the average is based on the two sets of measurement values If one set of measurement values is stor...
Страница 43: ...alue Symbol appears on the display when the average reading is shown 2 Press the button to display the set of measurement values from the most recent to the oldest Press the button to display the next set of measurement values from the oldest to the most recent 3 Press the START STOP button to turn the monitor off HEM 670IT Date and Time of Measurement Number of Measurement Memory Symbol HEM 670IT...
Страница 44: ...M MORNING AVERAGES Morning averages are based on the first average reading using the TruRead Mode or the first 3 reading within 10 minutes using the Single Mode Measurement times must be between 4 00 AM and 9 59 AM EVENING AVERAGES Evening averages are based on the last average reading using the TruRead Mode or the last 3 reading within 10 minutes using the Single Mode Measurement times must be be...
Страница 45: ...ton again The Evening Data graph is displayed NOTE Continue to press the MORNING EVENING AVERAGE button to display the data again 2 Press the START STOP button to turn the monitor off HEM 670IT Morning Data Graph Morning Symbol Evening Symbol USING THE MEMORY FUNCTION Evening Data Graph HEM 670ITCAN_EN_FR_Q6_r2 qxd 5 13 09 10 45 PM Page 45 ...
Страница 46: ...al bar displays the diastolic pressure of 99 mmHg The box displays the pulse rate of 100 beats per minute TO VIEW THE DATA FLASHING ON THE DISPLAY Press the SET button during the Graph display to view the measurement values for the data flashing on the screen Press the button to view later or more recent weekly averages Press the MORNING EVENING AVERAGE button to return to the GRAPH display Measur...
Страница 47: ...op of the vertical bar 2 If the systolic blood pressure value is measured at 170 mmHg or higher three of more times during 8 weeks of data displayed in the graph the screen automatically changes to display the values on the graph up to 210 mmHg USING THE MEMORY FUNCTION Display screen higher than 170 mmHg Display Screen at 210 mmHg HEM 670ITCAN_EN_FR_Q6_r2 qxd 5 13 09 10 45 PM Page 47 ...
Страница 48: ...ing combinations Display Average above CHS guidelines Morning Hypertension Average within CHS guidelines Morning Average Evening Average Morning average from This Week with Morning Average Symbol Morning average from 7 weeks ago with Morning Average Symbol blinking Heartbeat Symbol Morning Hypertension Symbol Evening average from This Week with Evening Average Symbol Evening average from 7 weeks a...
Страница 49: ...ears if the weekly average for morning measurements is above 135 85 In this case the Morning Hypertension Symbol is displayed when the Evening Average is displayed regardless of the values for the Evening Average HEM 670ITCAN_EN_FR_Q6_r2 qxd 5 13 09 10 45 PM Page 49 ...
Страница 50: ...nue to press the SET button until the Delete Data Screen displays 2 Select YES or NO NOTE The DELETE DATA SETTING automatically defaults to NO after deleting the measurement values stored in the memory Press the button to change the Delete Data Setting to YES Press the SET button ARE YOU SURE displays on the screen All Memory Erasure Screen Are You Sure YES Screen All Memory Erasure YES Screen HEM...
Страница 51: ...splays NOTE If you delete the data the monitor will automatically turn off To cancel the Delete Data press the button to select NO Press the SET button The Reset Setting Screen displays Press the START STOP button to turn the power off USING THE MEMORY FUNCTION Data Deleted Blank Screen HEM 670ITCAN_EN_FR_Q6_r2 qxd 5 13 09 10 45 PM Page 51 ...
Страница 52: ...s exclusive to Omron s blood pressure monitors and pedometers Visit http software omronhealthcare com to register your customer information for online support and to get software updates CAUTION This is a CD ROM disc Do not play this disc on general audio players DVD players or personal game devices It may damage the speaker of the device and may harm your eardrums Downloading Instructions HEM 670...
Страница 53: ...e 32MB or more Display Super VGA 800 x 600 pixel or higher resolution video adapter and monitor Others A CD ROM or DVD drive USB port USB Revision 1 1 compliant A printer Microsoft Internet Explorer 5 0 or higher Adobe Acrobat Reader 5 0 or higher Trademark and Registered trademark Microsoft and Windows are registered trademarks in the United States and other countries Adobe Adobe logo Acrobat and...
Страница 54: ...nhealthcare com 1 HOW TO CONFIRM THE VERSION OF THE SOFTWARE BEFORE INSTALLATION Check A and B part of the CD ROM If you do not find any version indication like C1 21 its version is 1 0 and it is necessary to update the software You can ignore the C of the C1 21 NOTE You can ignore the C of the C1 21 Click HELP on the menu bar and select Version Information If it is not 1 21 or higher go to 2 How ...
Страница 55: ...ect Uninstall Omron Health Management Software 4 Follow the directions on the message boxes 2 3 Install Omron Health Management Software from either a CD ROM or the Omron Website A From a CD ROM version C1 21 or higher 1 Follow the directions in the included instruction manual B From http software omronhealthcare com 1 Follow the Software Updates directions on the screen 2 4 Transfer the data file...
Страница 56: ...ftware Enable the anti virus software again after installation is complete 1 Insert the installation CD ROM disc into the CD drive of your PC If no screen appears Windows 2000 i Click My Computer and double click the CD drive in which the CD ROM disc is inserted ii When folder names of the CD ROM are listed double click the setup exe icon Windows XP i Click My Computer from the start menu ii From ...
Страница 57: ...G THE SOFTWARE 2 The installation screen of MDAC may appear Click OK If this screen does not appear skip to Step 5 3 Select the checkbox I accept and click Next HEM 670ITCAN_EN_FR_Q6_r2 qxd 5 13 09 10 45 PM Page 57 ...
Страница 58: ...started Select the checkbox Let setup restart the system now and click Finish Your PC will restart After restart start the CD ROM Refer to Step 1 for how to start the CD ROM When restart is unnecessary Setup is complete appears Click Close HEM 670ITCAN_EN_FR_Q6_r2 qxd 5 13 09 10 45 PM Page 58 ...
Страница 59: ...ework 1 1 License Agreement appears Read the License Agreement thoroughly and if you agree with it select I agree and click Install NOTE The program will not be installed if you disagree with the License Agreement 7 The dialog box appears that informs the Microsoft NET Framework 1 1 installation is complete Click OK HEM 670ITCAN_EN_FR_Q6_r2 qxd 5 13 09 10 45 PM Page 59 ...
Страница 60: ...ontinue installation 9 The License Agreement of Omron Health Management Software appears Read the License Agreement thoroughly and if you agree with it select I accept the terms and click Next NOTE The program will not be installed if you disagree with the License Agreement HEM 670ITCAN_EN_FR_Q6_r2 qxd 5 13 09 10 45 PM Page 60 ...
Страница 61: ...ck the installation destination folder and click Next To change the installation destination click Change and select a folder for installation 11 The installation confirmation screen appears To continue installation click Install HEM 670ITCAN_EN_FR_Q6_r2 qxd 5 13 09 10 45 PM Page 61 ...
Страница 62: ...when your PC must be restarted Click Yes to restart your PC 13 The Omron Health Management Software shortcut icon is created on the desktop 14 Remove the CD ROM disc from the CD drive 15 Enable anti virus software if it had been disabled before you installed this software HEM 670ITCAN_EN_FR_Q6_r2 qxd 5 13 09 10 45 PM Page 62 ...
Страница 63: ...ron Health Management Software shortcut icon on the desktop If no icon appears on the desktop From the Start menu select All programs or Programs Omron Health Management Software and click the Omron Health Management Software shortcut 2 If you are using Omron Health Management Software for the first time click Add User on the User Management screen HEM 670ITCAN_EN_FR_Q6_r2 qxd 5 13 09 10 45 PM Pag...
Страница 64: ...multiple users data Data is controlled by user name The number of users who can register for this software varies depending on the amount of free disc space in your PC The user name can be up to 28 characters 4 Click the user name and click Graph Screen 5 Click the Blood Pressure Monitor icon HEM 670ITCAN_EN_FR_Q6_r2 qxd 5 13 09 10 45 PM Page 64 ...
Страница 65: ...accessories Parts and accessories not approved for use with the device may damage the unit 1 Open the Serial Port Cover 2 Plug the USB Connector large connector into the USB port in your PC 3 Plug the Mini Serial Connector small connector into the Serial Port in the Omron Wrist Monitor USB Connector Mini Serial Connector HEM 670ITCAN_EN_FR_Q6_r2 qxd 5 13 09 10 45 PM Page 65 ...
Страница 66: ...log appears Make sure your cable is connected then click Yes 6 Select the blood pressure monitor being used and click OK 7 Start importing data Click Cancel if you want to cancel 8 The dialog appears when complete Click OK and view your data on the graph HEM 670ITCAN_EN_FR_Q6_r2 qxd 5 13 09 10 45 PM Page 66 ...
Страница 67: ...ES The operating system currently installed in your PC is neither Windows 2000 nor Windows XP You cannot run this program on your PC Install Omron Health Management Software onto a PC on which the corresponding operating system is running as listed in Operating environment requirements Out of Disc Space Disc space required for the installation exceeds available disc space The amount of free disc s...
Страница 68: ...nitor to extreme hot or cold temperatures humidity or direct sunlight CAUTION Store the device and the components in a clean safe location CAUTION Do not subject the monitor to strong shocks such as dropping the unit on the floor Remove the batteries if the unit will not be used for three months or longer Always replace all the batteries with new ones at the same time CAUTION Use only Omron author...
Страница 69: ...m or body movement during the measurement Talking during the measurement Turn the unit off Refer to Taking a Measurement Take another measurement Do not move or talk until the measurement results display After several seconds Excessive arm or body movement during measurement Turn the unit off Refer to Taking a Measurement Take another measurement and do not move until the measurement results displ...
Страница 70: ... blood pressure Review the sections Before Taking a Measurement and Taking a Measurement TROUBLESHOOTING TIPS ERROR INDICATORS AND TROUBLESHOOTING TIPS Batteries are almost worn out Replace both batteries with new ones as soon as possible Near Low Battery Indicator flashes Batteries are worn Replace both batteries with new ones immediately Low Battery Indicator flashes Abnormal Unit Function Repai...
Страница 71: ...ing measures Reorient or relocate the receiving antenna Increase the separation between the product and the receiver Connect the product into an outlet on a circuit different from that to which the receiver is connected Consult the dealer or an experienced radio TV technician for help POTENTIAL FOR RADIO TELEVISION INTERFERENCE for Canada only This digital apparatus does not exceed the Class B lim...
Страница 72: ...s Repair or replacement is our only responsibility and your only remedy under the above warranties To obtain warranty service contact Customer Service by calling 1 800 634 4350 for the address of the repair location and the return shipping and handling fee Enclose the Proof of Purchase Include a letter with your name address phone number and description of the specific problem Pack the product car...
Страница 73: ...ely 300 uses when used 3 times a day with new alkaline batteries when inflated to 170 mmHg at 72ºF Operating Temperature 50ºF to 104ºF 10ºC to 40ºC 30 to 85 RH Humidity Storage Temperature 4ºF to 140ºF 20ºC to 60ºC 10 to 95 RH Humidity Air Pressure 700 1060 hPa Main Unit Weight Approximately 5 1 2 oz not including batteries Main Unit Dimensions 3 W x 2 1 2 H x 1 1 2 D not including the wrist cuff ...
Страница 74: ...Made in China OMRON HEALTHCARE INC 1200 Lakeside Drive Bannockburn Illinois 60015 www omronhealthcare com Copyright 2009 Omron Healthcare Inc HEM 670ITCAN_EN_FR_Q6_r2 qxd 5 15 09 11 04 AM Page 74 ...