


Network Dome Camera·
Quick Operation Guide
28
28
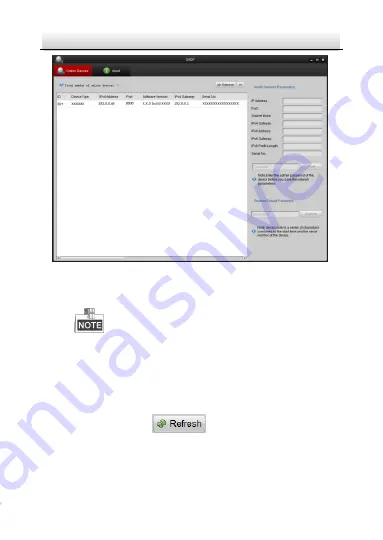
Figure 3-2
Search Online Devices
Device can be searched and displayed in the list in 15
seconds after it goes online; it will be removed from the list
in 45 seconds after it goes offline.
Search online devices manually:
You can also click
to refresh the online device
list manually. The newly searched devices will be added to
the list.
Содержание KNC-p3DR28V12IR
Страница 1: ...Network Dome Camera Quick Operation Guide KNC p3DR28V12IR...
Страница 11: ...Network Dome Camera Quick Operation Guide 10 Figure 1 2 Audio and Alarm Interfaces Alarm Audio Cable Interface...
Страница 26: ...Network Dome Camera Quick Operation Guide 25 Figure 2 15 Lens Adjustment Zoom Focus Lever...
Страница 34: ...Network Dome Camera Quick Operation Guide 33 Figure 4 2 Download Plug in Figure 4 3 Install Plug in 1...
Страница 36: ...Network Dome Camera Quick Operation Guide 0...


