


START HERE
Windows ™ XP/ Vista/ 7
OM-EL-WiFi Configuration Software Installation
Getting Started
Installing Software
Sensor Settings
The sensor will arrive partly charged but ideally you should charge it for 24 hours before use for
optimum performance. The sensor will automatically start recharging while connected to a PC or USB
charger using the USB cable provided.
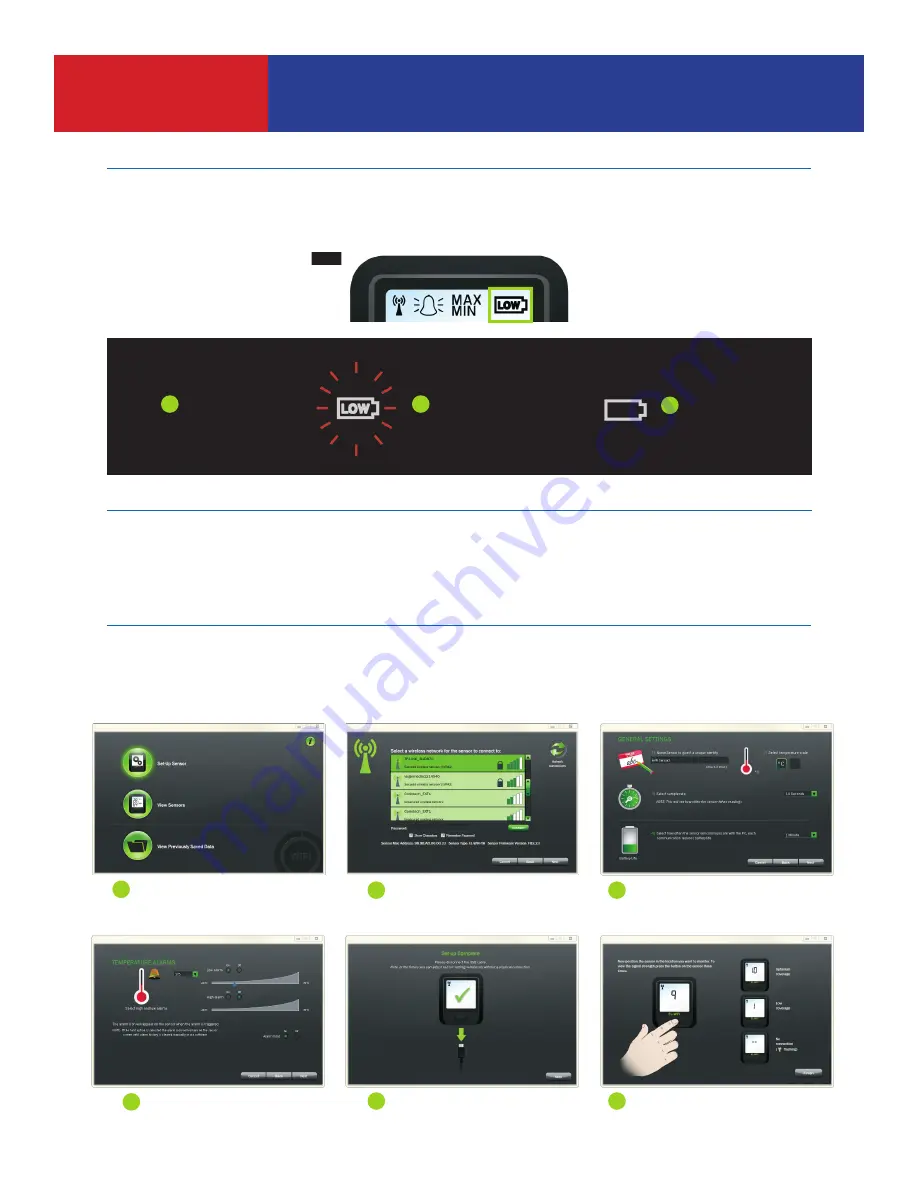
The battery icon has three states:
The sensor may already be displaying a reading but it will not be confi gured or connected to your WiFi
network until you complete the product set-up.
To set up the unit use our free EasyLog WiFi PC software available to download from the ‘Software’
section at www.omega.com.
Not Displayed
Battery OK
1
Solid
Battery Charging
3
Flashing
Battery Low - Recharge!
2
Note:
These screens will vary depending on which sensor model purchased.
Connect the OM-EL-WiFi Sensor to the PC’s USB port with the USB cable provided.
Double click on the EasyLog WiFi icon on your Windows™ desktop. This will load the wizard confi guration
software. Follow the on-screen instructions to set up your sensor.
Click on the ‘Set-Up
Sensor’ button
1
Set High & Low Alarms
4
Name your Sensor, Select
Temperature Scale, Sample
Rate & Transmission Rate
3
Position your Sensor where
you wish to take readings
6
Click on your network
and enter your password
if required
2
Sensor Set-up is now
complete
5
Содержание OM-EL-WiFi Series
Страница 2: ......
Страница 3: ...For full product data sheet pricing and on line store visit Operation Guide Operation Guide...
Страница 6: ......
Страница 7: ...M5268 0213 M4307 0810...