OMAX JetMachining® Center Operator’s Guide
Operation
3 - 14
400433D-EN
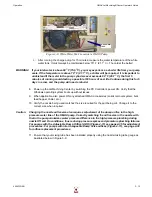
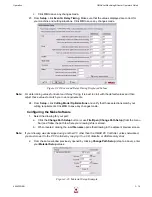
Figure 3-9: Verify Correct Mixing Tube Placement
• Verify that the gauge touches both the
mixing tube tip
and the
nozzle guard shoulder
.
• Verify that no gap exists at either location.
Note:
If a gap greater than 0.010
"
is seen at either location, it is recommended that you disassemble the nozzle,
clean all the components, re-assemble the nozzle, ensure that the mixing tube is pushed in all the way, and
recheck for correct mixing tube placement using the nozzle/mixing tube gauge.
12. Pour the desired abrasive size (mesh) into your nozzle hopper. Ensure that the amount added will
be sufficient to finish cutting the part.
13. Check the tank’s water level. Make sure that the material being cut can be covered and also
uncovered with tank water. Add or drain tank water as needed.
14. In Windows, click the OMAX
Make
icon to launch the cutting software.
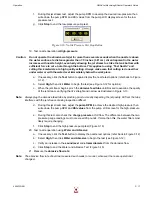
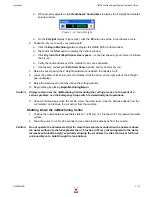
15. Auto Home the machine to ensure that the machine’s zero (absolute home) position is set (Figure
Caution:
Prior to auto homing the machine, ensure that the Z-axis height is high enough to prevent
nozzle movement from striking the table sides. Also ensure that the nozzle is within 1 foot (30.5
cm) of the home position.
Figure 3-10: Use the Homes Menu Option to Initiate an Auto Home
MAXJET 5
gauge
Mini
MAXJET 5
gauge
Measuring the MAXJET 5
Measuring the Mini MAXJET 5
Nozzle/Mixing Tube Gauge
(P/N 306730)
mixing
tube tip
nozzle guard
shoulder
mixing
tube tip
Содержание JetMachining Center 2626
Страница 8: ...OMAX JetMachining Center Operator s Guide viii 400433D EN ...
Страница 12: ...OMAX JetMachining Center Operator s Guide xii 400433D EN ...
Страница 22: ...OMAX JetMachining Center Operator s Guide Safety First 1 10 400433D EN ...
Страница 140: ...OMAX JetMachining Center Operator s Guide OMAX Glossary 6 16 400433D EN ...
Страница 144: ...OMAX JetMachining Center Operator s Guide Index 4 400433D EN ...

