71
5
EN
Menu setting method
Menu setting method
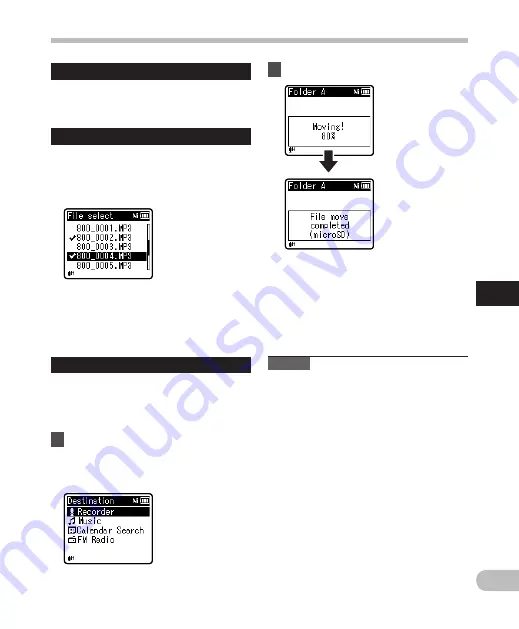
When you select [ One file ]:
1
Press the
+
or
−
button to select the file
you want to move or copy.
2
Press the
`
OK
button to select the file.
When you select [ Selected files ]:
1
Press the
+
or
−
button to select the file(s)
you want to move or copy.
2
Press the
9
button to check the file(s)
selected.
3
Repeat steps
1
and
2
until all the files
you want to move/copy are selected, then
press the
`
OK
button.
8
Press the
`
OK
button.
• File move or file copy starts if
[
Moving!
] or [
Copying!
] appears
on the display. During the process,
the progress status is shown as a
percentage. The process is completed
when [
File move completed
] or
[
File copy completed
] is displayed.
Notes
• The recorder cannot copy when the
memory capacity is not sufficient.
• The recorder cannot move or copy when
the number of files exceeds 200.
• Do not remove the battery during
moving or copying. Doing so may
damage the data.
• A file cannot be moved or copied to the
same folder.
• When operation is canceled during
moving or copying, only the files for
which the move or copy process has
already been completed are saved at the
new location. The move or copy process
is canceled for all other files.
• Files which are locked remain so even
after they are moved or copied.
• DRM files cannot be moved or copied.
• Files cannot be moved or copied directly
under the [
Recorder
] folder.
When you select [ All files ]:
When you select [
All files
], all the files in the
folder are automatically selected and the
recorder moves to the [
Destination
] screen.
7
Press the
9
,
0
or
+
,
−
button to select the folder to
which you want to move or copy
the file.


