16
17
Mode display
Mode
No display
————————
Selftimer
Remote Control
3.5m (11.5 ft)
5m (16.4 ft)
30˚
1
2
3
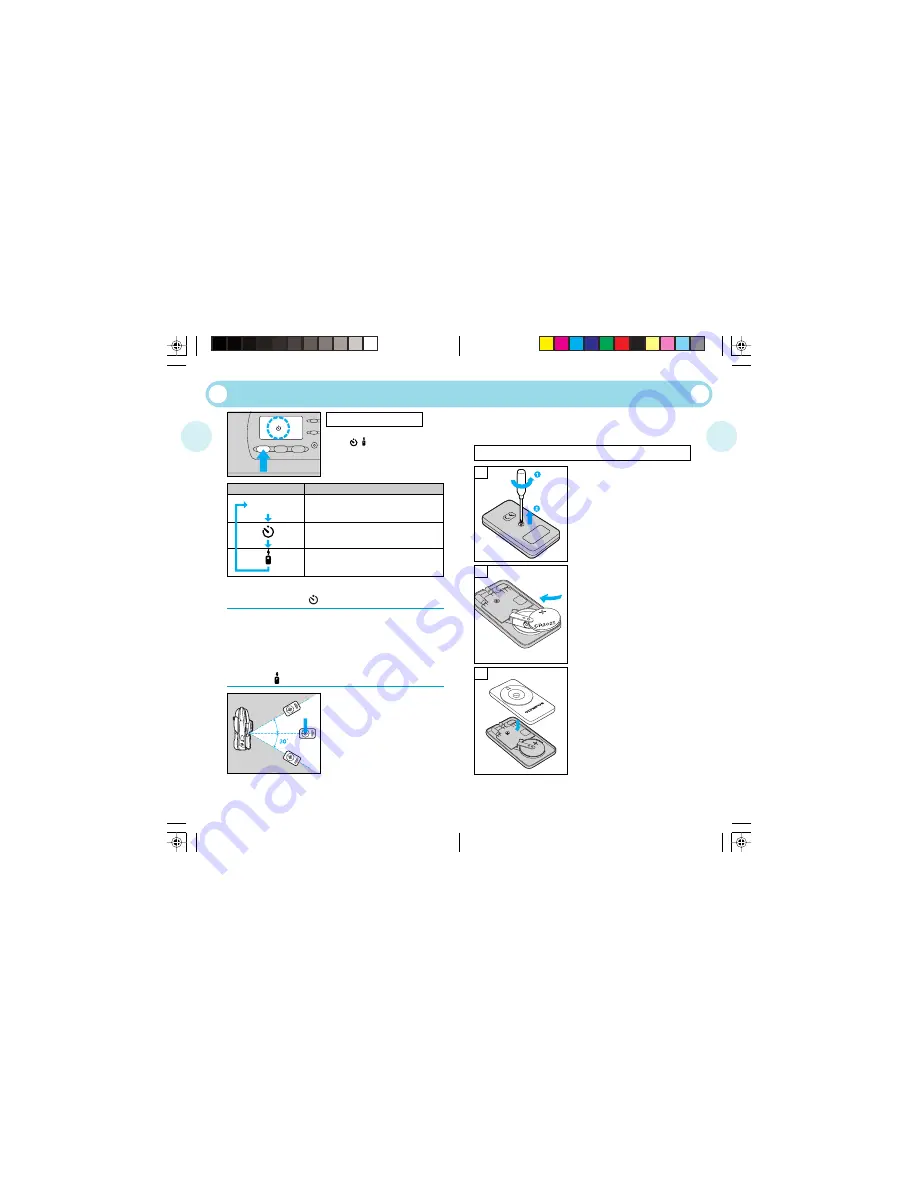
REMOTE CONTROL
RC-300C
USING THE SELFTIMER/REMOTE CONTROL
Selftimer
Secure the camera on a tripod or other support. Compose your shot in
the viewfinder. Press the shutter release button halfway (the focus and
exposure are locked at this time). Then press the shutter release button
all the way. The selftimer indicator lights for about 10 seconds and then
blinks for about 2 seconds. After this, the shutter will release.
How to select the mode
Press the selftimer/remote control
button (
/ ). The mode switches in
the order shown below. The selected
mode is displayed on the LCD panel.
Compose your shot in the viewfinder.
Position the autofocus frame on your
subject. To take a picture, point the
remote control at the camera and
press the button on the remote
control. The selftimer/remote control
indicator starts blinking, and the
shutter will release about 3 seconds
later.
Remote Control (Optional)
1. Turn the screw on the bottom of the
remote control counterclockwise to
loosen.
If the selftimer/remote control indicator doesn’t blink even
when you press the button, replace the battery with a new
one (CR2025).
How to replace the battery of the remote control (RC-300C)
2. Turn the remote control over, and
remove the cover. With the battery
facing up, remove the old battery
and insert a new battery as shown.
3. Replace the cover, turn the remote
control over, and turn the screw on
the bottom clockwise to tighten.
RC-300C (Optional)


