background image

14

EN

[ib]

Operating 
System

Windows XP (Service Pack 2 or later) /
Windows  Vista / Windows  7

Processor

Pentium 4 1.3 GHz or better
(Pentium D 3.0 GHz or better required 
for movies)

RAM

512 MB or more (1 GB or more 
recommended)
(1 GB or more required for movies — 2 GB 
or more recommended)

Free Hard 
Drive Space

1 GB or more

Monitor 
Settings

1024 x 768 pixels or more
Minimum 65,536 colors (16,770,000 
colors recommended)

Graphics

A minimum of 64 MB video RAM with 
DirectX 9 or later.

*  See online help for information on using the software.

4

  Install the camera manual.


Click the “Camera Instruction Manual” button and 
follow the on-screen instructions.

Macintosh

Macintosh

1

  Insert the supplied CD in a CD-ROM drive.


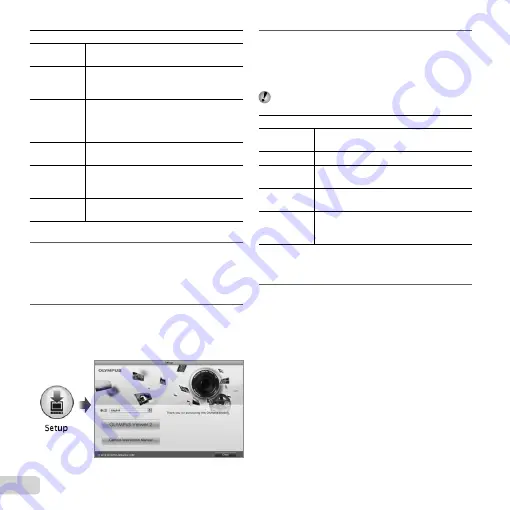
Double-click the CD (OLYMPUS Setup) icon on 
the desktop.


Double-click the “Setup” icon to display the “Setup” dialog.

2

  Install OLYMPUS Viewer 2.


Check the system requirements before beginning 
installation.


Click the “OLYMPUS Viewer 2” button and follow 
the on-screen instructions to install the software.

  You can register via “Registration” in OLYMPUS 

Viewer 2 “Help”.

OLYMPUS Viewer 2

Operating 
System

Mac OS X v10.4.11–v10.6

Processor

Intel Core Solo/Duo 1.5 GHz or better

RAM

1 GB or more (2 GB or more 
recommended)

Free Hard 
Drive Space

1 GB or more

Monitor 
Settings

1024 x 768 pixels or more
Minimum 32,000 colors (16,770,000 
colors recommended)

*  Other languages can be selected from the language 

combo box. For information on using the software, see 
online help.

3

  Copy the camera manual.


Click the “Camera Instruction Manual” button to 
open the folder containing the camera manuals. 
Copy the manual for your language to the computer.

Содержание SP-810UZ

Страница 1: ...lly to enjoy optimum performance and a longer service life Keep this manual in a safe place for future reference We recommend that you take test shots to get accustomed to your camera before taking im...

Страница 2: ...AVC3 USB AC adapter F 2AC OLYMPUS Setup CD ROM Names of Parts Names of Parts Camera unit 2 1 6 7 9 5 3 8 4 1 Flash 2 AF illuminator Self timer lamp 3 Microphone 4 Lens 5 Card slot 6 Battery card comp...

Страница 3: ...nging information display button erase 7 E button menu guide 8 Connector cover 9 Multi connector 10 HDMI micro connector 11 Indicator lamp 12 Zoom lever 13 Shutter button 14 n button Attaching the cam...

Страница 4: ...balance p 29 8 ISO p 30 9 Drive p 30 10 Recording with sound movies p 38 11 Date stamp p 37 12 World time p 48 13 Image stabilization still images Digital image stabilization movies p 36 14 Metering...

Страница 5: ...ISO p 30 14 Exposure compensation p 29 15 White balance p 29 16 Compression still images p 34 62 Image quality movies p 34 63 17 Image size p 34 62 63 18 File number 19 Date and time p 15 48 20 Shado...

Страница 6: ...r p 18 22 Shutter button p 17 54 R button shooting movies p 17 q button switching between shooting and playback p 17 20 43 button p 9 E button menu guide p 22 G down button erase p 21 F up INFO button...

Страница 7: ...D Time Y M D Y M D NORM OK Single Print Print 4 30 4 30 More 00 00 NORM 14M FILE 100 0004 100 0004 00 00 11 10 26 11 10 26 Operation guides displayed at the bottom of the screen indicate that the butt...

Страница 8: ...unction menu is used to choose the shooting mode and provides access to frequently used shooting settings 14M 4 4 P P 0 0 0 0 AUTO WB AUTO WB AUTO ISO AUTO ISO MENU MENU 3D 3D Program Auto Program Aut...

Страница 9: ...Size 14M OK Set 1 2 3 1 2 MENU Exit Reset Reset Digital Zoom Off Digital Zoom Off Compression Normal Shadow Adjust Auto AF Mode ESP Face iESP ESP Image Size 14M MENU OK Set Back 1 2 3 1 2 Reset Reset...

Страница 10: ...age Size Image Quality IS Movie Mode R Movie sound recording b q Playback p 39 Slideshow Edit Erase Print Order R Protect y Rotate cr Settings 1 p 42 Memory Format Format Backup Eye Fi USB Connection...

Страница 11: ...licks into place Turn off the camera before opening the battery card compartment cover When using the camera be sure to close the battery card compartment cover Slide the battery lock knob in the dire...

Страница 12: ...the wall outlet when the charging is complete or the playback ends For details on the battery and the USB AC adapter see Battery and USB AC adapter p 59 The battery can be charged while the camera is...

Страница 13: ...k Launcher exe If a User Account Control dialog is displayed click Yes or Continue 2 Register your Olympus product Click the Registration button and follow the on screen instructions To register the c...

Страница 14: ...ck the CD OLYMPUS Setup icon on the desktop Double click the Setup icon to display the Setup dialog 2 Install OLYMPUS Viewer 2 Check the system requirements before beginning installation Click the OLY...

Страница 15: ...ng for Y 2011 X Y M D Y M D Time MENU Cancel 01 01 4 As in Steps 2 and 3 use FGHI to set M month D day Time hours and minutes and Y M D date order and then press the A button For precise time setting...

Страница 16: ...r standby mode screen If P mode is not displayed press H to display the function menu screen and then set the shooting mode to P Using the Menu p 8 Current shooting mode display 4 4 P P 3D 3D 0 0 0 0...

Страница 17: ...the R button again to stop recording P P 1 400 F3 5 1 400 F3 5 AF target mark Press halfway Shutter speed Aperture value Focusing p 56 5 To take the picture gently press the shutter button all the way...

Страница 18: ...image to the selected Image Size then enter the digital zoom range if Digital Zoom is On Photographs taken with the zoom bar displayed in red may appear grainy Using the zoom Turning the zoom lever a...

Страница 19: ...deye Pre flashes are emitted to reduce the occurrence of red eye in your photos Fill In The flash fires regardless of the available light Flash Off The flash does not fire Changing the shooting inform...

Страница 20: ...the recording rewinds increases each time H is pressed Adjusting the volume Turn the wheel controller or use FG to adjust the volume Reading a histogram Reading a histogram If the peak fills too much...

Страница 21: ...controller for continuous advance or rewind Resuming playback Press the A button to resume playback To operate with To operate with HI HI 1 Press I or H to advance or rewind one frame at a time Hold...

Страница 22: ...iled No information Reading a histogram p 20 Using the menu guide Pressing the E button in the setup menu displays a description of the current item Using the Menu p 8 Index view and close up view Ind...

Страница 23: ...nge the shooting mode The shooting mode P M P p W can be changed with using the function menu Using the Menu p 8 Shooting with automatic settings M mode The camera will automatically select the optima...

Страница 24: ...Using V V Beauty Beauty 1 Point the camera toward the subject Check the frame appearing around the face detected by the camera and then press the shutter button to take the picture The unedited image...

Страница 25: ...Application Auto Three frames are taken and combined by the camera The user only composes the shots so that the target marks and pointers overlap and the camera automatically releases the shutter Man...

Страница 26: ...d part of the first frame is displayed on joint area 1 1st frame MANUAL MANUAL MANUAL MANUAL 1 2 1 2 MENU OK Save Cancel 3 Compose the next shot so that joint area 1 overlaps joint area 2 4 Press the...

Страница 27: ...ame is taken automatically Manual After shooting the first frame move the camera to overlap the subject with the image in the monitor Then manually release the shutter Depending on the subject or the...

Страница 28: ...om p 18 cannot be set when a Super Macro is selected Using the self timer After the shutter button is pressed all the way down the picture is taken after a short delay 1 Select the self timer option i...

Страница 29: ...the A button Adjusting to a natural color scheme White balance For more natural coloring choose a white balance option suited to the scene 1 Select the white balance option in the function menu WB Aut...

Страница 30: ...in the function menu P P 0 0 0 0 AUTO WB AUTO WB 200 ISO 200 ISO 100 ISO ISO 100 1 400 F3 0 F3 0 1 400 400 ISO 400 ISO ISO 200 ISO 200 MENU MENU 2 Use HI to select the setting option and press the A...

Страница 31: ...ntial shots at approximately 30 frames sec 1 The shooting speed varies depending on the settings for Image Size Compression p 36 The Image Size is limited c n or lower d 3 or lower e 2 or lower When s...

Страница 32: ...button Stop playback Press the button Playing back W images 3D images shot with this camera can be played back on 3D compatible devices connected to this camera using an HDMI cable sold separately Sh...

Страница 33: ...tions to the default settings Reset Restoring the shooting functions to the default settings Reset I Shooting menu 1 Reset Submenu 2 Application Yes Restores the following menu functions to the defaul...

Страница 34: ...r playing pictures on a widescreen TV and for printing on A3 or 11 x17 16 9F 1920x1080 Suitable for playing pictures on a widescreen TV and for printing on A5 or 5 x7 Compression Fine Shooting at high...

Страница 35: ...t appear or may take some time to appear 2 If the frame blinks in red the camera cannot focus Try refocusing on the subject To focus on a moving subject To focus on a moving subject continuously AF Tr...

Страница 36: ...es Submenu 2 Application Off The image stabilizer is deactivated This is recommended for shooting when the camera is fixed in place on a tripod or other stable surface On The image stabilizer is activ...

Страница 37: ...is not recorded with images Images shot with the camera in a vertical position are not rotated during playback On Information about the vertical horizontal orientation of the camera during shooting i...

Страница 38: ...38 EN Recording sound when shooting Recording sound when shooting movies movies R R A Movie menu R Submenu 2 Application Off No sound is recorded On Sound is recorded...

Страница 39: ...saves a high resolution image as a separate image with a smaller size for use in e mail attachments and other applications E 320 x 240 1 Use HI to select an image 2 Use FG to select an image size and...

Страница 40: ...Soft Soft Hard Brightening areas that are dark Brightening areas that are dark due to backlight or other reasons due to backlight or other reasons Shadow Adj Shadow Adj q Playback menu Edit Shadow Ad...

Страница 41: ...es All Erase 1 Use FG to select All Erase and press the A button 2 Use FG to select Yes and press the A button Saving print settings to the image data Saving print settings to the image data Print Ord...

Страница 42: ...fi to Off This camera does not support the Eye Fi card s Endless mode Erasing data completely Erasing data completely Memory Format Format Memory Format Format r Settings 1 Memory Format Format Befor...

Страница 43: ...guaranteed in the following cases Computers with USB ports installed using an expansion card etc Computers without a factory installed OS and home built computers Turning on the camera with the Turnin...

Страница 44: ...gs 2 File Name Month 1 to C A October B November C December Day 01 to 31 Pmdd Folder name Folder name File name DCIM 100OLYMP 999OLYMP Pmdd0001 jpg Pmdd9999 jpg Automatic numbering Automatic numbering...

Страница 45: ...on starts Adjusting the brightness of the monitor Adjusting the brightness of the monitor s s s Settings 2 s To adjust the monitor brightness To adjust the monitor brightness 1 Use FG to adjust the br...

Страница 46: ...ll be connected 480p 576p 720p 1080i 2 Connect the TV and camera 3 Turn on the TV and change INPUT to VIDEO an input jack connected to the camera 4 Turn on the camera and use FGHI to select the image...

Страница 47: ...is displayed on the TV With some TVs operations cannot be performed with the TV remote control even though the operation guide is displayed on the screen If operations cannot be performed with the TV...

Страница 48: ...World Time if the camera clock has not first been set using X Submenu 2 Submenu 3 Application Home Alternate x The time in the home time zone the time zone selected for x in submenu 2 z The time in t...

Страница 49: ...nual For details on the available paper types loading paper and installing ink cassettes refer to the printer s instruction manual Printing images at the printer s standard settings Easy Print In the...

Страница 50: ...d press I If the Printpaper screen is not displayed the Size Borderless and Pics Sheet are set to the printer s standard Printpaper Size Borderless Standard OK Set MENU Back Standard Standard 5 Use FG...

Страница 51: ...e the frame and then press the A button OK Set Cropping frame 2 Use FG to select OK and press the A button 8 If necessary repeat Steps 6 and 7 to select the image to be printed make the detailed setti...

Страница 52: ...eservations 1 Display the setup menu Setup menu p 8 2 From the playback menu q select Print Order and then press the A button 3 Use FG to select and press the A button NORM 4 30 4 30 11 10 26 12 30 11...

Страница 53: ...4 Use HI to select the image with the print reservation you want to cancel Use FG to set the print quantity to 0 5 If necessary repeat Step 4 and then press the A button when finished 6 Use FG to sele...

Страница 54: ...e internal temperature may increase resulting in automatic shutdown If this occurs remove the battery from the camera and wait until the camera has sufficiently cooled The camera s external temperatur...

Страница 55: ...he image on a computer If the image still cannot be viewed the image file is corrupted Error message Corrective action The Image Cannot Be Edited Problem with selected image Use photo retouch software...

Страница 56: ...ture of a shadowy subject Using the AF illuminator makes focusing easier AF Illuminat p 36 Taking a picture of subjects where autofocus is difficult In the following cases after focusing on an object...

Страница 57: ...res using Fill In p 19 flash A subject against backlight is brightened Taking pictures of a white beach or snow scene Set the mode to q Beach Snow p 23 Taking pictures using exposure compensation p 29...

Страница 58: ...batteries last longer Set Power Save p 47 to On Playback Editing tips Playback Playing images in the internal memory and card Remove the card and display the images in internal memory Inserting the ba...

Страница 59: ...he incorrect battery type Dispose of the used battery following the instructions p 66 Power consumption by the camera varies depending on which functions are used During the conditions described below...

Страница 60: ...a can be erased and retouching is also available with the use of a computer Cards can be removed from the camera and exchanged but this is not possible with the internal memory Use of larger capacity...

Страница 61: ...out recording process of the card Readout recording process of the card During shooting the current memory indicator lights up in red while the camera is writing data Never open the battery card compa...

Страница 62: ...ng conditions and memory cards used The figures in the table below are the number of the storable pictures when using the internal memory formatted Memory Format Format p 42 Still pictures Still pictu...

Страница 63: ...9 320x240 L 2 min 27 sec 2 min 33 sec 167 min 20 sec 167 min 23 sec 1 The continuous recording length is up to 29 minutes in the HD quality specified The maximum file size of a single movie is 4 GB r...

Страница 64: ...ower source described on the product label Lightning If a lightning storm occurs while using a USB AC adapter remove it from the wall outlet immediately Foreign Objects To avoid personal injury never...

Страница 65: ...tc Never store batteries where they will be exposed to direct sunlight or subjected to high temperatures in a hot vehicle near a heat source etc To prevent causing battery leaks or damaging their term...

Страница 66: ...t use any other type of battery If the battery s terminals get wet or greasy camera contact failure may result Wipe the battery well with a dry cloth before use Always charge a battery when using it f...

Страница 67: ...erves the right to alter the features and contents of this publication or software without obligation or advance notice FCC Notice FCC Notice Radio and Television Interference Changes or modifications...

Страница 68: ...f one 1 year from the date of purchase If any Product proves to be defective within the one year warranty period the customer must return the defective Product to any of Olympus Service Centers follow...

Страница 69: ...ANTY SET FORTH ABOVE OLYMPUS MAKES NO AND DISCLAIMS ALL OTHER REPRESENTATIONS GUARANTIES CONDITIONS AND WARRANTIES CONCERNING THE PRODUCTS WHETHER DIRECT OR INDIRECT EXPRESS OR IMPLIED OR ARISING UNDE...

Страница 70: ...uct carefully using ample padding material to prevent damage in transit and either deliver it to the Authorized Olympus Dealer that sold you the Product or ship it postage prepaid and insured to any o...

Страница 71: ...Any defect or damage that occurs due to transport a fall shock etc after purchase of the product d Any defect or damage that occurs due to fire earthquake flood damage thunderbolt other natural disast...

Страница 72: ...ranty Certificate 4 This Warranty applies to the product only the Warranty does not apply to any other accessory equipment such as the case strap lens cap and batteries 5 Olympus sole liability under...

Страница 73: ...PERSONAL AND NONCOMMERCIAL USE OF A CONSUMER TO i ENCODE VIDEO IN COMPLIANCE WITH THE AVC STANDARD AVC VIDEO AND OR ii DECODE AVC VIDEO THAT WAS ENCODED BY A CONSUMER ENGAGED IN A PERSONAL AND NON COM...

Страница 74: ...C SDXC Eye Fi card No of effective pixels 14 000 000 pixels Image pickup device 1 2 3 CCD primary color filter Lens Olympus lens 4 5 to 90 mm f3 0 to 6 9 Equivalent to 25 to 500 mm on a 35 mm film Pho...

Страница 75: ...ion rechargeable battery Model No LI 50BA LI 50BB Standard voltage DC 3 7 V Standard capacity 925 mAh Battery life Approx 300 full charges varies on usage Operating environment Temperature 0 C to 40...

Страница 76: ......

Страница 77: ...VR809501...

Отзывы: