background image

E

64

The Minimum Number of Storable Pictures

While HQ and SHQ images have the same number of
pixels, SHQ uses lower compression allowing for better
image quality when enlarged.  It may take a little longer to
record or display images in the SHQ mode. (See p. 86 for
the number of pixels.)

The number of storable pictures is reduced the most and
the recording time is the longest in the Non-Compression
SHQ mode.

The number of remaining pictures may not be
reduced every time a picture is taken, or
increased when a picture is erased. 

Note:

2MB Card

4MB

8MB

16MB

SQ

30

60

122

244

HQ

9

18

36

73

SHQ

4

9

18

36

Non-
Compression

0

1

2

4

SHQ

Memory
capacity

Recording
mode

Содержание Camedia D-340R

Страница 1: ...s vous prions de lire attentivement ce mode d emploi de mani re obtenir les meilleurs r sultats possibles n Avant d effectuer des prises de vues importantes nous vous conseillons par ailleurs de faire...

Страница 2: ...ert the user to the presence of uninsulated dangerous voltage within the product s enclosure that may be of sufficient magnitude to constitute a risk of electric shock to persons The exclamation point...

Страница 3: ...CHOQUE ELECTRICO NO ABRA PRECAUCION PARA REDUCIR EL RIESGO DE CHOQUE ELECTRICO NO ABRA LA CUBIERTA O PARTE TRASERA EN EL INTERIOR NO HAY COMPONENTES QUE EL USUARIO PUEDA REPARAR REFIERA LA REPARACION...

Страница 4: ...l cleaners Use a damp cloth for cleaning 6 Attachments Attachments not recommended by the product manufacturer may be hazardous and or cause damage to the product Do not use these attachments 7 Water...

Страница 5: ...ctement aux instructions du fabricant et utiliser un accessoire de fixation recommand INSTRUCCIONES IMPORTANTES DE SEGURIDAD 1 Lea las instrucciones Todas las instrucciones de seguridad y de operaci n...

Страница 6: ...feature If you are unable to insert the plug fully into the outlet try reversing the plug If the plug should still fail to fit contact your electrician to replace your obsolete outlet 11 Power Cord Pr...

Страница 7: ...retirer l adaptateur secteur et d brancher l antenne ou le syst me c bl 9 Fuentes de alimentaci n Este producto debe ser empleado con el tipo de fuente de alimentaci n indicado en el r tulo exclusivam...

Страница 8: ...Refer all servicing to qualified service personnel 16 Damage Requiring Service If using the optional AC adapter unplug this product from the wall outlet and refer servicing to qualified service perso...

Страница 9: ...pareil puisse fonctionner de nouveau normalement d Lorsque l appareil est tomb ou a t endommag de quelque autre mani re 13 Sobrecarga No sobrecargue los tomacorrientes cordones de extensi n o los toma...

Страница 10: ...ondition 19 Heat The product should be situated away from heat sources such as radiators heat registers stoves or other products including amplifiers that produce heat Radio and Television Interferenc...

Страница 11: ...ccord ou utilis dans des conditions non conformes au mode d emploi cet appareil peut constituer un risque pour la sant e Cuando el producto presenta cambios notables en las prestaciones lo cual indica...

Страница 12: ...nt to an outlet on a circuit different from that to which the receiver is connected Only the included RS 232C serial cable should be used to connect the camera to a personal computer PC Declaration of...

Страница 13: ...ne doit pas causer de brouillage radio lectrique 2 Cet appareil doit pouvoir r sister toutes les interf rences y compris celles susceptibles d entraver son bon fonctionnement Sin embargo no se garanti...

Страница 14: ...ble laws The lithium battery may present the risk of fire or chemical burn if mishandled Do not recharge disassemble heat above 212 F 100 C or dispose of in a fire Before use wipe the battery clean wi...

Страница 15: ...Tous les autres noms de soci t s et de produits sont des marques d pos es et ou des marques commerciales de leurs propri taires respectifs Este aparato digital Clase B cumple con todos los requisitos...

Страница 16: ...part of this publication may be reproduced or reprinted except for personal use without the prior permission of Olympus Olympus makes no representations or warranties regarding any damages or benefit...

Страница 17: ...pertes subies et les b n fices manqu s de m me que pour les cr ances de tiers en d coulant cons cutifs l effacement de prises de vues Avisos legales y otros Todo el contenido de esta publicaci n est...

Страница 18: ...ture reference Warning Ignoring this Warning mark and operating this product incorrectly may lead to serious injury or death Caution Ignoring this Caution mark and operating this product incorrectly m...

Страница 19: ...GRAPHIANT DES ENFANTS UN FLASH D CLENCH TROP PR S DES YEUX DE LA PERSONNE PHOTOGRAPHI E EST SUSCEPTIBLE DE LUI CAUSER DES L SIONS OCULAIRES NE JAMAIS PHOTOGRAPHIER LES ENFANTS MOINS D 1 M DE DISTANCE...

Страница 20: ...SWALLOW BATTERIES OR SMALL ATTACHMENTS IF THIS HAPPENS CONTACT A PHYSICIAN IMMEDIATELY THE CHILD MIGHT ACTIVATE THE FLASH FROM TOO CLOSE AND CAUSE DAMAGE TO HIS OR HER EYES THE CHILD MIGHT DAMAGE THE...

Страница 21: ...CHALEUR NE JAMAIS D MONTER L APPAREIL AVEC LES PILES L INT RIEUR NE JAMAIS UTILISER DES PILES USAG ES AVEC DES PILES NEUVES DES PILES DE TYPES DIFF RENTS OU ENCORE DES PILES DE FABRICANTS DIFF RENTS...

Страница 22: ...OPPOSITE DIRECTION TO THAT SHOWN IN THESE INSTRUCTIONS 6 DO NOT STORE THE CAMERA IN HUMID OR DUSTY PLACES THIS MAY CAUSE FIRE OR ELECTRIC SHOCK 7 DO NOT COVER THE FLASH WITH YOUR HAND DURING OPERATIO...

Страница 23: ...DE D PANNAGE OLYMPUS LE PLUS PROCHE NE PAS LAISSER LES PILES DANS UN APPAREIL HUMIDE CE QUI RISQUERAIT DE PROVOQUER UN INCENDIE OU UNE D CHARGE LECTRIQUE NO CARGUE LAS PILAS ALCALINAS NI LAS DE LITIO...

Страница 24: ...CK AND INJURY 3 UNLOAD THE BATTERIES WHEN NOT USING THE CAMERA FOR LONG PERIODS BATTERY HEAT GENERATION OR FLUID LEAK MAY CAUSE A FIRE OR INJURY 4 DO NOT USE THE CAMERA IF THE BATTERY FLUID HAS LEAKED...

Страница 25: ...AVEC LES MAINS MOUILL ES 6 NE JAMAIS RANGER L APPAREIL PHOTO DANS UN ENDROIT TR S CHAUD CE QUI RISQUERAIT D ENDOMMAGER DES PI CES OU DE PROVOQUER UN INCENDIE PRECAUCIONE 1 SI NOTA UN OLOR INUSUAL RUI...

Страница 26: ...ions Inside a car Near a magnetic field n Do not shake the camera or subject it to shocks n Do not leave the camera with its lens pointing towards direct sunlight This will damage the lens n Do not le...

Страница 27: ...nts qui se trouvent l int rieur de l appareil photo n Ne jamais d clencher le flash plusieurs fois de suite pendant une p riode prolong e car il peut alors devenir extr mement chaud Ne jamais toucher...

Страница 28: ...e temporarily disabled when exposed to cold temperatures Try to keep the camera and batteries warm when using the camera in a cold environment Batteries that are weak in cold temperatures will be rest...

Страница 29: ...nickel s assurer qu elles ont toutes t charg es fond et au moyen du m me chargeur n Avant d utiliser des accus hydrure nickel lire attentivement le mode d emploi joint aux accus MANIPULACION DE LAS PI...

Страница 30: ...Macintosh C ble de connexion pour ordinateurs Macintosh Conector de conversi n para Macintosh AA alkaline batteries 4 pieces 4 piles alcalines AA R6 Pilas alcalinas AA 4 pilas Options SmartMedia card...

Страница 31: ...ia Adaptateur de disquette FlashPath 3 5 pour carte SmartMedia Batteries NiMH et chargeur Adaptateur secteur tui souple en vinyle Imprimante photo P 300 P 330 Opcionales Tarjeta SmartMedia de 4MB 8MB...

Страница 32: ...r a 1 8 4 5 cm LCD monitor is provided for more flexibility when composing shots and viewing images can be enlarged 3 times n With the Digital Tele mode the subject can be photographed cropped to appe...

Страница 33: ...formations que vous devez tenir compte g Le produit r el peut pr senter de l g res diff rences par rapport celui figurant sur les illustrations n El CCD de 1 310 000 pixels ofrece la calidad de imagen...

Страница 34: ...wer 56 Checking the batteries 60 Checking the number of remaining pictures 62 Adjusting the date and time 66 TAKING PICTURES Points to remember 70 Taking pictures 74 Using the focus lock 80 Autofocus...

Страница 35: ...de flash automatique 91 Flash att nuant l effet yeux rouges 93 Flash d bray 95 Flash d appoint 97 PREPARATIVOS Nombres y funciones de los componentes 41 Uso de la correa 47 Colocaci n de las pilas 49...

Страница 36: ...LAYING PICTURES ON THE LCD MONITOR Turning on the LCD monitor 110 Displaying pictures 112 Index Display mode 114 Function button 116 Close Up display 118 Slide Show mode 120 File No display 122 Protec...

Страница 37: ...ec l imprimante P 300 133 Impression de l index des images en m moire 135 Impression de gros plan 137 Pr s lection d impression 139 Ajuste del pitido 99 Autodisparador 99 Bot n de funci n 101 Modo sec...

Страница 38: ...omputer environment 148 Installing provided software 150 Connecting to a personal computer 152 Using a personal computer 154 Transferring directly from SmartMedia 156 System chart 158 MISCELLANEOUS Qu...

Страница 39: ...ues sur le r tro clairage de l cran ACL 173 Compatibilit des donn es d image 175 Fiche technique 177 Impresi n de 4 cortes 141 Impresi n m ltiple 143 Impresi n invertida 145 Impresi n con la P 330 147...

Страница 40: ...nel P 44 5 Selftimer Protect mode button P 98 124 6 Recording mode selection Index Display button P 86 114 7 Function button P 100 116 8 Card compartment cover P 54 9 Flash P 88 0 Lens barrier P 56 Le...

Страница 41: ...e de sortie vid o NTSC P 131 Connecteur pour ordinateur RS 232C P 133 155 Connecteur pour adaptateur secteur P 51 NOMBRES Y FUNCIONES DE LOS COMPONENTES Unidad principal 1 Bot n OK y de disparo del ob...

Страница 42: ...iewfinder P 44 Condition indicator LED P 44 LCD monitor P 44 LCD monitor ON OFF button P 78 110 q Previous Next button P 112 w Threaded mount bottom e Battery compartment open close lever bottom P 48...

Страница 43: ...arri re d avance P 113 w Embase filet e de tr pied e Couvercle d ouverture fermeture du compartiment des piles sous l appareil P 49 Visor P 45 LED indicador de estado P 45 Monitor LCD P 45 Bot n ON O...

Страница 44: ...g correction mark p 80 90 Close up correction marks p 106 Flash mode 15 98 12 21 10 35 LCD Control Panel Icons Sequential shooting Selftimer Battery check Recording mode Macro Card error Number of rem...

Страница 45: ...ement Contr le des piles Verrouillage des images en m moire Date Heure Num ro de vue Ic nes d cran ACL Indicaci n del visor LED indicador de estado Panel de control LCD monitor LCD Escritura Marca de...

Страница 46: ...1 2 3 Caution Attach the strap correctly as shown on the left so that the camera does not fall off If the strap is attached incorrectly and the camera comes loose and falls off Olympus is not respons...

Страница 47: ...parfaitement fix e et se desserre en entra nant la chute de l appareil Olympus d cline toute responsabilit pour les dommages occasionn s USO DE LA CORREA Precauci n Coloque correctamente la correa com...

Страница 48: ...se manganese batteries they may overheat and destroy the camera Read BATTERY HANDLING on page 28 1 Set the battery compartment open close lever to to open the cover 2 Insert the new batteries correctl...

Страница 49: ...piles Avant de mettre les piles en place s assurer imp rativement que le capot de protection de l objectif est ferm et que l alimentation est par cons quent coup e Remarque COLOCACION DE LAS PILAS Est...

Страница 50: ...cordement pour adaptateur secteur Conector adaptador de CA AC adapter Adaptateur secteur Adaptador de CA AC wall outlet Prise secteur Tomacorriente de alimentaci n Warning Use the AC adapter correctly...

Страница 51: ...nt et respecter les mesures de pr caution indiqu es ci apr s Une utilisation incorrecte de l adaptateur secteur peut provoquer un incendie ou une d charge lectrique Employer uniquement un adaptateur s...

Страница 52: ...for this camera Hold the AC adapter unit when removing it from an outlet Never pull forcibly bend or twist the AC adapter If there are any scratches or other damage on the AC adapter or if there is a...

Страница 53: ...s hors tension avant d tre raccord l adaptateur secteur ou s par de lui Retirer l adaptateur secteur de la prise de courant en cas de non utilisation Si el cord n del adaptador de CA est caliente y hu...

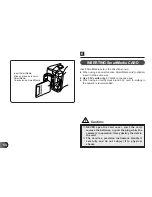
Страница 54: ...may destroy the data in the card The card is a precision instrument Handle it carefully and do not subject it to physical shocks INSERTING SmartMedia CARD Insert SmartMedia card in the direction show...

Страница 55: ...ment des cartes de 3 3 volts Cet appareil n exploite pas les cartes de 5 volts En utilisant une carte de 3 3 V de marque autre que Olympus il est recommand de la formater dans l appareil Precauci n NU...

Страница 56: ...l panel and the Condition indicator LED will blink When the card needs to be formatted the LCD monitor is turned on and the Card error indicator lights on the control panel Olympus brand cards are rec...

Страница 57: ...t recommand es format es l usine Des cartes de marque autre que Olympus doivent tre format es par l appareil CONEXION DE LA ALIMENTACION Para conectar la alimentaci n deslice el cubreobjetivo en la pa...

Страница 58: ...Appuyer ensemble Presione conjuntamente Press to cancel Appuyer pour annuler Presione para cancelar Press OK to format Appuyer sur OK pour formater Presione OK para formatear To format the card 1 Pres...

Страница 59: ...s touches de Mode effacement et de marche arr t de l cran ACL pour faire appara tre l indication YES NO Appuyer ensuite sur la touche OK Al formatear la tarjeta borra los datos existentes incluyendo l...

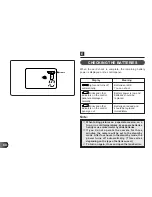
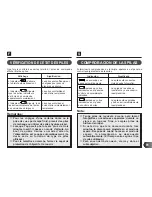
Страница 60: ...ly blinks and other Batteries are dead and indicators on the control should be replaced panel go out immediately When taking pictures on a special occasion on a trip or in cold temperatures keep spare...

Страница 61: ...onction du type de piles utilis es Pour le remettre en marche fermer le capot de protection de l objectif et le rouvrir Remarque COMPROBACION DE LAS PILAS Al terminar la comprobaci n de la tarjeta apa...

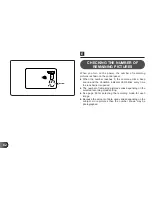
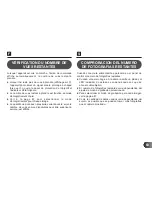
Страница 62: ...mera emits a beep sound and the Condition indicator LED blinks every time the lens barrier is opened The number of remaining pictures varies depending on the selected recording mode setting See page 8...

Страница 63: ...La quantit de donn es n cessaire variant avec le sujet le nombre de vues encore disponibles peut tre sup rieur celui qui est affich COMPROBACION DEL NUMERO DE FOTOGRAFIAS RESTANTES Cuando conecta la...

Страница 64: ...ges in the SHQ mode See p 86 for the number of pixels The number of storable pictures is reduced the most and the recording time is the longest in the Non Compression SHQ mode The number of remaining...

Страница 65: ...ro m nimo de fotograf as almlcenables Modo de grabaci n Capacidad de memoria Las im genes HQ y SHQ tienen el mismo n mero de pixels pero SHQ emplea una compresi n menor permitiendo una mejor calidad d...

Страница 66: ...Press the Erase mode button to go to the date input screen without setting the Date Print Press the LCD monitor ON OFF button to cancel the setting and turn off the LCD monitor Date Print is possible...

Страница 67: ...he d effacement ou sur la touche de marche arr t de l cran ACL avant d avoir termin le r glage pour l annuler et teindre l cran ACL Lire la remarque de la page 69 AJUSTE DE LA FECHA Y DE LA HORA Para...

Страница 68: ...icated in the camera settings window For exact information on how to use the utility software refer to the online manual provided with the software Be sure to set the date regardless of whether or not...

Страница 69: ...Ajuste la fecha y la hora como se indica en la ventana de ajustes de la c mara Para la informaci n exacta sobre c mo emplear el software utilitario refi rase al manual en pantalla suministrado con el...

Страница 70: ...the camera with its flash positioned at the top The Selftimer signal is shaped in such a manner to provide a reference point for your left index finger When your finger is placed on the Selftimer sig...

Страница 71: ...pour la prise de vues en format vertical 3 Mani re incorrecte de tenir l appareil Ne pas recouvrir l objectif ni le flash avec les doigts ou la bandouli re Remarque PUNTOS A RECORDAR Sostenga la c mar...

Страница 72: ...tter release button fully to release the shutter and take the picture The camera emits a beep sound when the shutter is released The Writing indicator on the control panel blinks and the Condition ind...

Страница 73: ...il photo au moment de d clencher Remarque Disparo correcto del obturador 1 Presione el bot n de disparo del obturador hasta mitad de recorrido Se enciende el LED indicador de estado pr ximo al visor S...

Страница 74: ...the shot has been taken 5 When the Writing indicator on the control panel and the Condition indicator LED stop blinking the camera is ready to take the next picture The writing indicator will disappe...

Страница 75: ...la fiche de secteur pendant que l indicateur d criture clignote ce qui risquerait d effacer les donn es contenues sur la carte 1 Componga la imagen empleando el visor ptico 2 Presione el bot n de dis...

Страница 76: ...n while the indicator is blinking the shutter will not release When the camera is being operated on battery power and the batteries are running low the camera may emit several short beeps and blink th...

Страница 77: ...r les piles et refaire la prise de vues L image imprim e est plus grande que celle qui appara t sur l cran ACL Remarque F S 77 6 Lorsque vous refermez le capot de protection de l objectif tous les ind...

Страница 78: ...LCD monitor are for composition purposes only If you need to know focus or exposure check your computer s display It is recommended to use the optical viewfinder for less camera movement and battery c...

Страница 79: ...mode prise de vues Quand une image est prise dans un endroit lumineux tel en plein soleil des lignes verticales peuvent appara tre sur l cran ACL Ce n est pas un mauvais fonctionnement Remarque 1 Abra...

Страница 80: ...ocus marks and press the Shutter release button halfway The Condition indicator LED next to the viewfinder lights When the focus is locked the exposure is also locked AE lock Autofocus mark Rep re d a...

Страница 81: ...tout en maintenant le d clencheur enfonc jusqu mi course et appuyer compl tement sur le d clencheur pour prendre la photo Si el sujeto principal no est dentro de las marcas de enfoque autom tico empl...

Страница 82: ...vertical lines n Use the focus lock first while holding the camera vertically Then switch the camera to the horizontal position to take the photograph 3 Subjects in excessively bright light n Use the...

Страница 83: ...er l image 5 Sujets tr s rapproch s se d pla ant rapidement n Faire tout d abord la mise au point sur un autre l ment plac la distance appareil sujet d sir e puis revenir sur le sujet principal pour r...

Страница 84: ...release the Next or Previous button 2 When the Shutter release button is pressed all the way the exposure is adjusted in the resulting picture After taking the picture the adjustment is returned to 0...

Страница 85: ...la luminosit Il est possible que la correction d exposition ne fonctionne pas efficacement lors des prises de vues au flash Remarque CONTROL DE EXPOSICION La exposici n puede ser ajustada manualmente...

Страница 86: ...two seconds at SHQ HQ or SHQ is indicated on the control panel when using the High Quality modes No indication on the control panel when using the Standard Quality mode Mode Resolution Compression SQ...

Страница 87: ...st mis hors tension Le nombre de vues restantes varie en fonction du mode d enregistrement choisi p 65 Remarque SELECCION DEL MODO DE GRABACION Usted puede seleccionar los modos de alta calidad HQ SHQ...

Страница 88: ...ot release while the flash is recharging so remove your finger from the Shutter release button and wait for several seconds The Red Eye Reducing Flash mode is not canceled when the power is turned off...

Страница 89: ...ur la photo p 93 Mode flash d bray Le flash ne se d clenche pas p 95 Mode flash d appoint Le flash se d clenche quelles que soient les conditions d clairage p 97 USO DE LOS MODOS DE FLASH Esta c mara...

Страница 90: ...e that is backlit position the subject within the backlighting correction marks to fire the flash When using the flash in the Macro mode light dark colors may be exaggerated p 104 Note Flash Working R...

Страница 91: ...sombres peuvent tre exag r es p 105 Remarque Port e du flash 0 2 m 3 0 m FLASH AUTOMATICO En el modo de flash autom tico el flash se disparar autom ticamente cuando la iluminaci n sea insuficiente o c...

Страница 92: ...xcept for the pre flashes this mode is the same as the Auto Flash mode Be sure to hold the camera still until the shutter releases This takes about one second Red eye reduction may not be effective wh...

Страница 93: ...sque le sujet a consomm de l alcool ou pris des comprim s ralentissant le temps de r action et donc susceptibles d entraver le processus d att nuation des yeux rouges Remarque Aseg rese de sostener la...

Страница 94: ...not fire even in low light conditions Use this mode in situations where flash photography is not desired or is prohibited or in twilight night scenes Since a slow shutter speed down to 1 2 seconds is...

Страница 95: ...est recommand d utiliser un tr pied afin d emp cher l appareil de bouger Remarque DESACTIVACION SOBRECONTROL DEL FLASH Cuando no desea disparar el flash aunque est en la oscuridad o cuando desee foto...

Страница 96: ...rdless of available light For example this mode can be used to brighten up the subject s shaded face Another use of this mode is to correct the color shift produced by artificial lights eg fluorescent...

Страница 97: ...ser uniquement dans les limites de port e du flash p 91 Si l clairage est trop intense on risque de ne pas obtenir l effet escompt Remarque FLASH DE RELLENO ACTIVACION FORZADA Cuando desee disparar el...

Страница 98: ...aded Note SELFTIMER 1 Press the Selftimer button The Selftimer indicator is displayed on the control panel Use a tripod to hold the camera securely 2 Aim at your subject and press the Shutter release...

Страница 99: ...t e apr s la prise de vues Pour annuler la fonction retardateur alors qu elle a d j t activ e appuyer de nouveau sur la touche de retardateur ou fermer le capot de protection de l objectif Remarque AJ...

Страница 100: ...for flagging Panorama pictures or photographing with a special function card available from Olympus optional Mode Use Standard mode For taking standard pictures Sequence mode For taking max 6 to 10 se...

Страница 101: ...car im genes panor micas o fotografiar con la tarjeta de funci n especial de Olympus opcional Mode Cas d utilisation Mode standard Pour prise de vues dans des conditions normales Fonction prise de Pou...

Страница 102: ...the size of the picture data Max 6 10 frames 6 10 images max M x de 6 a 10 fotogramas The flash cannot be used in the Sequence mode This mode can only be used in the SQ mode automatically sets Since t...

Страница 103: ...et de boug l image obtenue peut tre plus sombre que la normale Il faut au maximum 10 secondes pour enregistrer Remarque MODO SECUENCIAL En el modo secuencial la c mara toma un m ximo de seis a diez fo...

Страница 104: ...may be exaggerated p 90 Press the Function button to cancel the mode Macro mode Fonction gros plan Modo primer plano Standard mode Mode standard Modo est ndar 4 0 1 m 8 0 2 m 20 0 5 m Infinity No fla...

Страница 105: ...mode SQ se r gle automatiquement Appuyer sur la touche de marche arr t de l cran ACL ou sur la touche de fonction pour annuler le mode MODO PRIMER PLANO Una fotograf a de un sujeto tama o 12 x 8 cm p...

Страница 106: ...nce between 4 0 1 m Subjects closer than 4 0 1 m may turn out to be out of focus and incorrectly exposed Using the LCD monitor as a viewfinder makes it easy to take close up pictures turns on automati...

Страница 107: ...matiquement en mode Gros plan LIMITE DE PRISE DE VUES Limite de prise de vues Gros plan p 105 0 1 m 0 5 m Mode standard 0 5 m Correcci n de primer plano El marco de la fotograf a en el visor muestra e...

Страница 108: ...ages Panorama images must be assembled on a computer Overlap the left end of the picture with the right end of the previous picture when shooting to the right Faire se chevaucher le bord gauche de la...

Страница 109: ...l La prise de nombreuses vues panoramiques haute r solution demandant un important volume de m moire dans l ordinateur il est conseill d utiliser la r solution standard Remarque MODO PANORAMICO El Sma...

Страница 110: ...Protect indicators if they are set When there are no pictures stored in the card a blank blue screen is displayed Recording mode Battery Remaining Date and Frame number indicators will disappear afte...

Страница 111: ...ent quelques secondes plus tard Ce n est pas un mauvais fonctionnement Remarque Cierre el cubreobjetivo y presione el bot n ON OFF del monitor LCD para conectar la alimentaci n del mismo Cuando se con...

Страница 112: ...utton on rear 2 Press the Previous button to see the previous picture Each time you press the Previous button the preceding picture will appear 3 Press the Next button to see the next picture Each tim...

Страница 113: ...re que la vue soit int gralement affich e avant d appuyer de nouveau sur l une des touches Si des vues similaires ont t prises cons cutivement l cran ACL peut para tre inchang INDICACION DE FOTOGRAFIA...

Страница 114: ...ng the currently selected picture 3 Press the Previous button to select preceding frames Press the Next button to select succeeding frames 4 After the frame in the upper left corner is reached the pre...

Страница 115: ...u sur la touche d index L image venant juste d tre s lectionn e est affich e sur l cran Il peut falloir quelques secondes avant que l image soit affich e MODO DE INDICACION DE INDICE El monitor LCD mu...

Страница 116: ...r is necessary Mode Use Regular display For a regular display Close Up For an enlarged display p 118 Slide Show For a slide show display p 120 File No For displaying the file No p 122 Random print For...

Страница 117: ...ode miroir et impression assist e par carte avec fonctions Fonction Application Affichage normal Permet l affichage normal Gros plan Permet un affichage agrandi p 119 Mode diaporama Permet l affichage...

Страница 118: ...picture you want to enlarge 2 Press the Function button to select the Close Up mode 3 Select the section with the Previous Next button then press the OK button You can change the section while an enl...

Страница 119: ...che OK Vous pouvez changer la section pendant qu une image agrandie est affich e 4 Appuyer sur la touche de fonction pour annuler le mode Usted puede ampliar las im genes por 3 veces 1 Indique la foto...

Страница 120: ...the Function button to select the Slide Show mode then press the OK Shutter Release button to start the Slide Show 3 Press the Function button again to stop at the currently displayed picture The Slid...

Страница 121: ...source d alimentation Le mode diaporama est galement compatible avec le mode d affichage de l index des images en m moire p 115 MODO DE DIAPOSITIVAS Usted puede repasar por todas las fotograf as alma...

Страница 122: ...button to select the File No display mode 3 Select either File No or Frame No with the Previous Next button then press the OK button The camera returns to the frame number display when the power is tu...

Страница 123: ...o o el n mero de fotograma a ser indicado 1 Indique las fotograf as 2 Presione el bot n de funci n para seleccionar el modo de indicaci n de n mero de archivo 3 Seleccione cualquiera de los dos el n m...

Страница 124: ...protect the selected picture The Protect indicator appears in the upper right corner of the LCD monitor 3 To cancel protection press the Protect mode button again The protected picture is not deleted...

Страница 125: ...n m moire p 115 Dans le cas d une carte int gralement prot g e autocollant de protection contre l criture le verrouillage individuel des images en m moire n est pas possible Remarque PROTECCION Usted...

Страница 126: ...the picture you want to erase 2 Press the Erase mode button until the One Frame Erase indicator in the upper right corner of the LCD monitor lights To cancel press the Erase mode button again 3 Press...

Страница 127: ...t au risque d effacer les donn es figurant sur la carte Ne jamais appuyer sur la touche d effacement pendant qu une image est en train d appara tre sur l cran BORRADO DE FOTOGRAFIAS Usted puede borrar...

Страница 128: ...ictures are erased after a few seconds The blue background display will appear on the LCD monitor If there are any protected pictures they will not be erased and the protected picture last taken will...

Страница 129: ...donn es restant sur la carte Ne jamais appuyer sur la touche d effacement pendant qu une image est en train d appara tre sur l cran Esta funci n s lo funciona cuando el cubreobjetivo est cerrado 1 Ll...

Страница 130: ...monitor ON OFF button 4 Select the picture with the Previous Next button Video output connector Prise de sortie vid o Conector de salida de video LCD monitor ON OFF button Touche de marche arr t de l...

Страница 131: ...imprimante vid o Il est conseill d utiliser ici l adaptateur secteur optionnel Les images montr es sur l cran peuvent tre sauvegard es sur une bande vid o Remarque CONEXION A UN TELEVISOR Conectando l...

Страница 132: ...arador P 300 By connecting the camera to the P 300 printer with the direct connect cable pictures can be printed directly from the camera Make sure that the power of the printer and the camera are off...

Страница 133: ...CT PRINT de l imprimante pour lancer le processus d impression Pendant l impression le voyant de retardateur clignote tandis que tous les autres indicateurs disparaissent La indicaci n del monitor LCD...

Страница 134: ...e printed on one sheet starting from the selected picture 3 Enter the number of copies to be printed on the printer then press the DIRECT PRINT button to start printing After printing the display adva...

Страница 135: ...a 31e vue Pour le raccordement l imprimante se reporter la page 133 En mode impression de l index des images en m moire la date est toujours imprim e en m me temps IMPRESION DE INDICE Es posible impri...

Страница 136: ...he Close Up display mode p 118 2 Enter the number of copies to be printed on the printer then press the DIRECT PRINT button to start printing See page 132 for connection to the printer Use of high qua...

Страница 137: ...RESION DE PRIMER PLANO Usted puede imprimir im genes ampliadas 1 Seleccione el modo de indicaci n de primer plano p 119 2 Ingrese el n mero de copias a ser impresas con la impresora y presione el bot...

Страница 138: ...ta 3 Enter the number of copies to be printed on the printer then press the DIRECT PRINT button to start printing See page 132 for connection to the printer Press for 3 seconds All print Press for 5 s...

Страница 139: ...la mise hors tension ont pour effet d effacer ces donn es Il est conseill d utiliser ici l adaptateur secteur optionnel Remarque Usted puede seleccionar una serie de fotograf as a ser directamente im...

Страница 140: ...ton in the Display mode to select the 4 cut print mode 2 Select frames with the Previous Next button and press the OK button at each picture to be printed 3 Enter the number of copies to be printed on...

Страница 141: ...r page 133 IMPRESION DE 4 CORTES Usted puede efectuar impresiones de 4 cortes Para hacer impresiones adhesivas es necesario colocar el papel especial en el alimentador de papel de la impresora P 300 1...

Страница 142: ...on button in the Display mode to select the Multi Print mode 2 Select frames with the Previous Next button and press the OK button at each picture to be printed 3 Enter the number of copies to be prin...

Страница 143: ...imante voir page 133 IMPRESION MULTIPLE Usted puede crear las populares impresiones de 16 cortes Para hacer impresiones adhesivas es necesario colocar el papel especial en el alimentador de papel de l...

Страница 144: ...rints 1 Press the Function button in the Display mode to select the Mirror Print mode 2 Select the picture to be printed with the Previous Next button 3 Enter the number of copies to be printed on the...

Страница 145: ...res souhait et appuyer sur la touche DIRECT PRINT pour lancer le processus d impression Plour le raccordement l imprimante se reporter la page 133 IMPRESION INVERTIDA Usted puede imprimir im genes tip...

Страница 146: ...andom print Close Up print 1 5X 2X Date print Mirror print Function card compatible Template card Read the P 330 instructions for details The P 330 printer cannot be connected to the Computer connecto...

Страница 147: ...eil Lorsque la P 330 est raccord e la prise de sortie vid o de l appareil les performances de l imprimante seront limit es Remarque La impresora P 330 no puede ser conectada al conector de la computad...

Страница 148: ...ater 33MHz or greater Pentium recommended CD ROM Drive 16MB RAM 45MB Available HD Space Standard RS 232C Interface D SUB 9 pin connector Monitor with 256 colors 640 x 480 Screen Recording mode Apple M...

Страница 149: ...ROM 24 Mo de m moire vive 45 Mo d espace disponible sur le disque dur Port s rie standard MAC Moniteur avec 256 couleurs R solution d cran de 640 x 480 Ne jamais utiliser le iMac Cuando emplea el soft...

Страница 150: ...l advantage of a wide range of functions including download display storage and panorama your Olympus digital camera comes with software applications and utilities For installation and operation pleas...

Страница 151: ...ourni avec du logiciel d applications et des utilitaires Pour l installation et le fonctionnement veuillez vous r f rer la documentation en ligne du logiciel Para beneficiarse completamente de una amp...

Страница 152: ...ter and then connect the provided computer cable Turn off AppleTalk if connected to the printer port The enclosed Macintosh conversion connector allows you to connect your camera to a Macintosh comput...

Страница 153: ...Pour viter de consommer des piles il est conseill d utiliser l adaptateur secteur optionnel Remarque CONEXION A UNA COMPUTADORA PERSONAL Emplee el conector apropiado de acuerdo a la plataforma de su c...

Страница 154: ...cable as shown on the page 152 2 Open the connector cover 3 Align the arrow mark on the communication cable plug with the camera s connector Insert the plug and push it in as far as it will go 4 Open...

Страница 155: ...aci n de la computadora y de la c mara est n desconectadas y que el cubreobjetivo est cerrado 1 Conecte el cable de comunicaci n al cable en serie de la computadora como se muestra en la p gina 153 2...

Страница 156: ...o a personal computer equipped with a 3 5 FDD using the optional FlashPath Floppydisk Adapter FlashPath Floppydisk Adapter Check for compatibility This equipment may not function properly on all opera...

Страница 157: ...ve de protection contre l criture sur un ordinateur ce qui provoquerait des erreurs Se r f rer aux modes d emploi des adaptateurs Remarque TRANSFERENCIA DIRECTA DESDE SmartMedia Los datos de imagen en...

Страница 158: ...em Personal computer Ordinateur personnel Computadora personal Printer Imprimante usage exclusif Impresora PC card adapter Adaptateur de carte PC Adaptador de tarjeta PC Camera Appareil photo C mara T...

Страница 159: ...ntes sont disponibles dans la mesure o l appareil est raccord l quipement propos en option Impression directe via l imprimante usage exclusif Al efectuar la conexi n con equipo opcional quedan a dispo...

Страница 160: ...ns under which the camera is used Using the LCD monitor frequently will use up your batteries quickly Keep the LCD monitor turned off to save power Use of the optional NiMH rechargeable batteries or A...

Страница 161: ...lorsque vous recevez l appareil Le r glage de la date peut se faire aussi bien depuis l appareil photo qu partir de l ordinateur p 67 69 P Cu nto tiempo duran las pilas RLa duraci n de la pila es afe...

Страница 162: ...use the camera for a long period QWhy do the subjects eyes sometimes appear red in pictures AThis red eye phenomenon occurs with all cameras when a flash is used It is caused by light from the flash r...

Страница 163: ...uis je utiliser un filtre ou un pare soleil ROlympus n en fournit pas QPuis je utiliser un flash externe RUne unit esclave peut ne pas fonctionner avec cet appareil P C mo debo almacenar la c mara RLa...

Страница 164: ...en the Shutter release button is pressed 1 The flash has not finished charging or the previous picture is being written into the SmartMedia Remove your finger from the Shutter release button and wait...

Страница 165: ...ans l appareil photo ou encore la carte est prot g e contre l criture Remplacer la carte SmartMedia Le flash ne se d clenche pas 1 Le flash est r gl sur arr t OFF S lectionner un mode flash autre que...

Страница 166: ...the camera is connected to a computer an error message appears while data is being transferred to the computer 1 The cable is not plugged in correctly Connect the cable correctly P 152 2 The power is...

Страница 167: ...ie a t s lectionn correctement P 153 5 Il n y a pas de port s rie disponible Installer un port s rie en suivant les indications fournies par l ordinateur Las fotograf as tomadas no aparecen en el moni...

Страница 168: ...The viewfinder s autofocus mark was not positioned on the subject Position the autofocus frame on the subject or use the focus lock P 80 3 The lens is dirty Clean the lens with a soft dry cloth 4 The...

Страница 169: ...ctement Respecter les distances minimales aux modes normal et macro P 107 Problemas con las im genes La fotograf a est desenfocada 1 La c mara ha sido movida cuando se presion el bot n del obturador S...

Страница 170: ...1 The flash was set to the Fill In Flash mode Set the flash mode to one other than Fill In Flash P 88 2 The subject was very bright Either adjust the exposure 1 or point the camera away from overly b...

Страница 171: ...appareil Veiller ce que le sujet se trouve l int rieur des rep res de correction de gros plan du viseur P 107 La fotograf a es demasiado oscura 1 Bloque el flash con el dedo Sostenga la c mara correct...

Страница 172: ...e color suddenly To avoid this keep the camera warm when using in cold temperatures Backlight performance will return to normal under normal temperature conditions n When the color LCD monitor shows d...

Страница 173: ...e toutefois dans les limites de tol rance de fonctionnement d un cran couleur ACL La luminosit de l cran ACL couleur peut en outre varier d une image l autre NOTAS SOBRE INDICACION E ILUMINACION POR D...

Страница 174: ...ICTURE DATA 174 Images taken by this camera may not be properly displayed or printed with other Olympus digital cameras Images taken by other Olympus digital cameras may not be properly displayed or p...

Страница 175: ...par d autres appareils photos num riques Olympus peuvent ne pas tre affich es ni imprim es correctement avec cet appareil COMPATIBILIDAD DE DATOS DE IMAGEN Las im genes tomadas por esta c mara pueden...

Страница 176: ...re HQ mode 4 MB 60 shots or more SQ mode 4 MB Erase One frame erase All frames erase Image pickup element 1 2 7 inch CCD solid state image pickup 1 310 000 pixels gross Recording image 1280 x 960 pixe...

Страница 177: ...sur un appareil de 35 mm lentille asph rique Posem tre Syst me int gral de mesure moyenne pond r e au centre travers l objectif TTL Tipo de producto C mara digital para fotografiado e indicaci n de im...

Страница 178: ...klighting correction mark LCD monitor LCD monitor 1 8 4 5 cm D TFD color LCD display No of pixels Approx 72 000 pixels On screen display Date Time Frame number Protect Recording mode One All erase Bat...

Страница 179: ...our r duction de l effet yeux rouges arr t flash d bray flash d appoint d clenchement forc Control de exposici n Exposici n autom tica programada Abertura F2 8 F5 6 F11 Obturador 1 2 1 500 seg Usado c...

Страница 180: ...g range 4 0 1 m Selftimer Electronic Selftimer with 12 sec delay Outer connector AC adapter connector Computer connector RS 232C Video output connector Date and time Record with picture data simultane...

Страница 181: ...n m moire 30 images impression de gros plan pr s lection d impression impression de 4 vues impression de vignettes impression mode miroir impression de la date Panel de control Indica el modo de graba...

Страница 182: ...four AA nickel metal hydride batteries AA lithium batteries AA alkaline batteries or AA NiCd batteries Do not use manganese batteries Exclusive AC adapter optional Dimensions 5 W x 2 6 H x 1 9 D 128...

Страница 183: ...CARACT RISTIQUES MODIFIABLES SANS PR AVIS NI OBLIGATIONS DE LA PART DU FABRICANT Ambiente de funcionamiento Temperatura 0 40 C funcionamiento 20 60 C almacenamiento Humedad 30 90 funcionamiento 10 90...

Страница 184: ...3157 U S A Tel 516 844 5000 OLYMPUS OPTICAL CO EUROPA GMBH Premises Goods delivery Wendenstra e 14 16 20097 Hamburg Germany Tel 040 237730 Letters Postfach 10 49 08 20034 Hamburg Germany OLYMPUS OPTI...

Отзывы: