background image

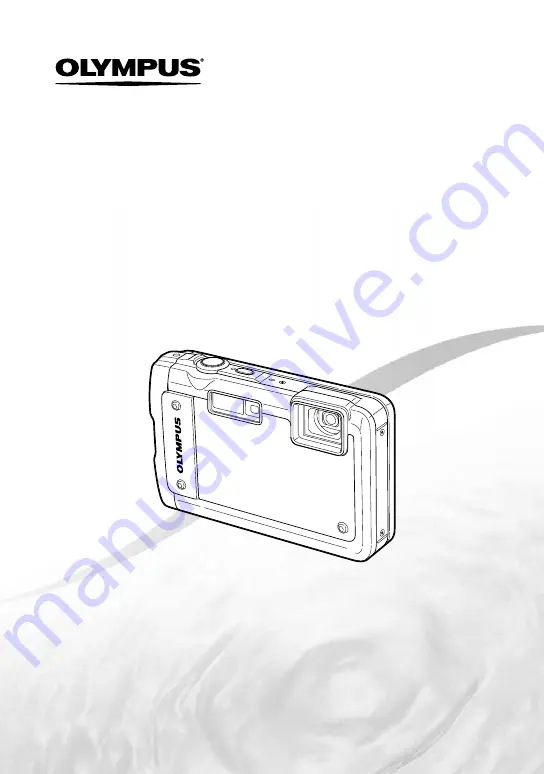
Instruction Manual

STYLUS TOUGH-8010 /

μ

 TOUGH-8010

STYLUS TOUGH-6020 /

μ

 TOUGH-6020

STYLUS TOUGH-3000 /

μ

 TOUGH-3000

DIGITAL CAMERA

  Thank you for purchasing an Olympus digital camera. Before you start to 

use your new camera, please read these instructions carefully to enjoy 
optimum performance and a longer service life. Keep this manual in a 
safe place for future reference.

  The application software and instruction manual PDF 

fi

 le are stored on 

the internal memory of the camera.

 We recommend that you take test shots to get accustomed to your 

camera before taking important photographs.

  In the interest of continually improving products, Olympus reserves the 

right to update or modify information contained in this manual.

  The screen and camera illustrations shown in this manual were produced 

during the development stages and may differ from the actual product. 
Unless otherwise speci

fi

 ed, the explanation about these illustrations is 

provided for STYLUS TOUGH-8010/

μ

 TOUGH-8010.

Содержание 227615

Страница 1: ...oftware and instruction manual PDF file are stored on the internal memory of the camera We recommend that you take test shots to get accustomed to your camera before taking important photographs In the interest of continually improving products Olympus reserves the right to update or modify information contained in this manual The screen and camera illustrations shown in this manual were produced ...

Страница 2: ...g Shooting Modes 23 Using Shooting Functions 28 Menus for Shooting Functions 33 Menus for Playback Editing and Printing Functions 38 Menus for Other Camera Settings 44 Printing 53 Usage Tips 58 Appendix 63 Step 1 Checking the contents of the box Other accessories not shown Warranty card Contents may vary depending on purchase location Digital camera USB cable CB USB6 AV cable CB AVC3 Strap USB AC ...

Страница 3: ...D Arrow pad H left G down D button erase p 20 F up INFO button changing information display p 18 21 I right A button Operation guides displayed at the bottom of the screen indicate that the m button A button or zoom buttons can be used MENU OK SEL IMAGE ERASE CANCEL Operation guide OK SET SHADOW ADJUST AUTO AF MODE FACE iESP ESP ESP FINE ZOOM OFF DIGITAL ZOOM OFF COMPRESSION NORMAL MENU OK SET EXI...

Страница 4: ...ESP ESP ESP FINE ZOOM OFF DIGITAL ZOOM OFF COMPRESSION NORMAL MENU OK SET EXIT 1 2 3 1 2 IMAGE SIZE IMAGE SIZE 14M 14M 2 Press H to select the page tabs Use FG to select the desired page tab and press I x X MENU OK SET EXIT WORLD TIME TV OUT OFF POWER SAVE 1 2 3 1 2 Page tab MENU OK SET EXIT TV OUT 1 2 3 1 2 OFF POWER SAVE x X X X X WORLD TIME Submenu 1 3 Use FG to select the desired submenu 1 and...

Страница 5: ...O WB AUTO ISO AUTO ISO PROGRAM AUTO PROGRAM AUTO PHOTO SURFING EVENT COLLECTION BEAUTY FIX EDIT ERASE SETUP SLIDESHOW SLIDESHOW 6 7 3 2 1 5 4 DIGITAL ZOOM p 35 R Still images p 35 R Movies p 36 IMAGE STABILIZER Still images IS MOVIE MODE Movies p 36 REC VIEW p 36 PIC ORIENTATION 1 p 37 ICON GUIDE p 37 REMOTE FLASH 2 p 37 8 9 8 3 2 1 4 MENU OK SET EXIT PRINT ORDER y 0 R 1 2 3 1 2 SHADOW ADJUST AUTO...

Страница 6: ...E p 48 TV OUT p 48 POWER SAVE p 50 MANOMETER 1 p 50 TAP CONTROL 2 p 51 LED ILLUMINATOR 2 p 52 COPY ENGLISH RESET USB CONNECTION PC MENU OK MEMORY FORMAT SET EXIT INTERNAL SD DATA REPAIR AUTO 1 2 1 2 3 3 2 1 1 STYLUS TOUGH 8010 μ TOUGH 8010 only 2 STYLUS TOUGH 8010 μ TOUGH 8010 and STYLUS TOUGH 6020 μ TOUGH 6020 only Operating the camera by tapping the Operating the camera by tapping the body body ...

Страница 7: ...amera unit 11 1 1 1 2 3 4 5 6 10 7 8 9 STYLUS TOUGH 6020 μ TOUGH 6020 STYLUS TOUGH 3000 μ TOUGH 3000 6 Lens p 63 7 Self timer lamp LED illuminator 2 p 30 p 32 52 8 Flash p 28 9 Battery lock knob p 11 10 Tripod socket 11 Microphone 3 p 35 43 1 STYLUS TOUGH 8010 μ TOUGH 8010 only 2 STYLUS TOUGH 8010 μ TOUGH 8010 and STYLUS TOUGH 6020 μ TOUGH 6020 only 3 STYLUS TOUGH 3000 μ TOUGH 3000 ...

Страница 8: ... OK p 3 7 Indicator lamp p 12 13 8 Shutter button p 16 58 9 Zoom buttons p 17 20 10 Movie record button p 17 11 Strap eyelet p 8 12 Arrow pad p 3 INFO button changing information display p 18 21 D button erase p 20 13 E button camera guide menu guide p 22 14 m button p 3 4 Attaching the camera strap Pull the strap tight so that it does not come loose 1 STYLUS TOUGH 8010 μ TOUGH 8010 and STYLUS TOU...

Страница 9: ...p 4 5 6 12 World time p 48 13 Image stabilization still images Digital image stabilization movies p 36 14 Metering p 34 15 Shadow Adjustment Technology p 34 16 Compression still images p 33 66 67 68 17 Image size still images p 33 66 67 68 18 Number of storable still pictures still images p 16 19 Current memory p 65 20 Remaining recording time movies p 17 21 Altitude water depth 2 p 50 22 Atmosphe...

Страница 10: ...ints p 56 p 55 3 Protect p 42 4 Adding sound p 35 36 43 5 Current memory p 65 6 Frame number total number of images still images p 18 Elapsed time total recording time movies p 19 7 Histogram p 18 8 Shutter speed p 16 9 Aperture value p 16 10 ISO p 31 11 Exposure compensation p 30 12 White balance p 30 13 Compression still images p 33 66 67 68 Image quality movies p 33 66 67 68 14 Image size p 33 ...

Страница 11: ...sing the camera be sure to close the battery card connector cover Battery charge and camera setup Connect the camera to the computer to charge the battery and setup the camera System requirements Windows XP SP2 or later Windows Vista Windows 7 When using another system other than the above or no computer see Charging the battery with the included USB AC adapter p 13 Inserting the battery 1 STYLUS ...

Страница 12: ...oper operation is not guaranteed in the following cases Computers with USB ports installed using an expansion card etc Computers without a factory installed OS and home built computers Double click the icon for the camera drive Removable Disk and then execute Setup exe to start the camera setup 3 Follow the instructions on the computer screen and setup the camera 1 Connect the camera to the comput...

Страница 13: ...arged The battery is not fully charged at shipment Before use be sure to charge the battery until the indicator lamp turns off STYLUS TOUGH 8010 μ TOUGH 8010 STYLUS TOUGH 6020 μ TOUGH 6020 up to 3 hours STYLUS TOUGH 3000 μ TOUGH 3000 up to 2 5 hours If the indicator lamp does not light the AC adapter is not connected to the camera correctly or the battery camera or AC adapter may be broken For det...

Страница 14: ...the date and time are not set Date and time setting screen X Y M D Y M D TIME MENU CANCEL 2 Use FG to select the year for Y MENU CANCEL X Y M D Y M D TIME 2010 2010 3 Press I to save the setting for Y 2010 X Y M D Y M D TIME MENU CANCEL 00 00 4 As in Steps 2 and 3 use FGHI and the A button to set M month D day TIME hours and minutes and Y M D date order For precise time setting press the A button ...

Страница 15: ...other types of memory card Using a SD SDHC memory card p 64 Although the camera can store images in internal memory SD SDHC memory cards sold separately can be also used to store pictures 1 Insert the card straight until it clicks into place Do not touch the contact area directly 2 STYLUS TOUGH 8010 μ TOUGH 8010 STYLUS TOUGH 6020 μ TOUGH 6020 STYLUS TOUGH 3000 μ TOUGH 3000 1 2 3 1 2 Close the batt...

Страница 16: ...value Focusing p 60 Shooting with the optimum aperture value and shutter speed P mode In this mode automatic shooting settings are activated while also allowing changes to a wide range of other shooting menu functions such as exposure compensation white balance etc as needed 1 Press the n button to turn on the camera P mode indicator 14M 4 4 P P 0 0 0 0 AUTO WB AUTO WB AUTO ISO AUTO ISO 00 34 00 3...

Страница 17: ...s performed with the P mode setting 2 Press the movie record button again to stop recording Sound will also be recorded When recording sound in a movie the sound of the lens triggering and camera operating may be recorded STYLUS TOUGH 3000 μ TOUGH 3000 During sound recording only the digital zoom can be used To record a movie with optical zoom set R movies p 36 to OFF Using the zoom Pressing the z...

Страница 18: ...is pressed Shooting mode display p 9 14M 4 4 P P 0 0 0 0 AUTO WB AUTO WB AUTO ISO AUTO ISO 14M 4 4 NORM P P 0 0 0 0 AUTO WB AUTO WB AUTO ISO AUTO ISO 00 34 00 34 00 34 00 34 Normal Detailed No information Reading a histogram If the peak fills too much of the frame the image will appear mostly white If the peak fills too much of the frame the image will appear mostly black The green section shows l...

Страница 19: ...display the last frame Advancing and rewinding one frame at a time Press I or H to advance or rewind one frame at a time Hold I or H pressed for continuous advance or rewind Resuming playback Press the A button to resume playback To stop movie playback Press the m button To play sound recordings To play sound recorded with an image select the image and press the A button A icon appears on images w...

Страница 20: ...x Index view enables quick selection of a desired image Close up view up to 10 magnification allows checking of image details In event index 1 images are grouped by the shooting dates and representative images for an event can be displayed 1 Pictures with different dates can be grouped into the same event using the PC software ib 1 Press the zoom buttons 10 02 26 12 30 10 02 26 12 30 4 30 4 30 10 ...

Страница 21: ...4 30 4 30 1 1000 F3 9 2 0 AUTO WB AUTO ISO FILE 100 0004 10 02 26 12 30 P NORM 14M 960hPa 0m Normal Detailed No information Reading a histogram p 18 Playing back panorama images Panorama images that were combined together using AUTO or MANUAL can be scrolled for viewing Creating panoramic images p mode p 25 1 Select a panorama image during playback Viewing images p 18 10 02 26 12 30 10 02 26 12 30...

Страница 22: ...amera History Message OK SET EXIT Search Search Submenu 2 Application Search Functions or operating methods can be searched from a term or shooting objective Learn about the camera Information is shown about recommended functions and basic operating methods for the camera History Searches can be performed from the search history Message Messages from the camera can be viewed 2 Use FG to select the...

Страница 23: ... using the function menu Using the Menu p 4 Shooting with automatic settings M mode The camera will automatically select the optimal shooting mode for the scene This is a fully automatic mode that allows you to take a picture suited to the scene by simply pressing the shutter button In M mode settings in the shooting menu can be selected but the changed setting is not reflected in the actual shot ...

Страница 24: ...nce is automatically fixed to approx 5 0 m 16 4 ft Important information about water and shock resistant features p 69 To lock the focus distance for underwater shoots AF lock When T SNAPSHOT k WIDE1 or H MACRO is selected press the A button STYLUS TOUGH 8010 μ TOUGH 8010 and STYLUS TOUGH 6020 μ TOUGH 6020 only 14M 4 4 0 0 0 0 AUTO WB AUTO WB AFLOCK AFLOCK AF lock mark To cancel press the A button...

Страница 25: ...user only composes the shots so that the target marks and pointers overlap and the camera automatically releases the shutter MANUAL Three frames are taken and combined by the camera The user composes the shots using the guide frame and manually releases the shutter PC The frames that were taken are combined into a panorama image using the PC software ib For details on installing the PC software ib...

Страница 26: ...L 1 Use HI to specify at which edge the next picture is to be connected MANUAL MANUAL 1 2 1 2 MENU BACK Direction for combining the next frame 2 Press the shutter button to take the first frame 1st frame MANUAL MANUAL 1 2 1 2 MANUAL MANUAL 1 2 1 2 MENU BACK MENU OK SAVE CANCEL Joint areas 3 Compose the next shot so that joint area 1 overlaps joint area 2 Composition of the 2nd frame MANUAL MANUAL ...

Страница 27: ...o 10 frames Refer to the PC software ib help guide for details on how to make panorama images Smoothing out skin tone and texture Q mode The camera identifies a person s face and gives the skin a smooth translucent look for taking the picture 1 Set the shooting mode to Q 14M 4 4 0 0 0 0 AUTO WB AUTO WB BEAUTY BEAUTY P P 2 Point the camera toward the subject Check the frame appearing around the fac...

Страница 28: ...ct the flash option in the shooting function menu 14M 4 4 P P 0 0 0 0 AUTO WB AUTO WB AUTO ISO AUTO ISO FLASH AUTO FLASH AUTO 2 Use HI to select the setting option and press the A button to set Option Description FLASH AUTO The flash fires automatically in low light or backlight conditions REDEYE Pre flashes are emitted to reduce the occurrence of red eye in your photos FILL IN The flash fires reg...

Страница 29: ...he camera to shoot subjects at even closer distances This function enables shooting as close as the following distances STYLUS TOUGH 8010 μ TOUGH 8010 STYLUS TOUGH 6020 μ TOUGH 6020 STYLUS TOUGH 3000 μ TOUGH 3000 3 cm 1 2 in 2 cm 0 8 in Subjects at the following or farther distances cannot be brought into focus STYLUS TOUGH 8010 μ TOUGH 8010 STYLUS TOUGH 6020 μ TOUGH 6020 STYLUS TOUGH 3000 μ TOUGH...

Страница 30: ...en Self timer shooting is automatically canceled after one shot To cancel the self timer after it starts Press the m button Adjusting the brightness Exposure compensation The standard brightness appropriate exposure set by the camera based on the shooting mode except for M can be adjusted brighter or darker to obtain a desired shot 1 Select the exposure compensation option in the shooting function...

Страница 31: ... the International Organization for Standardization ISO standards specify the sensitivity for digital cameras and film thus codes such as ISO 100 are used to represent sensitivity In the ISO setting although smaller values result in less sensitivity sharp images can be taken under fully lit conditions Larger values result in higher sensitivity and images can be taken at fast shutter speeds even un...

Страница 32: ...to W the flash is fixed to FLASH OFF When set to W IMAGE SIZE is limited to 3 or lower and the ISO sensitivity is fixed to ISO AUTO Using the LED illuminator STYLUS TOUGH 8010 μ TOUGH 8010 and STYLUS TOUGH 6020 μ TOUGH 6020 only In a dark location the LED illuminator can be used as an auxiliary light to see things or compose shots 1 Set LED ILLUMINATOR p 52 to ON 2 Press and hold F down until the ...

Страница 33: ...8 2232 2 Suitable for playing pictures on a widescreen TV and for printing on A3 or 11 17 16 9F 1920 1080 Suitable for playing pictures on a widescreen TV and for printing on A5 or 5 7 COMPRESSION FINE Shooting at high quality NORMAL Shooting at normal quality 1 STYLUS TOUGH 8010 μ TOUGH 8010 and STYLUS TOUGH 6020 μ TOUGH 6020 only 2 STYLUS TOUGH 3000 μ TOUGH 3000 only Number of storable pictures ...

Страница 34: ...r some subjects the frame may not appear or may take some time to appear 2 If the frame blinks in red the camera cannot focus Try refocusing on the subject To focus on a moving subject continuously AF Tracking 1 Hold the camera to align the AF target mark on the subject and press the A button 2 When the camera recognizes the subject the AF target mark automatically tracks the subject movement to f...

Страница 35: ...t higher magnifications than optical zoom DIGITAL ZOOM I Shooting menu 1 X DIGITAL ZOOM Available shooting modes P M s P p Q Submenu 2 Application OFF Only optical zoom is used to zoom in for shooting ON Optical zoom and digital zoom are combined to zoom in for shooting 1 1 STYLUS TOUGH 8010 μ TOUGH 8010 STYLUS TOUGH 6020 μ TOUGH 6020 Approx 25 max STYLUS TOUGH 3000 μ TOUGH 3000 Approx 18 max The ...

Страница 36: ...d or other stable surface ON The image stabilizer is activated The camera s default settings are IMAGE STABILIZER still images to ON and IS MOVIE MODE movies to OFF There may be a noise coming from inside the camera when the shutter button is pressed with IMAGE STABILIZER still images set to ON Images may not be stabilized if camera shake is too severe When the shutter speed is extremely slow such...

Страница 37: ...lly rotated during playback Displaying icon guides ICON GUIDE J Shooting menu 2 X ICON GUIDE Available shooting modes P M s P p Q Submenu 2 Application OFF No icon guide is displayed ON The explanation of the selected icon will be displayed when a shooting mode or shooting function menu icon is selected position the cursor on the icon for a while to display the explanation Icon guide 14M 4 4 0 0 0...

Страница 38: ...ion effect used between slides START Starts the slideshow Single frame advance rewind During a slideshow press I to skip ahead one frame or press H to go back one frame Searching for images and playing back the related images PHOTO SURFING PHOTO SURFING In PHOTO SURFING images can be searched and related images can be played back by selecting the related items To start PHOTO SURFING Press the A bu...

Страница 39: ...has been created with the PC software ib and imported back from a computer To start COLLECTION q Press the A button and then use FGHI to select the desired collection Press the A button again to start playback of the selected collection Use HI to advance or rewind by one frame To stop COLLECTION q press the m button COLLECTION MENU OK SET BACK Using a PC software ib and importing data back to the ...

Страница 40: ...mage When CLEAR SKIN is selected Use FG to select the retouching level and press the A button CLEAR SKIN MENU OK SET BACK AVG SOFT SOFT HARD Changing the image size Q EDIT X Q Submenu 2 Application C 640 480 This saves a high resolution image as a separate image with a smaller size for use in e mail attachments and other applications E 320 240 1 Use HI to select an image 2 Use FG to select an imag...

Страница 41: ...ct an image and press the A button 2 Use HI to select a calendar Use FG to select the image orientation and then press the A button 3 Use FG to select the Year of the calendar and press I 4 Use FG to select the Month of the calendar and press the A button The edited image is saved as a separate image Brightening areas that are dark due to backlight or other reasons SHADOW ADJ EDIT X SHADOW ADJ 1 U...

Страница 42: ...n index view Images can be quickly selected using the FGHI buttons Press the T button to return to the single frame display MENU OK SEL IMAGE ERASE CANCEL R mark 3 Repeat Step 2 to select the images to be erased and then press the m button to erase the selected images 4 Use FG to select YES and press the A button The images with a R mark are erased To erase all images ALL ERASE 1 Use FG to select ...

Страница 43: ... m button The new picture orientations will be saved even after the power is turned off Adding sound to still images R q Playback menu X R 1 Use HI to select an image 2 Aim the microphone toward the sound source STYLUS TOUGH 8010 μ TOUGH 8010 Microphone STYLUS TOUGH 6020 μ TOUGH 6020 Microphone STYLUS TOUGH 3000 μ TOUGH 3000 Microphone 3 Press the A button Recording starts The camera adds records ...

Страница 44: ...vice INTERNAL SD r Settings 1 X INTERNAL SD Submenu 2 Application AUTO If a card is inserted the card is automatically selected If no card is inserted internal memory is used IN 1 Internal memory is selected 1 Internal memory is used even if a card is inserted Erasing data completely MEMORY FORMAT FORMAT r Settings 1 X MEMORY FORMAT FORMAT Before formatting check that no important data is left in ...

Страница 45: ...ista Windows 7 Macintosh Mac OS X v10 3 or later When using another system other than Windows XP SP2 or later Windows Vista Windows 7 set to STORAGE Even if a computer has USB ports proper operation is not guaranteed in the following cases Computers with USB ports installed using an expansion card etc Computers without a factory installed OS and home built computers Turning on the camera with the ...

Страница 46: ...FG can be used to adjust volume during playback 2 Even when SILENT MODE is ON sound is played when images are displayed on a television Resetting the file names of pictures FILE NAME s Settings 2 X FILE NAME Month 1 to C A October B November C December Day 01 to 31 Pmdd Folder name Folder name File name DCIM 100OLYMP 999OLYMP Pmdd0001 jpg Pmdd9999 jpg Automatic numbering Automatic numbering Submen...

Страница 47: ...o perform it again To adjust the CCD and the image processing function Press the A button when START Submenu 2 is displayed The camera checks and adjusts the CCD and the image processing function at the same time Adjusting the brightness of the monitor s s Settings 2 X s To adjust the monitor brightness 1 Use FG to adjust the brightness while viewing the screen and then press the A button MENU OK ...

Страница 48: ...d zone and the home time zone x to display the time in the travel destination time zone y Playing back images on a TV TV OUT t Settings 3 X TV OUT The TV video signal system varies depending on the countries and regions Before viewing camera images on your TV select the video output according to your TV s video signal type Submenu 2 Submenu 3 Application VIDEO OUT NTSC Connecting the camera to a T...

Страница 49: ...ual When the camera is connected to the computer or other device via USB cable do not connect the HDMI cable to the camera Connect to the HDMI connector on the TV HDMI mini connector HDMI cable type C commercially available Open the battery card connector cover in the direction of the arrow 3 Turn on the TV and change INPUT to VIDEO an input jack connected to the camera For details on changing the...

Страница 50: ... POWER SAVE ON When the camera is not being used for approx 10 seconds the monitor automatically turns off to save battery power To resume standby mode Press any button Displaying the current altitude water depth atmospheric hydraulic pressure MANOMETER STYLUS TOUGH 8010 μ TOUGH 8010 only t Settings 3 X MANOMETER The readings may have a margin of error depending on meteorological conditions Use th...

Страница 51: ...he camera body once Then tap the top side of the camera once The flash mode selection screen is displayed 2 Tap the right or left side of the camera body to select a function 3 Tap the back of the camera body twice to confirm your selection 14M 4 4 P P 0 0 0 0 AUTO WB AUTO WB AUTO ISO AUTO ISO FLASH AUTO FLASH AUTO Tap the camera firmly using the pad of your finger When the camera is stabilized on...

Страница 52: ...ect the STR setting with FG and press the I button 4 Select the INTVL setting with FG and press the A button TOP MENU OK SET BACK STR INTVL NORM AVG AVG Check the operation of the camera by tapping on the camera after making the settings Using the LED illuminator as an auxiliary light LED ILLUMINATOR STYLUS TOUGH 8010 μ TOUGH 8010 and STYLUS TOUGH 6020 μ TOUGH 6020 only t Settings 3 X LED ILLUMINA...

Страница 53: ...omputer To find out if your printer supports PictBridge refer to the printer s instruction manual 1 PictBridge is a standard for connecting digital cameras and printers of different makers and printing out pictures directly The printing modes paper sizes and other parameters that can be set with the camera vary depending on the printer that is used For details refer to the printer s instruction ma...

Страница 54: ...are set to the printer s standard PRINTPAPER SIZE BORDERLESS STANDARD OK SET MENU BACK STANDARD STANDARD 5 Use FG to select the BORDERLESS or PICS SHEET settings and press the A button Submenu 4 Application OFF ON 1 The image is printed with a border around it OFF The image is printed to fill the entire paper ON The number of images per sheet varies depending on the printer The number of images pe...

Страница 55: ... SET 2 Use FG to select OK and press the A button MENU OK P CANCEL OK OK SET BACK 8 If necessary repeat Steps 6 and 7 to select the image to be printed make the detailed settings and set SINGLEPRINT 9 Press the A button PRINT MENU OK CANCEL SET BACK PRINT PRINT 10Use FG to select PRINT and press the A button Printing starts When OPTION SET is selected in ALL PRINT mode PRINT INFO screen is display...

Страница 56: ...device Making new DPOF reservations with this camera will erase the reservations made by the other device DPOF print reservations can be made for up to 999 images per card Single frame print reservations 1 Display the SETUP menu Using the Menu p 4 2 From the playback menu q select PRINT ORDER and then press the A button PRINT ORDER U MENU OK SET EXIT 3 Use FG to select and press the A button NORM ...

Страница 57: ...s the A button Resetting the print reservation data for selected images 1 Follow Steps 1 and 2 in p 56 2 Use FG to select and press the A button 3 Use FG to select KEEP and press the A button 4 Use HI to select the image with the print reservation you want to cancel Use FG to set the print quantity to 0 5 If necessary repeat Step 4 and then press the A button when finished 6 Use FG to select the X...

Страница 58: ... the internal temperature may increase resulting in automatic shutdown If this occurs remove the battery from the camera and wait until the camera has sufficiently cooled The camera s external temperature may also increase during use however this is normal and does not indicate malfunction Monitor Difficult to see Condensation 1 may have occurred Turn off the power and wait for the camera body to ...

Страница 59: ...the image on a computer If the image still cannot be viewed the image file is corrupted THE IMAGE CANNOT BE EDITED Problem with selected image Use photo retouch software etc to edit the image on a computer BATTERY EMPTY Battery problem Charge the battery NO CONNECTION Connection problem Connect the camera and computer or printer correctly NO PAPER Printer problem Load paper into the printer Error ...

Страница 60: ... no vertical lines 1 1 It is also effective to compose the shot by holding the camera vertically to focus and then returning to the horizontal position to take the picture When objects are at different distances Fast moving object The subject is not in the center of the frame Camera shake Taking pictures without camera shake Taking pictures using IMAGE STABILIZER p 36 When a picture is taken of a ...

Страница 61: ...shade as they appear Taking pictures by selecting white balance p 30 Best results in most environments can normally be obtained with the WB AUTO setting but for some subjects you should try experimenting with different settings This is especially true for sunshade under a clear sky mixed natural and artificial light settings and so on Taking pictures using FILL IN p 28 flash Use of the flash is al...

Страница 62: ... card sold separately p 15 Selecting a storage device INTERNAL SD p 44 Viewing images with high picture quality on a high definition TV Connect the camera to the TV using an HDMI cable commercially available To play back camera images on a TV p 48 Editing Erasing the sound recorded to a still image Record over the sound with silence when playing back the image Adding sound to still images R p 43 ...

Страница 63: ...or charge it using the included USB AC adapter F 2AC a separately sold AC adapter F 1AC D 7AC or charger STYLUS TOUGH 8010 μ TOUGH 8010 STYLUS TOUGH 6020 μ TOUGH 6020 LI 50C STYLUS TOUGH 3000 μ TOUGH 3000 LI 41C LI 40C Camera care Exterior Wipe gently with a soft cloth If the camera is very dirty soak the cloth in mild soapy water and wring well Wipe the camera with the damp cloth and then dry it ...

Страница 64: ...other AC adapter with this camera Using a separately sold charger A charger sold separately can be used to charge the battery In this case remove the battery from the camera and set the battery to the charger STYLUS TOUGH 8010 μ TOUGH 8010 STYLUS TOUGH 6020 μ TOUGH 6020 LI 50C STYLUS TOUGH 3000 μ TOUGH 3000 LI 41C LI 40C Using your charger and USB AC adapter abroad The charger and USB AC adapter c...

Страница 65: ...ck mode Shooting mode 10 02 26 12 30 10 02 26 12 30 4 30 4 30 4 4 P P 0 0 0 0 AUTO WB AUTO WB AUTO ISO AUTO ISO 14M 00 34 00 34 Even if MEMORY FORMAT FORMAT ERASE ERASE EVENT SEL IMAGE or ALL ERASE is performed the data in the card is not completely erased When disposing of the card damage the card to prevent the disclosure of personal data Readout recording process of the card During shooting the...

Страница 66: ...till pictures IMAGE SIZE COMPRESSION Number of storable still pictures Internal memory SD SDHC memory card 1GB With sound Without sound With sound Without sound 6 4288 3216 L 225 237 133 140 M 423 466 251 276 4 3264 2448 L 373 406 220 240 M 677 793 400 469 n 2560 1920 L 570 651 337 385 M 1 036 1 337 613 790 3 2048 1536 L 819 996 484 589 M 1 411 2 032 846 1 226 2 1600 1200 L 1 239 1 693 732 1 001 M...

Страница 67: ...84 1 540 M 963 2 022 1 430 3 004 7 640 480 L 1 189 3 370 1 820 5 461 M 1 444 6 741 2 145 10 013 K 4288 2416 L 117 125 175 187 M 217 246 324 368 0 1920 1080 L 459 612 690 924 M 722 1 189 1 092 1 820 Movies IMAGE SIZE IMAGE QUALITY Continuous recording length Internal memory SD SDHC memory card 1GB With sound Without sound With sound Without sound L 1280 720 L 8 min 36 sec 8 min 43 sec 13 min 18 sec...

Страница 68: ...1 011 984 1 540 M 963 2 022 1 430 3 004 7 640 480 L 1 189 3 370 1 820 5 461 M 1 444 6 741 2 145 10 013 K 3968 2232 L 135 146 202 218 M 249 288 370 429 0 1920 1080 L 459 612 690 924 M 722 1 189 1 092 1 820 Movies IMAGE SIZE IMAGE QUALITY Continuous recording length Internal memory SD SDHC memory card 1GB With sound Without sound With sound Without sound L 1280 720 L 8 min 36 sec 8 min 43 sec 13 min...

Страница 69: ... 6 Take a test shot to check the operation of the flash and the resulting image Be sure to check the charge level of the camera and wireless flash before taking pictures Although there is no limit on the number of wireless flash units that are set up usage of a maximum of three units is recommended to prevent malfunction due to interference with each other When the camera flash is set to RC the ca...

Страница 70: ...the camera in a bucket containing fresh water for about 10 minutes with the battery card connector cover firmly closed After that dry the camera in the shade with good ventilation Water drops may be observed on the inner surface of the battery card connector cover after you open the cover If any water drops are found be sure to wipe them off before using the camera Notes after use Foreign material...

Страница 71: ...duct is used without observing the information given under this symbol minor personal injury damage to the equipment or loss of valuable data may result WARNING TO AVOID THE RISK OF FIRE OR ELECTRICAL SHOCK NEVER DISASSEMBLE EXPOSE THIS PRODUCT TO WATER OR OPERATE IN A HIGH HUMIDITY ENVIRONMENT General Precautions Read All Instructions Before you use the product read all operating instructions Sav...

Страница 72: ...amera in this state a low temperature burn may be caused In places subject to extremely cold temperatures the temperature of the camera s body may be lower than the environmental temperature If possible wear gloves when handling the camera in cold temperatures Be careful with the strap Be careful with the strap when you carry the camera It could easily catch on stray objects and cause serious dama...

Страница 73: ...high voltage such as near a TV set microwave video game loud speakers large monitor unit TV radio tower or transmission towers In such cases turn the camera off and on again before further operation Always observe the operating environment restrictions described in the camera s manual Battery Handling Precautions This camera uses a lithium ion battery specified by Olympus Do not use any other type...

Страница 74: ...rein Olympus reserves the right to alter the features and contents of this publication or software without obligation or advance notice FCC Notice Radio and Television Interference Changes or modifications not expressly approved by the manufacturer may void the user s authority to operate this equipment This equipment has been tested and found to comply with the limits for a Class B digital device...

Страница 75: ...Olympus Service Center Olympus shall not be obligated to perform preventive maintenance installation deinstallation or maintenance Olympus reserves the right to i use reconditioned refurbished and or serviceable used parts that meet Olympus s quality assurance standards for warranty or any other repairs and ii make any internal or external design and or feature changes on or to its products withou...

Страница 76: ...us This limited warranty is the complete and exclusive statement of warranty which Olympus agrees to provide with respect to the Products and it shall supersede all prior and contemporaneous oral or written agreements understandings proposals and communications pertaining to the subject matter hereof This limited warranty is exclusively for the benefit of the original customer and cannot be transf...

Страница 77: ...k and shall be responsible for any costs incurred in transporting the product Provisions of Guarantee 1 OLYMPUS IMAGING CORP Shinjuku Monolith 2 3 1 Nishi Shinjuku Shinjuku ku Tokyo 163 0914 Japan grants a one year World Wide Guarantee This worldwide Guarantee must be presented at an Olympus authorized repair service station before any repair can be made under conditions of this Guarantee This Gua...

Страница 78: ...ed service station at his own risk and shall be responsible for any costs incurred in transporting the product 3 This warranty does not cover the following and the customer will be required to pay repair charge even for defects occurring within the one year period referred to above Any defect that occurs due to mishandling such as an operation performed that is not mentioned in the Handling Care o...

Страница 79: ...ny consequential incidental or indirect damages including but not limited to damages for loss of business profits business interruption and loss of business information arising from the use of inability to use these written materials or software Some states do not allow the exclusion or limitation of liability for consequential or incidental damages so the above limitations may not apply to you Tr...

Страница 80: ...6020 μ TOUGH 6020 0 6 m 2 0 ft to normal 0 2 m 0 7 ft to W 0 5 m 1 6 ft to T macro mode 0 03 m 0 1 ft to 0 6 m 2 0 ft f 6 7 fixed super macro mode STYLUS TOUGH 3000 μ TOUGH 3000 0 5 m 1 6 ft to normal 0 1 m 0 3 ft to W 0 3 m 1 0 ft to T macro mode 0 02 m 0 07 ft to 0 5 m 1 6 ft f 6 5 fixed super macro mode Monitor 2 7 TFT color LCD display 230 000 dots Connector DC IN jack USB connector A V OUT ja...

Страница 81: ...Lithium ion rechargeable battery Standard voltage DC 3 7 V Standard capacity 740 mAh Battery life Approx 300 full charges varies on usage Operating environment Temperature 0 C to 40 C 32 F to 104 F charging 10 C to 60 C 14 F to 140 F operation 20 C to 35 C 4 F to 95 F storage Dimensions 31 5 mm W 39 5 mm H 6 0 mm D 1 2 1 5 0 2 in Weight Approx 15 g 0 5 oz Lithium ion battery LI 50B Product type Li...

Страница 82: ...2AC 2B Design and specifications subject to change without notice Using in low temperatures Low temperature operation of the Olympus lithium ion battery is guaranteed to 0 C 32 F However the Olympus lithium ion battery has been tested for use with this product in temperatures up to 10 C 14 F Olympus lithium ion battery STYLUS TOUGH 8010 μ TOUGH 8010 STYLUS TOUGH 6020 μ TOUGH 6020 LI 50B STYLUS TOU...

Страница 83: ...VN678203 ...

Отзывы: