


50.
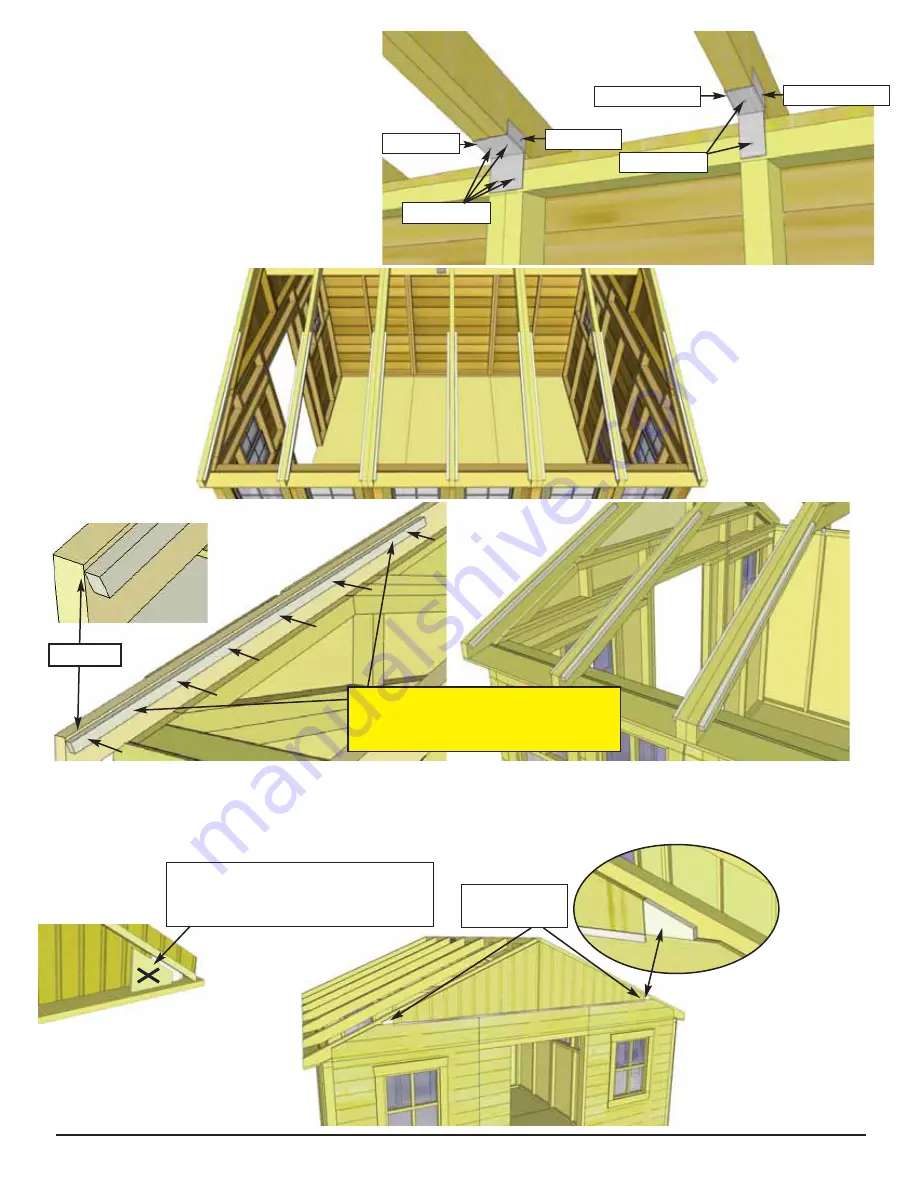
Locate
Triangular Gable
Trims (4)
inside corner of gables.
They are protected behind a piece
of scrap wood marked with an “X”
1/4” gap
Further secure Cleats with
2 - 1 1/4” screws.
Important:
Drill
pilot holes to prevent splitting!
Note:
Triangular Gable Trims are
found inside gable corner behind
scrap piece marked with “
X
”.
Triangular
Gable Trims
1 1/4” Screw
2” Screws
1 1/4” Screw
2” Screws
2” Screw
2” Screw
48.
Attach all Single and Double Rafter
Brackets where rafters meet Top Wall
Plates inside of shed. Attach with 2 - 1 1/4”
Screws and 2 - 2” Screws per
Single Rafter
Bracket
and 6 - 2” Screws per
Double
Rafter Bracket
.
49.
Position a 3/4” x 3/4” x 48” long
Polygal Support Cleat
on each Long Rafter flush to end and
recessed 1/4” down from top of rafter. Nail to rafter using 6 - finishing nails.
Note:
Start nails in Supports
on ground first. Further secure with 2 - 1 1/4” screws - see diagram above. Complete remaining 11
Polygal Support Cleats.
51.
Position Triangular
Gable Trims in each
corner of exposed cavity
of Gable Wall.
Use 2 finishing nails per
piece to secure into
rafter.
Toll Free 1-888-658-1658 www.outdoorlivingtoday.com [email protected]
Page 24


