background image

Guida Rapida per l'Utente

Istruzioni per la custodia e il funzionamento - 3

Italiano

• Tenere i bambini lontani da una batteria danneggiata e prov-

vedere tempestivamente al suo smaltimento. Smaltire sempre 
con cura le batterie. Le batterie possono esplodere o presen-
tare perdite se esposte a fuoco oppure se manipolate o smal-
tite impropriamente.

• Tenere la batteria lontana da qualsiasi apparecchio di metallo.
• Apporre del nastro adesivo sui contatti della batteria prima di 

smaltirla.

• Non gettare le batterie nel fuoco, poiché potrebbero esplo-

dere. Fare riferimento alle normative locali per istruzioni spe-
ciali in tema di smaltimento rifiuti.

• Non toccare i contatti della batteria con le mani o con oggetti 

metallici.

Assistenza

Ogni tentativo di riparare da soli il computer può annullare
la garanzia ed esporre l'utente a scosse elettriche. Per
l'assistenza rivolgersi solo a personale tecnico qualificato, in
particolar modo nelle situazioni seguenti:

• Quando il cavo di alimentazione è danneggiato o logo-

rato.

• Se il computer è stato esposto alla pioggia o ad altri 

liquidi.

• Se il computer non funziona normalmente dopo aver 

seguito correttamente le istruzioni operative.

• Se il computer è caduto o si è danneggiato( attenzione: i 

n caso di rottura dello schermo LCD non toccare il liquido 
che ne  fuoriesce in quanto è tossico ).

• Se c'è un odore non usuale, calore o fumo che fuoriesce 

dal computer.

Pulizia

• Per pulire il computer utilizzare solo un panno morbido e 

pulito, evitando di applicare detergenti direttamente sul 
computer.

• Non utilizzare detergenti volatili (distillati di petrolio) o 

abrasivi su qualsiasi parte del computer.

• Prima di pulire il computer ricordare sempre di rimuovere 

la batteria e di scollegare il computer da qualsiasi fonte di 
alimentazione esterna, da periferiche e altri cavi (incluse 
linee telefoniche).

Smaltimento della batteria & Attenzione

Il prodotto acquistato contiene una batteria ricaricabile. La
batteria è riciclabile. Al termine della durata di uso, in base alle
diverse leggi locali e statali, può essere illegale smaltire questa
batteria insieme ai rifiuti comuni. Controllare i requisiti previsti
nella propria zona consultando i funzionari locali addetti allo
smaltimento dei rifiuti solidi per le opzioni di riciclo o lo
smaltimento corretto.

Pericolo di esplosione in caso sostituzione errata della batteria.
Sostituire solamente con lo stesso tipo o con uno analogo
raccomandato dal produttore. Eliminare la batteria usata
seguendo le istruzioni del produttore.

qrgOlibookP1500 IT.fm  Page 3  Wednesday, October 21, 2009  10:47 AM

Содержание OLIBOOKP1500

Страница 1: ...Code 383315V 02...

Страница 2: ...procedures in accordance with Directive 2002 96 CE and subsequent amendments To dispose of our devices correctly a Contact the Local Authorities who will give you the practical information you need a...

Страница 3: ...M815L QG TOC eng fm Page I Saturday August 1 2009 1 54 PM Italiano...

Страница 4: ...nzionamento 2 Guida di avvio rapido 4 Prima installazione e personalizzazione del sistema operativo 5 Installazione del sistema operativo 8 Software del sistema 9 Descrizione del sistema vista anterio...

Страница 5: ...icazione o di modificarne il contenuto senza preavviso Tutte le funzionalit del computer sono gi state configurate in fabbrica Nel caso si stia pianificando di riconfigurare o reinstallare componenti...

Страница 6: ...l estero ma richiede ugualmente un alimentazione stabile e continua Se non si certi delle specifiche elettriche locali consultare l assistenza tecnica o la societ locale di forni tura elettrica L adat...

Страница 7: ...computer caduto o si danneggiato attenzione i n caso di rottura dello schermo LCD non toccare il liquido che ne fuoriesce in quanto tossico Se c un odore non usuale calore o fumo che fuoriesce dal com...

Страница 8: ...n una mano sollevare con cautela il coperchio LCD fino a un angolo di visione comodo non superare i 120 gradi mentre con l altra mano come illustrato nella seguente Figura 1 si mantiene la base del co...

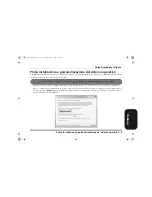
Страница 9: ...te 1 Alla prima accensione del computer portatile dopo una breve fase con schermo nero e scorrimento di una barra bianca compare una schermata in cui si pu selezionare la nazionalit della tastiera Sce...

Страница 10: ...sonalizzazione dei dati per accedere alle Risorse del computer 4 Inserire il nome utente e la password e un immagine da associare all account utente Il codice seriale si trova sull etichetta presente...

Страница 11: ...oste controllare e premere Avanti per continuare 7 La configurazione completata attendere che il sistema operativo esegua il salvataggio delle impostazioni e il caricamento di Windows Vista Win 7 8 Al...

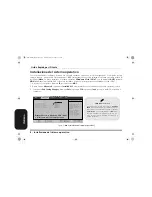
Страница 12: ...BIOS selezione del sistema operativo Main Advanced Security Boot Exit F1 Help Select Item Change Values F9 Setup Defaults Esc Exit Select Menu Enter Select XSub Menu F10 Save and Exit Item Specific H...

Страница 13: ...ess molto importante installare i driver nell ordine elencato nella Tabella 4 Non sar possibile utilizzare la maggior parte dei controlli avanzati finch i driver e le utilit necessarie non sono state...

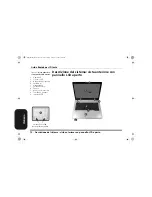
Страница 14: ...perto Figura 3 Vista anteriore con pannello LCD aperto 1 Camera PC 2 Schermo LCD 3 Altoparlanti incorporati 4 Pulsante di alimentazione 5 Pulsanti Hot Key 6 Tastiera 7 Microfono incorporato 8 TouchPad...

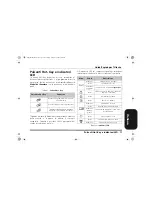
Страница 15: ...to corrente del computer Tabella 2 Indicatori LED Pulsante Hot Key Funzione Attivare il programma di posta elettro nica predefinito Attivare il browser Internet predefinito Attivazione disattivazione...

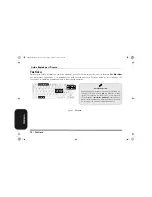
Страница 16: ...nalit operative Tastierino Tasti funzione Bloc Num Tasto Fn Bloc Scorr numerico Caratteri speciali Alcune applicazioni software consentono di utilizzare i ta sti numerici insieme al tasto Alt per prod...

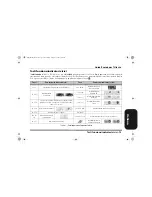
Страница 17: ...nzione indicatori visivi Fn Play pausa nei programmi Audio Video Fn F8 F9 Riduzione Aumento luminosit LCD Fn F1 Attiva disattiva TouchPad Fn F10 Attiva disattiva Camera PC Fn F11 Attiva disattiva LAN...

Страница 18: ...ta delle cuffie 12 Bay unit ottica 13 Foro di espulsione di emergenza 14 Jack RJ 11 per modem 15 Slot blocco di sicurezza 16 Batteria 1 2 5 4 6 3 7 6 8 9 10 11 16 15 14 13 6 12 Lato anteriore Lato sin...

Страница 19: ...ay CPU RAM 3 Ventola 4 Coperchio bay disco rigido 5 Coperchio modulo Bluetooth 6 Altoparlanti incorporati Surriscaldamento Per prevenire il surri scaldamento del computer accertarsi che non vi sia nul...

Страница 20: ...ermo nel menu Aspetto e personalizzazione menu o fare doppio clic personalizzazione Impostazioni schermo 3 Scorrere l indicatore nella posizione desiderata in Risoluzione 4 Fare clic sulla freccia e s...

Страница 21: ...ostazioni avanzate risparmio energia per ac cedere a ulteriori opzioni di configura zione Funzionalit audio possibile configurare le opzioni audio del computer dal pannello di controllo Audio di Windo...

Страница 22: ...clic su Annulla e seguire la procedura di installazione come descritto Windows Update Dopo l installazione di tutti i driver assicurarsi di aver attivato Windows update per ottenere tutti i recenti ag...

Страница 23: ...dalla Sospensione Lo stato predefinito del modulo Bluetooth sar spento dopo aver ripreso dallo stato di risparmio energetico Sospensione Utilizzare la combinazione di tasti Fn F12 per accendere il mod...

Страница 24: ...BIOS Phoenix BIOS SPI Flash ROM da 8Mb Opzioni di LCD 15 4 WXGA WXGA WSXGA TFT LCD Core Logic Chipset SiS M672 SiS968 Memoria Due slot SODIMM 200 pin dotate di sup porto per la memoria DDRII DDR2 667...

Страница 25: ...ede Modulo lettore di schede 7 in 1 MS MS Pro SD Mini SD MMC RS MMC MS Duo Nota Schede MS Duo Mini SD RS MMC richiedono PC adattatore Alimentazione Pacco batteria Smart agli ioni di Litio a 6 celle 44...

Страница 26: ...Italiano qrgOlibookP1500 IT fm Page 22 Wednesday October 21 2009 10 47 AM...

Страница 27: ...M815L QG TOC eng fm Page I Saturday August 1 2009 1 54 PM English...

Страница 28: ...ncise User Guide 1 Instructions for Care and Operation 2 System Startup 4 First installation and Operating System Customisation 5 Operating System Setup 8 System Software 9 System Map Front View with...

Страница 29: ...ntents without notice All computer s features have already been setup If you are planning to re configure or re install portions of the system refer to the expanded User s Manual The Device Drivers Us...

Страница 30: ...rrupted power supply If you are unsure of your local power specifications consult your service representative or local power company The AC DC adapter may have either a 2 prong or a 3 prong grounded p...

Страница 31: ...computer has been dropped or damaged do not touch the poisonous liquid if the LCD panel bre aks If there is an unusual odor heat or smoke coming from your computer Cleaning Use a soft clean cloth to c...

Страница 32: ...adapter 5 Use one hand to raise the lid LCD to a comfortable viewing angle do not exceed 120 degrees use the other hand as illustrated in Figure 1 to support the base of the computer Note Never lift t...

Страница 33: ...nts 1 On first powering on the portable computer after a short phase with a black screen and scrolling white bar a screen appears in which you can select the nationality for the keyboard Select the se...

Страница 34: ...ta to access Computer Resources 4 Enter the user name and password and choose an image to associate with the user account The serial code can be found on the label on the back of the notebook If you d...

Страница 35: ...nd press Next to continue 7 The configuration is complete Wait while the operating system saves the settings and loads Windows Vista Win 7 8 When loading is complete the Windows desktop appears with t...

Страница 36: ...S Operating System Selection Main Advanced Security Boot Exit F1 Help Select Item Change Values F9 Setup Defaults Esc Exit Select Menu Enter Select XSub Menu F10 Save and Exit Item Specific Help Advan...

Страница 37: ...er and a hard ware component e g a wireless network module It is very im portant that you install the drivers in the order listed in Table 4 You will be unable to use most advanced controls until the...

Страница 38: ...pen Figure 3 Front View with LCD Panel Open 1 Built In PC Camera 2 LCD 3 Speakers 4 Power Button 5 Hot Key Buttons 6 Keyboard 7 Built In Microphone 8 TouchPad Buttons 9 LED Indicators 8 TouchPad Butto...

Страница 39: ...computer Table 2 LED Indicators Hot Key Button Function Activate the Default E Mail Browser Activate the Default Internet Program Toggle Silent Mode for power saving Icon Color Description Orange DC P...

Страница 40: ...ion Keys Numeric Keypad Function Keys NumLk ScrLk Numeric Keypad Fn Key Special Characters Some software applications allow the number keys to be used with Alt to produce special characters These spec...

Страница 41: ...able 3 Function Keys Visual Indicators Keys Function Visual Indicators Keys Function Visual Indicators Fn Play Pause in Audio Video Programs Fn F8 F9 Brightness Decrease Increase Fn F1 TouchPad Toggle...

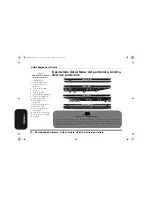
Страница 42: ...1 Headphone Out Jack 12 Optical Device Drive Bay 13 Emergency Eject Hole 14 RJ 11 Modem Jack 15 Security Lock Slot 16 Battery 1 2 5 4 6 3 7 6 8 Front Left Right Rear 9 10 11 16 15 14 13 6 Disc Emergen...

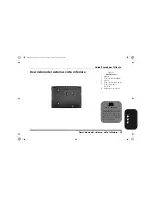
Страница 43: ...1 Battery 2 RAM CPU Bay Cover 3 Vent 4 Hard Disk Bay Cover 5 Bluetooth Module Cover 6 Speakers Overheating To prevent your computer from overheating make sure nothing blocks any vent while the compute...

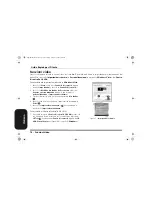
Страница 44: ...reen resolution under the Appearance and Personalization menu or double click Personalization Display Settings 3 Move the slider to the preferred setting in Resolution 4 Click the arrow and scroll to...

Страница 45: ...ther configuration options Audio Features You can configure the audio options on your computer from the Sound control panel in Windows or from the Realtek HD Audio Manager icon in the taskbar control...

Страница 46: ...procedure click Cancel and follow the installation procedure as directed Windows Update After installing all the drivers make sure you enable Windows Update in order to get all the latest security up...

Страница 47: ...uming from the Sleep power saving state Use the key combination Fn F12 to power on the Bluetooth module after the computer resumes from Sleep A file cannot be copied to from a connected Bluetooth devi...

Страница 48: ...ns 15 4 WXGA WXGA WSXGA Glare Type TFT LCD Core Logic SiS M672 SiS968 Chipset Memory Two 200 Pin SO DIMM Sockets Supporting DDRII DDR2 667 MHz Memory Memory Expandable up to 4GB BIOS One 8Mb SPI Flash...

Страница 49: ...Module Card Reader Embedded 7 in 1 Card Reader MS MS Pro SD Mini SD MMC RS MMC MS Duo Note MS Duo Mini SD RS MMC Cards require a PC adapter Power 6 Cell Smart Lithium Ion Battery Pack 4400 mAH Full R...

Страница 50: ...English qrgOlibookP1500 GB fm Page 22 Wednesday October 21 2009 10 45 AM...

Страница 51: ...M815L QG TOC eng fm Page I Saturday August 1 2009 1 54 PM...

Страница 52: ...M815L QG TOC eng fm Page I Saturday August 1 2009 1 54 PM...

Отзывы: