background image


OLIBOARD - Tableaux interactifs


III


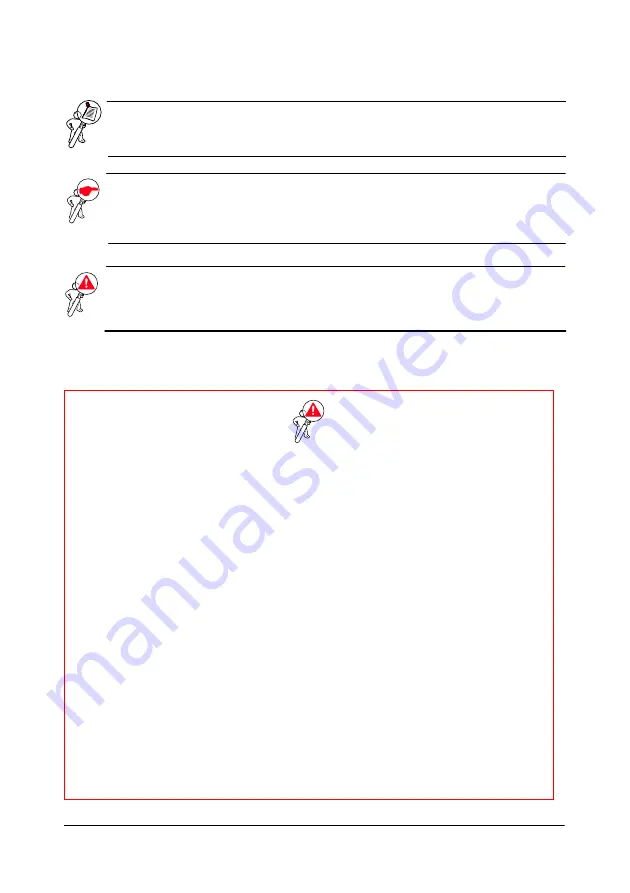
INSTRUCTION :

 constitue une instruction supplémentaire relative au 

logiciel. 


REMARQUE : 

décrit d'éventuels problèmes susceptibles de surgir durant 

l'utilisation du tableau ainsi que les solutions permettant de 
les résoudre et d'en prévenir la survenance. 


ATTENTION :  attire l'attention de l'utilisation sur les risques de 

blessures ou dommages au produit en cas d'usage 
inapproprié. 


Avertissement 


Afin de prévenir les décharges électriques, ne pas installer le tableau 
interactif dans des environnements humides ou enfumés. 


Après avoir installé le tableau interactif, éviter de toucher le cordon 
d'alimentation et le câble de transmission des données. 


Tenir le tableau loin des flammes libres, contacts électriques et éviter 
d'exposer le produit à la lumière directe du soleil. 


Après avoir installé le tableau, contrôler que celui-ci ait été fixé 
correctement. 


Éviter de regarder directement le rayon de lumière émis par le projecteur 
sur le tableau. 


Ne pas toucher le projecteur car celui-ci pourrait être chaud, et ce, même 

après quelques minutes quelques minutes de fonctionnement. Consulter le 
manuel du projecteur pour ce qui est des avertissements et normes 
d'utilisation le concernant. 


Ne pas s'accrocher à l'équerre de soutien du projecteur. 


En cas d'installation du tableau sur le piédestal, faire attention à ne pas se 

prendre les pieds dans ce dernier. 


Содержание OLIBOARD-T

Страница 1: ...ser Manual Manuel del l utilisateur Benutzerhandbuch Manuale utente Manual del usuario OLIBOARD T INTERACTIVE WHITEBOARDS TABLEAUX INTERACTIFS INTERAKTIVE TAFELN LAVAGNE INTERATTIVE PIZARRAS INTERACTIVAS ...

Страница 2: ...authorised personnel All rights reserved No part of this material may be reproduced or transmitted in any form or by any means electronic or mechanical including photocopying recording or similar without prior permission in writing from Olivetti S p A The content of this manual can be modified without warning Every care has been set in the creation realization verification and documentation of the...

Страница 3: ...eboard is installed avoid touching its power and data cables Keep the interactive whiteboard away from open flames electrical contacts and direct sunlight After the interactive whiteboard is installed make sure that it is fixed securely Avoid looking directly at the beam of light emitted by the projector onto the whiteboard Do not touch the projector because it could be hot even after only a few m...

Страница 4: ... on the floor to avoid any possibility of them being tripped over Do not scratch the surface or the frame of the whiteboard with sharp or hard objects When fixed onto a wall the whiteboard must be vertical to the wall surface Do not hang objects or weights onto the whiteboard and if present the pedestal When it is installed on the pedestal use caution whenever you move it to avoid it tipping over ...

Страница 5: ...Do not look directly at the beam of light emitted by the projector onto the whiteboard Do not touch the projector because it could be hot even after only a few minutes of operation Pay attention to the connection cables and if the whiteboard is mounted on a pedestal be careful not to trip over it In any case it is recommended not to run near the whiteboard and the pedestal Do not hang onto the sup...

Страница 6: ...OLIBOARD Interactive Whiteboard VI Page left intentionally blank ...

Страница 7: ...tep by step Installation 10 Installing the Oliboard Software Driver 10 Installing the Oliboard Software 11 Installing the USB Software Driver 11 Removing the Oliboard Software 11 Running the Software 12 Starting the Driver of the Interactive Whiteboard 12 Orienting the Interactive Whiteboard Windows 7 13 Orienting the Interactive Whiteboard Windows XP 14 Starting the Whiteboard Application Softwar...

Страница 8: ...OLIBOARD Interactive Whiteboards VIII Page left intentionally blank ...

Страница 9: ... to ensure resilience to wear and a protection against acts of vandalism featuring high tracing precision rapid response and operational sensitivity it allows intuitive use by even less expert users The software provided offers sophisticated functions such as partial magnification searchlight replay camera customised background specialized tools compass ruler set square etc With the touch of a fin...

Страница 10: ...video projector NOTE some computers are not equipped with this type of port In this case you must use an adapter not supplied with the whiteboard and projector Windows 7 Windows XP Windows 7 Software Configuration Recommended Computer Setup 1 To obtain the best picture on the whiteboard the format of the computer video output its resolution and of the projector must be the same as that of the whit...

Страница 11: ... Whiteboards 3 ENGLISH UNPACKING THE INTERACTIVE WHITEBOARD AND ACCESSORIES The standard Interactive Whiteboard kit contains the following components Interactive Whiteboard the colour of the product could vary Accessories ...

Страница 12: ... pen 2 Colours can vary Pen holder 1 USB special cable about 10 meter 1 Cable for connecting the computer to the Interactive Whiteboard Oliboard Installation Disk 1 Drivers and application software for Windows User Manual 1 User Guide Installation brackets and accessories for wall fixing 1 Wall fixing kit Various mechanical parts ...

Страница 13: ...and available on order In the following the model B5848 Optional floor stand mod B5848 Floor stand dimensions without whiteboard or projector model B5848 width 127 cm depth 75 cm height 246 cm max height of projector stand when assembled Model B5848 comes into two packages package 1 cm 1680 x 770 x 110 gross weight 34 5 Kg package 2 cm 2030 x 750 x 170 gross weight 28 Kg ...

Страница 14: ...OLIBOARD Interactive Whiteboards 6 MAIN FEATURES External View The colour varies according to the model ...

Страница 15: ...d infrared Interface and Power Supply USB Operating Temperature 20 C 55 F Operating Humidity RH 30 80 Power capability 2W Models OLIBOARD 78S External area diagonal dimensions 85 2158 mm 1690 x 1342 mm Active area width height 78 1 4 1988 mm 1580 x 1206 mm Aspect ratio 4 3 Net weight 1 kg 16 Kg Packaging dimensions gross weight 2 Kg 183x149x13 cm 25 Kg ...

Страница 16: ...be connected to the USB port of the computer The VGA or HDMI cable of the video projector must be connected to the VGA or HDMI port of the computer Ref Description 1 VGA or HDMI PC 2 USB port PC 3 USB cable 4 USB port whiteboard 5 VGA or HDMI Video Projector The USB special cable has two labels at the sides indicating the PC side and the whiteboard side When connecting the computer to the video pr...

Страница 17: ...s is equivalent to running the autorun program 3 The Installation Guide window opens 4 Click Install All to perform the express installation 5 Choose the language you want to install and confirm with Next 6 Select the installation path and confirm with Next Oliboard software and driver will be installed 7 At the end a message is displayed asking you the installation of the USB driver USB optical t...

Страница 18: ...board Software disk 2 Click the program logo 3 The Installation Guide window opens 4 Click Install Step By Step Installing the Oliboard Software Driver 1 Click to install the driver for the Interactive Whiteboard 2 Choose the language you want to install and confirm with Next 3 Select the installation path and confirm with Next 4 End the installation by clicking the Finish button ...

Страница 19: ... the driver for the USB cable optical USB touch driver 2 Confirm installation with Next in case of request select the installation path 3 End the installation by clicking the Finish button REMOVING THE OLIBOARD SOFTWARE Click on Start Control Panel Add or Remove Programs select Oliboard then click on Add Remove Select the option for removing all the features installed and follow the instructions s...

Страница 20: ...he message Start device failed make sure that the cable of the whiteboard is connected correctly between the computer and the whiteboard page 10 NOTE After having started the driver click on the icon of the Oliboard driver to activate or deactivate the autostart parameter depending on whether or not you want the Oliboard driver to be run automatically the next time the computer is powered on If th...

Страница 21: ...ch 2 Select the calibration function in the displayed window 3 With the finger or the whiteboard pen click on the mid point of the cross on the whiteboard Repeat this same operation for all the other orientation points being careful to canter well the mid point of the flashing cross with the electronic pen 4 Save orientation INSTRUCTION Select orientation the first time you install the Oliboard Dr...

Страница 22: ... serves to tune the whiteboard for the image to be projected onto it Using the mouse left button click on the Oliboard Driver icon in the control bar at the bottom Select Orientation in the popup menu then select the type of orientation required see the INSTRUCTION note at the end of this paragraph ...

Страница 23: ...reful to canter well the mid point of the flashing cross with the electronic pen INSTRUCTION Select Re orientation the first time you install the Oliboard Driver or if the position of the projector or the Interactive Whiteboard changes or if the display mode changes e g the image size or resolution To perform a rapid re orientation you can select Previous re orientation record as long as no change...

Страница 24: ...the user can customise the tool bar resources and templates NOTE Before starting the application software make sure that the Interactive Whiteboard is connected correctly to the computer and that the Interactive Whiteboard driver is running NOTE For how to operate the software refer to the instructions in the ONLINE HELP selectable from main menu of the Oliboard software Setting Up the Oliboard Fu...

Страница 25: ...ord 1 Click Start All Programs Olivetti Oliboard Software User Manager to display the following window Key in the administrator account data to access the software The default administrator account is Administrator and the Password is oliboard 2 The User Manager window is displayed ...

Страница 26: ...IBOARD Interactive Whiteboards 18 3 Select Edit New User to create a personal account 4 Key in the user name and password and select Create 5 When the process completes the new user appears in the window ...

Страница 27: ...ediately execute the procedure or it is possible to postpone the registration When the number of execution without registration is finished it is necessary to remove the software In order to execute the registration process it is necessary a direct connection to Internet and to insert the activation code normally included in the CD ROM NOTE Registration is not requested if whiteboard is connected ...

Страница 28: ...he XML File Check the version of Internet Explorer Update to Internet Explorer version 6 0 if the version in use is 5 0 or earlier 3 Only certain parts of whiteboard can be written on Carry out the procedure for orienting the whiteboard 4 Some orientation points cannot be found when orienting the whiteboard Make sure that the lateral deviation and the vertical offset of the projector are correct E...

Страница 29: ...e computer resolution have a minimum luminous flux exceeding 500 Lumens For the precise amount the room size must be taken into account 8 What to do when an unerasable colour pen has been used to write on the whiteboard Never use colour pens to write on the Oliboard Should this happen clean the whiteboard lightly using cotton wool dampened with alcohol 9 How to clean the panel of the whiteboard Cl...

Страница 30: ...OLIBOARD Interactive Whiteboards 22 Page left intentionally blank ...

Страница 31: ...roduction partielle ou intégrale de ce document est interdite sous quelque forme que ce soit ou par le biais d un quelconque instrument électronique ou mécanique y compris la photocopie enregistrement ou autres et ce sans autorisation écrite préalable d Olivetti S p A Le contenu de ce manuel peut être modifié sans préavis Le plus grand soin ayant été apporté lors de la création du contrôle et de l...

Страница 32: ...ctif éviter de toucher le cordon d alimentation et le câble de transmission des données Tenir le tableau loin des flammes libres contacts électriques et éviter d exposer le produit à la lumière directe du soleil Après avoir installé le tableau contrôler que celui ci ait été fixé correctement Éviter de regarder directement le rayon de lumière émis par le projecteur sur le tableau Ne pas toucher le ...

Страница 33: ...r de câbles traîner sur le sol pour éviter que les personnes ne puissent s y prendre les pieds Ne pas rayer la surface ni le cadre du tableau avec des objets durs ou pointus En cas d installation murale le tableau doit être parallèle à la surface murale Ne pas accrocher d objets ou de poids sur le tableau et si présent sur le piédestal En cas d installation sur le piédestal faire attention que le ...

Страница 34: ... de lumière émis par le projecteur sur le tableau Ne pas toucher le projecteur car celui ci pourrait être chaud et ce même après quelques minutes quelques minutes de fonctionnement Faire attention aux câbles de branchement et si le tableau est installé sur un piédestal recommander aux élèves de faire attention à ne pas s y prendre les pieds Dans tous les cas recommander aux élèves de ne pas chahut...

Страница 35: ...OLIBOARD Tableaux interactifs VI Page laissée blanche intentionnellement ...

Страница 36: ...on guidée 10 Installation du pilote du logiciel Oliboard 10 Installation du logiciel Oliboard 11 Installation du pilote du USB 11 Désinstallation du logiciel Oliboard 11 Exécution du logiciel 12 Lancement du pilote du tableau interactif 12 Orientation du tableau interactif Windows 7 13 Orientation du tableau interactif Windows XP 14 Lancement du logiciel du tableau 16 Configuration des fonctions O...

Страница 37: ...OLIBOARD Tableaux interactifs VIII Page laissée blanche intentionnellement ...

Страница 38: ...tion contre les actes de vandalisme et d autre part par une très haute précision de traçage rapidité de réponse et sensibilité opérationnelle assurant un usage convivial même pour les moins experts Le logiciel accompagnant le produit offre des fonctions avancées comme l agrandissement partiel le réflecteur la reproduction l appareil photo le fond d écran personnalisable et des outils spécialisés c...

Страница 39: ...vidéoprojecteur REMARQUE certains ordinateurs sont dépourvus de ce type de porte Dans ce cas il sera nécessaire d utiliser un adaptateur non fourni avec le tableau et le vidéoprojecteur Windows 7 Windows XP Windows 7 Configuration logicielle Configuration suggérée pour l ordinateur 1 Pour une vision optimale du tableau le format de la sortie vidéo de l ordinateur soit la résolution et du projecteu...

Страница 40: ...OLIBOARD Tableaux interactifs 3 FRANÇAIS DEBALLAGE ET ACCESSOIRES Le tableau interactif comprend normalement les composants suivants Tableau interactif la couleur du produit peut varier Accessoires ...

Страница 41: ...leau 2 Les couleurs peuvent varier Porte stylos 1 Câble spécial USB de 10 mètres 1 Câble pour brancher l ordinateur au tableau interactif CD d installation Oliboard 1 Pilote et logiciel pour Windows Manuel de l utilisateur 1 Guide d utilisation Équerres d installation et kit de fixation murale 1 Kit de fixation murale Pièces mécaniques en vrac ...

Страница 42: ...re commandé séparément Ci après le modèle B5848 Piédestal en option mod B5848 Dimensions piédestal sans tableau ni projecteur modèle B5848 largeur 127 cm prof 75 cm hauteur 246 cm hauteur maxi du support projecteur monté Emballage piédestal modèle B5848 composé de deux emballages emballage 1 1680 x 770 x 110 cm poids brut 34 5 Kg env emballage 2 2030 x 750 x 170 cm poids brut 28 Kg env ...

Страница 43: ...OLIBOARD Tableaux interactifs 6 CARACTÉRISTIQUES PRINCIPALES Aspect extérieur La couleur peut varier en fonction du modèle ...

Страница 44: ...nterface et alimentation USB Température de fonctionnement de 20 C à 55 Ԩ Taux d humidité de fonctionnement Taux d humidité de 30 à 80 Puissance 2W Modèles OLIBOARD 78T Zone extérieure diagonale dimensions 85 2158 mm 1690 x 1342 mm Zone active largeur hauteur 78 1 4 1988 mm 1580 x 1206 mm Format 4 3 Poids net 1 kg 16 Kg Emballage dimensions poids brut 2 Kg 183x149x13 cm 25 Kg ...

Страница 45: ...e USB de l ordinateur Le câble BGA ou HDMI du vidéoprojecteur doit être branché à la porte VGA ou HDMI de l ordinateur Réf Description 1 VGA ou HDMI PC 2 USB PC 3 Câble spécial USB 4 Porte interface tableau USB 5 VGA ou HDMI Vidéoprojecteur Le câble spécial USB a deux étiquettes à ses côtés qui indiquent le côté du PC et le côté du Tableau Le branchement entre l ordinateur et le vidéoprojecteur do...

Страница 46: ...nstaller afin de pouvoir lancer l installation rapide 5 Sélectionner la langue voulue puis confirmer en appuyant sur Continuer 6 Sélectionner la destination pour l installation du logiciel et confirmer en appuyant sur Continuer L installation du logiciel e du pilote sera réalisée 7 Lorsque le système demandera si l on cliquer sur l option Oui pour lancer l installation À la fin un message s affich...

Страница 47: ...u programme 3 Une fenêtre pour l installation guidée s affichera 4 Cliquer sur Installation guidée Installation du pilote du logiciel Oliboard 1 Cliquer sur pour installer le pilote du tableau interactif 2 Sélectionner la langue voulue puis confirmer en appuyant sur Continuer 3 Sélectionner la destination pour l installation du pilote et confirmer en appuyant sur Continuer 4 Achever l installation...

Страница 48: ...2 Confirmer l exécution de l installation avec Continuer dans le cas de demande sélectionner le parcours d installation 3 Confirmer l achèvement de l installation avec Fin DESINSTALLATION DU LOGICIEL OLIBOARD Cliquer sur Démarrer Panneau de configuration Installation programmes puis sélectionner Oliboard et enfin cliquer sur Désinstaller programmes Sélectionner l option afin de supprimer toutes le...

Страница 49: ...QUE si le message Erreur démarrage dispositif est affiché contrôler que le câble du tableau est branché correctement à l ordinateur et au tableau page 10 REMARQUE après avoir lancé l exécution du pilote cliquer sur l icône du pilote Oliboard afin d activer ou de désactiver le paramètre de démarrage automatique selon si l on souhaite lancer ou non automatiquement l exécution d Oliboard lors du proc...

Страница 50: ...ch Oliboard Touch 2 Sélectionner la fonction de calibration par la fenêtre visualisée 3 Cliquer avec le doit ou le stylo du tableau au centre de la croix sur le tableau Puis répéter l opération pour les autres points d orientation tout en veillant à bien centrer le cœur de la croix 4 Sauver l orientation INSTRUCTION sélectionner Orientation lors de la première installation du pilote Oliboard ou lo...

Страница 51: ...ableau pour ce qui est de l image projetée sur ce dernier Cliquer sur la touche gauche de la souris sur l icône du Pilote Oliboard dans la barre des tâches en bas sélectionner Orientation dans le menu déroulant puis sélectionner la modalité d orientation souhaitée voir remarque INSTRUCTION à la fin de ce paragraphe ...

Страница 52: ... cœur de la croix clignotante INSTRUCTION sélectionner Réorientation lors de la première installation du pilote Oliboard ou lorsque la position du projecteur ou du tableau interactif a été changée ou encore si la modalité d affichage a été modifiée ex dimension de l image ou résolution Pour effectuer l orientation de façon rapide il est possible de sélectionner Réorientation précédente à condition...

Страница 53: ... de personnaliser la barre d outils les ressources ainsi que les modèles REMARQUE avant de lancer le programme contrôler que le tableau interactif a été branché correctement au PC et que le pilote du tableau est en cours d exécution REMARQUE pour ce qui est des modalités de fonctionnement du logiciel consulter les instructions du GUIDE en ligne AIDE en ligne qui peut être activé depuis le menu du ...

Страница 54: ...ous les programmes Olivetti Logiciel Oliboard Gestionnaire utilisateur pour afficher la fenêtre suivante Saisir les données du compte administrateur afin de pouvoir accéder au logiciel Le compte administrateur par défaut est le suivant Administrateur Mot de passe oliboard 2 La fenêtre Gestionnaire utilisateur s ouvrira ...

Страница 55: ...nteractifs 18 3 Sélectionner Modifier Nouvel utilisateur pour créer un compte personnel 4 Saisir le nom utilisateur et le mot de passe puis sélectionner Créer 5 À la fin le nouvel utilisateur sera affiché dans la fenêtre ...

Страница 56: ...enregistrement immédiatement ou bien de le faire plus tard Si le tableau n a pas été enregistré et que le nombre de d exécutions possibles est épuisé il sera nécessaire de désinstaller le logiciel Pour enregistrer le logiciel il est nécessaire d être connecté à Internet et de disposer du code d activation normalement fourni avec le CD ROM du logiciel REMARQUE l enregistrement du logiciel n est pas...

Страница 57: ...on utilisée est 5 0 ou inférieure 3 Il n est possible d écrire que sur certaines parties du tableau Exécuter la procédure de Réorientation du tableau 4 Durant l orientation du tableau il est impossible de trouver certains points d orientation Contrôler que la déviation latérale et l offset vertical du projecteur sont corrects Contrôler que tous les contenus affichés sur l écran de l ordinateur pui...

Страница 58: ... la puissance lumineuse minimale doit être supérieure à 500 Lumen Pour une configuration spécifique faire référence aux dimensions de la salle 8 Que faire lorsqu on a utilisé un feutre de couleur non effaçable pour écrire sur le tableau Ne jamais utiliser de feutres colorés pour écrire sur le tableau Si cela arrive nettoyer délicatement le tableau à l aide d un coton absorbant humidifié d alcool 9...

Страница 59: ...OLIBOARD Tableaux interactifs 22 Page laissée blanche intentionnellement ...

Страница 60: ...le Rechte vorbehalten Ohne vorherige schriftliche Genehmigung seitens der Fa Olivetti S p A dürfen diese Unterlagen oder Teile davon weder vervielfältigt noch in jeglicher Form elektronisch oder mechanisch z B durch Fotokopieren Aufnahme oder ähnliches weitergereicht werden Der Inhalt dieses Handbuches kann ohne vorherige Ankündigung geändert werden Die Software der Oliboard Tafel sowie der Inhalt...

Страница 61: ...Tafel mit dem Strom versorgungskabel und dem Datenkabel in Berührung zu kommen Halten Sie die interaktive Tafel fern von offenem Feuer Stromkontakten und direkter Sonneneinstrahlung Vergewissern Sie sich nach dem Aufbau dass die interaktive Tafel sicher befestigt ist Vermeiden Sie direkt in den Lichtstrahl zu schauen der vom Projektor auf die Tafel geworfen wird Den Projektor nicht berühren da er ...

Страница 62: ...uf dem Boden herum liegen lassen da Stolpergefahr besteht Die Oberfläche und den Rahmen der Tafel nicht mit harten oder spitzen Gegenständen zerkratzen Bei Wandmontage muss die Tafel vertikal zur Wandfläche angebracht werden Hängen Sie keine Gegenstände oder Gewichte an die Tafel und falls vorhanden an den Ständer Bei Montage im Ständer die Tafel mit Vorsicht verschieben damit sie nicht umkippt Di...

Страница 63: ...n den Lichtstrahl schauen der vom Projektor auf die Tafel geworfen wird Den Projektor nicht berühren da er nach wenigen Minuten Betrieb bereits heiß sein könnte Auf die Verbindungskabel achten und falls die Tafel im Ständer montiert ist darauf achten nicht über den Ständer zu stolpern Grundsätzlich ist es angebracht in der Nähe der Tafel und des Ständers nicht zu rennen Keine Gegenstände an die Ha...

Страница 64: ...OLIBOARD Interaktive Tafeln VI Beabsichtigte Leerseite ...

Страница 65: ...on 10 Oliboard Software Treiber installieren 10 Oliboard Software installieren 11 Software Treiber für USB installieren 11 Oliboard Software deinstallieren 11 Software starten 12 Treiber der interaktiven Tafel starten 12 Kalibrieren der interaktiven Tafel Windows 7 13 Kalibrieren der interaktiven Tafel WIndowsXP 14 Anwendungssoftware der Tafel starten 16 Oliboard Funktionen einstellen 16 Persönlic...

Страница 66: ...OLIBOARD Interaktive Tafeln VIII Beabsichtigte Leerseite ...

Страница 67: ...nsachgemäße Handhabung ist Aufgrund der hohen Zeichnungspräzision der schnellen Rückmeldungen und der Bedienungssensibilität können selbst unerfahrene Benutzer problemlos mit der Tafel arbeiten Die mitgelieferte Software bietet fortschrittliche Funktionen z B Vergrößerung von Bereichen Scheinwerferfunktion Wiedergabe Kamera individuell einstellbarer Hintergrund spezielle Hilfsmittel Zirkel Lineal ...

Страница 68: ...tors HINWEIS Bei einigen Rechnern ist dieser Anschluss nicht vorhanden In diesem Fall wird ein Adapter benötigt nicht im Lieferumfang der Tafel und des Projektors enthalten Windows 7 Windows XP Windows 7 Software Konfiguration Empfohlene Rechnereinstellungen 1 Für eine optimale Bilddarstellung auf der Tafel muss das Format der Bildschirmausgabe des Rechners seine Auflösung und das des Projektors i...

Страница 69: ...teraktive Tafeln 3 DEUTSCH AUSPACKEN DER TAFEL UND DER ZUBEHÖRTEILE Im Lieferumfang der interaktiven Tafel sind folgende Komponenten enthalten Interaktive Tafel Die Farbe des Produktes kann variieren Zubehörteile ...

Страница 70: ...2 Die Farben können variieren Stifthalter 1 USB Spezialkabel von 10 Meter Länge 1 Kabel um die interaktive Tafel an einen Rechner anzuschließen Oliboard Installations CD 1 Treiber und Anwendungs software für Windows Benutzerhandbuch 1 Gebrauchs anleitung Montagehalterun gen und Zubehör teile für die Wand montage 1 Kit für die Wand montage Verschiedene mechanische Teile ...

Страница 71: ...tellt werden Nachfolgend Modell B5848 Optionaler Tafelständer Mod B5848 Abmessungen des Ständers ohne Tafel und Projektor Modell B5848 Breite 127 cm Tiefe 75 cm Höhe 246 cm max Höhe der Projektorhalterung nach der Montage Das Modell B5848 besteht aus zwei Verpackungen Verpackung 1 cm 1680 x 770 x 110 Bruttogewicht 34 5 Kg Verpackung 2 cm 2030 x 750 x 170 Bruttogewicht 28 Kg ...

Страница 72: ...OLIBOARD Interaktive Tafeln 6 HAUPTMERKMALE Vorderansicht Die Farbe kann je nach Modell variieren ...

Страница 73: ...terface und Stromversorgung USB Betriebstemperatur 20 C 55 C Luftfeuchtigkeit RH 30 80 Stromleistung 2W Modelle OLIBOARD 78T Kompletter Bereich diagonal Abmessungen 85 2158 mm 1690 x 1342 mm Aktiver Bereich Breite Höhe 78 1 4 1988 mm 1580 x 1206 mm Abbildungsverhältnis 4 3 Nettogewicht 1 kg 16 Kg Verpackung Abmessungen Bruttogewicht 2 Kg 183x149x13 cm 25 Kg ...

Страница 74: ...ngeschlossen werden Das VGA Kabel oder HDMI des Videoprojektors muss am VGA Anschluss oder HDMI des Rechners angeschlossen werden Ref Bezeichnung 1 VGA oder HDMI PC 2 USB PC 3 USB Spezialkabel 4 USB Interface Tafel 5 VGA oder HDMI Videoprojektor Das spezielle USB Kabel hat zwei Markierungen an den Enden die zeigen welches Ende an den PC und welches an die Tafel angeschlossen werden muss Beim Ansch...

Страница 75: ...m Starten des Autorun Programms 3 Das Fenster mit der Installationsbedienerführung erscheint 4 Klicken Sie auf Alles installieren um eine Schnellinstallation durchzuführen 5 Wählen Sie die Sprache aus die installiert werden soll und bestätigen Sie mit Weiter 6 Wählen Sie den Installationspfad und bestätigen Sie mit Weiter Die Installation der Software und der Treiber software Olicard wird dann aus...

Страница 76: ... Das Fenster mit der Installationsbedienerführung erscheint 4 Klicken Sie auf Schrittweise Installation Oliboard Software Treiber installieren 1 Klicken Sie auf um die Treiber der interaktiven Tafel zu installieren 2 Wählen Sie die Sprache aus die installiert werden soll und bestätigen Sie mit Weiter 3 Wählen Sie den Installationspfad und bestätigen Sie mit Weiter 4 Schließen Sie die Installation ...

Страница 77: ...bel zu installieren 2 Die Installation mit Weiter bestätigen falls erforderlich den Installationspfad eingeben 3 Klicken Sie auf Beenden um die Installation abzuschliessen OLIBOARD SOFTWARE DEINSTALLIEREN Klicken Sie auf Start Systemsteuerung Software installieren oder entfernen wählen Sie Oliboard und klicken Sie anschließend auf Programme entfernen Wählen Sie dann die Option zum Entfernen aller ...

Страница 78: ...tionsmoduls HINWEIS Erscheint die Meldung Gerät starten fehlgeschlagen prüfen Sie ob das Spezialkabel korrekt an den Rechner und an der Tafel angeschlossen ist Seite 13 HINWEIS Nachdem der Treiber gestartet wurde klicken Sie auf das Icon des Oliboard Treibers um die Autostart Einstellung zu aktivieren oder zu deaktivieren je nach dem ob Sie möchten dass der Oliboard Treiber nach dem Neustart des R...

Страница 79: ...ehe Anweisungshinweis am Ende dieses Abschnitts 2 Wählen Sie die Funktion Kalibrierung im gezeigten Fenster 3 Berühren Sie die Mitte des Kreuzes mit dem Finger oder dem Stift Hintereinander wiederholen Sie diesen Schritt für alle anderen Punkte mit der größtmöglichen Sorgfalt das Kreuz in der Mitte zu berühren 4 Speichern Sie die Kalibrierung ANWEISUNG Wählen Sie bei der Erstinstallation des Olibo...

Страница 80: ...ann das Bild das auf die Tafel projiziert wird ausgerichtet werden Klicken Sie mit der linken Maustaste auf das Oliboard Treiber Icon in der unteren Steuerleiste Wählen Sie im Aufklappmenü Kalibrierung und wählen Sie dann die gewünschte Kalibrierung siehe Anweisungshinweis am Ende dieses Abschnitts ...

Страница 81: ...auf den elektronischen Stift genau in die Mitte des blinkenden Kreuzes zu setzen ANWEISUNG Wählen Sie bei der Erstinstallation des Oliboard Treibers Neu Kalibrierung und auch wenn die Position des Projektors oder der interaktiven Tafel oder der Anzeigemodus geändert wurde z B Bildgröße oder Auflösung Um eine schnelle Neu Kalibrierung auszuführen können Sie Aufgezeichnete vorherige Kalibrierung wäh...

Страница 82: ... der Benutzer die Hilfsmittelleiste die Stammdaten und die Vorlagen personalisieren HINWEIS Bevor Sie das Anwendungsprogramm starten vergewissern Sie sich dass die interaktive Tafel korrekt am PC angeschlossen ist und dass der Treiber der interaktiven Tafel aktiv ist HINWEIS Für die Bedienung der Software siehe die Anweisungen in der Online Hilfe die vom Hauptmenü der Oliboard Software aufgerufen ...

Страница 83: ...auf Start Alle Programme Olivetti Oliboard Software Benutzer Manager folgendes Fenster erscheint Geben Sie die Daten für das Administrator Konto ein für den Zugriff auf die Software Voreingestellt ist als Administrator Konto Administrator und als Passwort oliboard 2 Das Benutzer Manager Fenster erscheint ...

Страница 84: ...18 3 Wählen Sie Bearbeiten Neuer Benutzer um ein persönliches Benutzerkonto einzurichten 4 Geben Sie den Benutzernamen und das Passwort ein und wählen Sie Erstellen 5 Nach dem Einrichten wird der neue Benutzer im Fenster angezeigt ...

Страница 85: ...ung kann sofort oder später erfolgen Wenn die Anzahl der ohne Registrierung zulässigen Aufrufe erreicht ist muss die Software deinstalliert werden Für die Registrierung der Software benötigen Sie einen Internet Zugang und der Aktivierungscode im Regelfall auf der mitgelieferten CD ROM enthalten muss eingegeben werden HINWEIS Die Registrierung der Software ist nicht erforderlich wenn die Tafel am R...

Страница 86: ...n Sie die Version des Internet Explorers Aktualisieren Sie auf die Version 6 0 wenn die Version 5 0 oder eine ältere Version derzeit im Einsatz ist 3 Man kann nur in einigen Bereichen der Tafel schreiben Kalibrieren Sie die Tafel 4 Beim Kalibrieren der Tafel werden einige Kalibrierungspunkte nicht gefunden Prüfen Sie ob die seitliche Abweichung und das senkrechte Offset des Projektors korrekt sind...

Страница 87: ...en erfüllen es muss ein Frontprojektor sein er muss die Auflösung des Rechners unterstützen er muss eine Mindestlichtstärke von über 500 Lumen haben Für die Ermittlung der genauen Lichtstärke ist die Raumgröße zu berücksichtigen 8 Was kann man tun wenn mit einem nicht löschbaren Farbstift auf die Tafel geschrieben wurde Verwenden Sie niemals Farbstifte um auf die Tafel zu schreiben Sollte dies jed...

Страница 88: ...OLIBOARD Interaktive Tafeln 22 Beabsichtigte Leerseite ...

Страница 89: ...on autorizzato Tutti i diritti riservati Nessuna parte di questo documento può essere riprodotta o trasmessa in qualsiasi forma o strumento elettronico o meccanico compresa la fotocopiatura registrazione o altri senza la preventiva autorizzazione scritta di Olivetti S p A Il contenuto di questo manuale può essere modificato senza preavviso Ogni cura è stata posta nella creazione realizzazione veri...

Страница 90: ...rattiva evitare di toccare il cavo di alimentazione e il cavo di trasmissione dati Tenere la lavagna interattiva lontano da fiamme libere contatti elettrici e luce solare diretta Dopo l installazione assicurarsi che la lavagna interattiva sia ben fissata Evitare di guardare direttamente il fascio di luce emesso dal proiettore sulla lavagna Non toccare il proiettore perché potrebbe essere caldo anc...

Страница 91: ...pavimento per evitare ogni possibilità di inciamparvi Non graffiare la superficie o la cornice della lavagna con oggetti duri o appuntiti In caso di installazione a parete la lavagna deve essere parallela alla superficie della parete Non appendere oggetti o pesi alla lavagna e se presente al piedistallo In caso di installazione su piedistallo usare cautela in eventuali spostamenti per evitare riba...

Страница 92: ...on guardare direttamente il fascio di luce emesso dal proiettore sulla lavagna Non toccare il proiettore perché potrebbe essere caldo anche dopo pochi minuti di funzionamento Fare attenzione ai cavi di collegamento e se la lavagna è installata sul piedistallo raccomandare di fare attenzione a non inciampare nello stesso Raccomandare comunque di non correre vicino alla lavagna e al piedistallo Non ...

Страница 93: ...OLIBOARD Lavagne interattive VI Pagina lasciata intenzionalmente bianca ...

Страница 94: ...zione driver software Oliboard 10 Installazione del software Oliboard 11 Installazione del driver software USB 11 Disinstallazione del software Oliboard 11 Esecuzione del software 12 Avvio del driver della lavagna interattiva 12 Orientamento della lavagna interattiva Windows 7 13 Orientamento della lavagna interattiva Windows XP 14 Avvio del software applicativo della lavagna 16 Impostazione delle...

Страница 95: ...OLIBOARD Lavagne interattive VIII Pagina lasciata intenzionalmente bianca ...

Страница 96: ...istenza all usura e buona protezione da atti vandalici e da un elevata precisione di tracciatura rapidità di risposta e sensibilità operativa per consentire un uso naturale anche ai meno esperti Il software in dotazione offre funzioni evolute quali ingrandimento parziale riflettore riproduzione fotocamera fondo personalizzabile strumenti specializzati compasso righello squadra goniometro Con il to...

Страница 97: ...del video proiettore NOTA alcuni computer sono sprovvisti di questa porta in tal caso occorrerà usare un adattatore non in dotazione alla lavagna e al proiettore Windows 7 Windows XP Windows 7 Configurazione software Impostazioni suggerite per il computer 1 Per una visione ottimale sulla lavagna il formato dell uscita video del computer la risoluzione e del proiettore devono essere nel medesimo fo...

Страница 98: ...RD Lavagne interattive 3 ITALIANO DISIMBALLAGGIO E ACCESSORI La dotazione della lavagna interattiva comprende normalmente i seguenti componenti Lavagna interattiva Il colore del prodotto può variare Accessori ...

Страница 99: ...colori possono variare Porta penne 1 Cavo speciale USB da circa 10 metri 1 Cavo per la connessione tra computer e lavagna interattiva Disco di installazione Oliboard 1 Driver e software applicativo per Windows Manuale utente 1 Guida per l utente Staffe di installazione e accessori per il fissaggio a parete 1 Kit di fissaggio a parete Varie parti meccaniche ...

Страница 100: ...bile a richiesta Di seguito il modello B5848 Piedistallo opzionale mod B5848 Dimensioni piedistallo senza lavagna e proiettore modello B5848 larghezza 127 cm prof 75 cm altezza 246 cm max altezza del supporto proiettore montato Imballo piedistallo modello B5848 costituito da due imballi package 1 cm 1680 x 770 x 110 peso lordo 34 5 Kg package 2 cm 2030 x 750 x 170 peso lordo 28 Kg ...

Страница 101: ...OLIBOARD Lavagne interattive 6 CARATTERISTICHE PRINCIPALI Aspetto esteriore Il colore può variare in funzione del modello ...

Страница 102: ...ossi Interfaccia e alimentazione USB Temperatura di esercizio 20 55 Umidità di esercizio RH 30 80 Assorbimento 2W Modelli OLIBOARD 78T Area esterna diagonale dimensioni 85 2158 mm 1690 x 1342 mm Area attiva larghezza altezza 78 1 4 1988 mm 1580 x 1206 mm Rapporto d aspetto 4 3 Peso netto 1 kg 16 Kg Imballo dimensioni peso lordo 2 Kg 183x149x13 cm 25 Kg ...

Страница 103: ...essere connesso alla porta USB del computer Il cavo VGA o HDMI del video proiettore deve essere connesso alla porta VGA o HDMI del computer Rif Descrizione 1 VGA o HDMI PC 2 Porta USB PC 3 Cavo speciale USB 4 Porta USB lavagna 5 VGA o HDMI video proiettore Il cavo speciale USB ha due etichette ai suoi lati che indicano il lato PC e il lato Lavagna Il collegamento fra computer e video proiettore de...

Страница 104: ...il programma di autorun 3 Apparirà la finestra della guida all installazione 4 Fare clic su Install All per eseguire l installazione rapida 5 Selezionare la lingua che si desidera installare e confermare con Next 6 Selezionare il percorso di installazione e confermare con Next L installazione del software e del driver sw Oliboard verrà eseguita 7 Al termine verrà richiesta l installazione del driv...

Страница 105: ... sul logo del programma 3 Apparirà la finestra della guida all installazione 4 Fare clic su Install Step By Step Installazione driver software Oliboard 1 Fare clic su per installare il driver sw della lavagna interattiva 2 Selezionare la lingua che si desidera installare e confermare con Next 3 Selezionare il percorso di installazione e confermare con Next 4 Terminare l installazione premendo il p...

Страница 106: ...r il cavo USB optical USB touch driver 2 Confermare l esecuzione dell installazione con Next in caso di richiesta selezionare il percorso di installazione 3 Confermare il completamento dell installazione con Finish DISINSTALLAZIONE DEL SOFTWARE OLIBOARD Fare clic su Start Pannello di controllo Programmi e funzionalità selezionare Oliboard e successivamente fare clic su Rimuovi programmi Quindi sel...

Страница 107: ...icona del driver NOTA se compare il messaggio Avvio dispositivo fallito verificare che il cavo della lavagna sia collegato correttamente al computer e alla lavagna pag 10 NOTA dopo aver avviato l esecuzione del driver cliccare sull icona di Oliboard driver per attivare o disattivare il parametro di avvio automatico in funzione che si voglia o meno lanciare in automatico l esecuzione di Oliboard dr...

Страница 108: ... Touch Oliboard Touch 2 Selezionare la funzione di calibrazione dalla finestra visualizzata 3 Toccare al centro della croce usando il dito o la penna della lavagna Successivamente ripetere l operazione per gli altri punti di orientamento avendo cura di centrare bene la croce 4 Salvare l orientamento ISTRUZIONE selezionare orientamento in occasione della prima installazione dell Oliboard Driver o s...

Страница 109: ...lavagna rispetto all immagine proiettata su di essa Fare clic con il pulsante sinistro del mouse sull icona dell Oliboard Driver nella barra dei comandi in basso selezionare Orientamento nel menu a comparsa e quindi selezionare la modalità di orientamento desiderata vedere nota ISTRUZIONE in fondo a questo paragrafo ...

Страница 110: ... la penna elettronica il centro della croce lampeggiante ISTRUZIONE selezionare Ri orientamento in occasione della prima installazione dell Oliboard Driver o se è cambiata la posizione del proiettore o della lavagna interattiva o se è cambiata la modalità di visualizzazione es dimensione dell immagine o risoluzione Per eseguire rapidamente un orientamento è possibile selezionare Ri orientamento pr...

Страница 111: ...à di personalizzare la barra degli strumenti le risorse e i modelli NOTA prima di avviare il programma applicativo assicurarsi che la lavagna interattiva sia correttamente collegata al PC e che il driver della lavagna interattiva sia in esecuzione NOTA per le modalità di funzionamento del software fare riferimento alle istruzioni della GUIDA on line HELP on line attivabile dal menù del software Ol...

Страница 112: ...nali 1 Fare clic su Start Tutti i programmi Olivetti Oliboard Software User Manager apparirà la finestra seguente Digitare i dati dell account amministratore per accedere al software L account amministratore predefinito è Administrator Password oliboard 2 Apparirà la finestra User Manager ...

Страница 113: ...agne interattive 18 3 Selezionare Modifica Nuovo utente per creare un account personale 4 Digitare il nome utente e la password e selezionare Crea 5 Al termine del processo nella finestra comparirà il nuovo utente ...

Страница 114: ...eguire subito la registrazione oppure la si può eseguire in tempi successivi Quando si è esaurito il numero di esecuzioni possibili senza registrazione occorre disinstallare il software Per registrare il software occorre disporre di un collegamento diretto ad Internet e del codice di attivazione di norma fornito con il CD ROM del software NOTA la registrazione del software non è richiesta se la la...

Страница 115: ...ne di Internet Explorer Aggiornare IE alla versione 6 0 se la versione in uso è la 5 0 o una versione precedente 3 È possibile scrivere solo su alcune parti della lavagna Eseguire la procedura di Ri Orientamento della lavagna 4 Durante l orientamento della lavagna risulta impossibile trovare alcuni punti di orientamento Controllare che la deviazione laterale e l offset verticale del proiettore sia...

Страница 116: ...frontale deve supportare la risoluzione del computer la potenza luminosa minima deve essere superiore a 500 Lumen Per il requisito specifico fare riferimento alle dimensioni della sala 8 Cosa fare se si è utilizzato un pennarello colorato non cancellabile per scrivere sulla lavagna Non usare mai pennarelli colorati per scrivere sulla lavagna Qualora accadesse pulire delicatamente la lavagna con co...

Страница 117: ...OLIBOARD Lavagne interattive 22 Pagina lasciata intenzionalmente bianca ...

Страница 118: ...zado Reservados todos los derechos Ninguna parte de este material puede ser reproducida ni transmitida de ninguna forma ni por ningún medio ya sea electrónico o mecánico incluidos el fotocopiado la grabación o medios similares sin la autorización previa por escrito de Olivetti S p A El contenido de este manual puede modificarse sin previo aviso Se ha puesto el máximo cuidado en la creación realiza...

Страница 119: ...ra interactiva evite tocar sus cables de alimentación y datos Mantenga la pizarra interactiva alejada de llamas de fuego expuestas contactos eléctricos o la luz directa del sol Una vez instalada la pizarra interactiva asegúrese de que quede fijada con seguridad Evite mirar directamente al haz de luz que emite el proyector hacia la pizarra No toque el proyector porque podría estar caliente incluso ...

Страница 120: ... para evitar cualquier posibilidad de que se tropiece con ellos No arañe la superficie ni el marco de la pizarra con objetos afilados ni duros Cuando se fija a una pared la pizarra debe estar vertical respecto a la superficie de la pared No cuelgue objetos ni pesos de la pizarra ni del pedestal en el caso de que lo haya Cuando se instale sobre el pedestal tenga cuidado al moverla para evitar que v...

Страница 121: ...siguientes No mire directamente al haz de luz que emite el proyector hacia la pizarra No toque el proyector porque podría estar caliente incluso unos pocos minutos después de su uso Preste especial atención a los cables y cuando la pizarra esté montada sobre un pedestal tenga cuidado de no tropezar con el pedestal En cualquier caso se recomienda no correr cerca de la pizarra y el pedestal No se cu...

Страница 122: ...OLIBOARD Pizarra interactiva VI Esta página se ha dejado en blanco intencionadamente ...

Страница 123: ... 10 Instalación del controlador del software Oliboard 10 Instalación del software Oliboard 11 Instalación del controlador de software para USB 11 Desinstalación del software Oliboard 11 Ejecución del software 12 Inicio del controlador de la Pizarra interactiva 12 Orientación de la Pizarra interactiva Windows 7 13 Orientación de la Pizarra interactiva Windows XP 14 Inicio del software de la aplicac...

Страница 124: ...OLIBOARD Pizarras interactivas VIII Esta página se ha dejado en blanco intencionadamente ...

Страница 125: ...tizar la resistencia al uso y protección contra actos vandálicos Gracias a su alta precisión de trazado su respuesta rápida y su sensibilidad de funcionamiento permite un uso intuitivo incluso por parte de los usuarios menos expertos El software suministrado ofrece sofisticadas funciones tales como ampliación parcial linterna reproducción cámara fondo personalizado herramientas especializadas comp...

Страница 126: ...e vídeo NOTA algunos ordenadores no están equipados con este tipo de puerto En este caso debe utilizar un adaptador no suministrado con la pizarra y el proyector Windows 7 Windows XP Windows 7 Configuración de software Configuración de ordenador recomendada 1 Para obtener la mejor imagen en la pizarra el formato de salida de vídeo del ordenador su resolución y del proyector debe ser el mismo que e...

Страница 127: ...nteractivas 3 ESPAÑOL DESEMBALAJE DE LA PIZARRA INTERACTIVA Y LOS ACCESORIOS El kit estándar de la Pizarra interactiva contiene los siguientes componentes Pizarra interactiva el color del producto puede variar Accesorios ...

Страница 128: ... pueden variar Porta Lápiz 1 Cable especial USB de 10 metros 1 Cable para conectar el ordenador a la Pizarra interactiva Disco de instalación de Oliboard 1 Controladores y software de la aplicación para Windows Manual del usuario 1 Guía del usuario Soportes de instalación y accesorios para fijación en pared 1 Kit de fijación para la pared Varias piezas mecánicas ...

Страница 129: ...o pedido A continuación se muestra el modelo B5848 Soporte especial de suelo mod B5848 Dimensiones del soporte de suelo sin pizarra ni proyector modelo B5848 anchura 127 cm profundidad 75 cm altura 246 cm altura máx del soporte para proyector una vez montado El modelo B5848 se suministra en dos paquetes paquete 1 cm 1 680 x 770 x 110 peso bruto 34 5 kg paquete 2 cm 2 030 x 750 x 170 peso bruto 28 ...

Страница 130: ...OLIBOARD Pizarras interactivas 6 CARACTERÍSTICAS PRINCIPALES Vista exterior El color varía según el modelo ...

Страница 131: ...os Interfaz y fuente de alimentación USB Temperatura de funcionamiento 20 C 55 F Humedad de funcionamiento 30 80 HR Capacidad de potencia 2 W Modelos OLIBOARD 78T Área exterior diagonal dimensiones 85 2158 mm 1690 x 1342 mm Área activa anchura altura 78 1 4 1988 mm 1580 x 1206 mm Relación de aspecto 4 3 Peso neto 1 kg 16 Kg Embalaje dimensiones peso bruto 2 kg 183x149x13 cm 25 Kg ...

Страница 132: ...a debe conectarse al puerto USB del ordenador El cable VGA o HDMI del proyector de vídeo debe conectarse al puerto VGA o HDMI del ordenador Ref Descripción 1 VGA o HDMI PC 2 USB PC 3 Cable especial USB 4 Puerto USB de interfaz de la pizarra 6 VGA o HDMI Proyector de vídeo El cable USB especial tiene dos eiquetas que indican el lado del PC y el lado de la pizarra Para conectar el ordenador al proye...

Страница 133: ...quivale a ejecutar el programa autorun 3 Se abre la ventana de guía de instalación 4 Haga clic en Instalar todo para realizar la instalación exprés 5 Seleccione el idioma que desee instalar y confirme con Siguiente 6 Seleccione la ruta de instalación y confirme con Siguiente Se inicia la instalación del software y del driver Oliboard 7 Al final se le solicitará que instale el driver USB optical US...

Страница 134: ...el icono del programa 3 Se abre la ventana de guía de instalación 4 Haga clic en Instalación paso a paso Instalación del controlador del software Oliboard 1 Haga clic en para instalar el controlador de la Pizarra interactiva 2 Seleccione el idioma que desee instalar y confirme con Siguiente 3 Seleccione la ruta de instalación y confirme con Siguiente 4 Termine la instalación haciendo clic en el bo...

Страница 135: ...a el cable USB 2 Confirme la ejecución de la instalación con Siguiente en caso que se solicite seleccione la ruta de instalación 3 Confirme la finalización de la instalación con Finalizar DESINSTALACIÓN DEL SOFTWARE OLIBOARD Haga clic en Inicio Panel de control Agregar o quitar programas seleccione Oliboard y haga clic en Agregar Quitar Seleccione la opción para eliminar todas las características ...

Страница 136: ...i aparece el mensaje Fallo de inicio de dispositivo en primer lugar asegúrese de que el cable de la pizarra esté conectado correctamente entre el ordenador y la pizarra página 13 NOTA después de iniciar el controlador haga clic en el icono del controlador de Oliboard para activar o desactivar el parámetro inicio automático en función de si desea o no ejecutar automáticamente el controlador de Olib...

Страница 137: ...gente y a continuación seleccione IR Touch Oliboard Touch 2 Seleccione la función de calibración de la ventana visualizada 3 Con el dedo o el lápiz de la pizarra haga clic en el centro del cursor de la pizarra Repita esta misma operación para el resto de puntos de orientación con cuidado de centrar bien el cursor 4 Guarde la orientación INSTRUCCIÓN seleccione Orientación la primera vez que instale...

Страница 138: ...a la imagen que se va a proyectar en ella Con el botón izquierdo del ratón haga clic en el icono del controlador de Oliboard en la barra de control situada en la parte inferior Seleccione Orientación en el menú emergente y a continuación seleccione el tipo de orientación requerida consulte la nota de INSTRUCCIÓN al final de este apartado ...

Страница 139: ...ar bien el cursor intermitente con el lápiz electrónico INSTRUCCIÓN seleccione Reorientación la primera vez que instale el controlador de Oliboard o si cambia la posición del proyector o la Pizarra interactiva o si cambia el modo de pantalla p ej el tamaño de imagen o la resolución Para realizar una reorientación rápida puede seleccionar Registro de reorientación anterior siempre que no se hayan r...

Страница 140: ...rsonalizar la barra de herramientas los recursos y las plantillas NOTA antes de iniciar el software de la aplicación asegúrese de que la Pizarra interactiva esté conectada correctamente al ordenador y que el controlador de la Pizarra interactiva se esté ejecutando NOTA para saber más acerca de cómo utilizar el software consulte las instrucciones de la AYUDA EN LÍNEA que se puede seleccionar en el ...

Страница 141: ...dos los programas Olivetti Oliboard Software Administrador de usuarios para que aparezca la siguiente ventana Introduzca los datos de la cuenta del administrador para acceder al software La cuenta de administrador predeterminada es Administrador y la contraseña oliboard 2 Aparece la ventana Administrador de usuarios ...

Страница 142: ...teractivas 18 3 Seleccione Editar Nuevo usuario para crear una cuenta personal 4 Introduzca un nombre de usuario y contraseña y seleccione Crear 5 Cuando se haya completado el proceso el nuevo usuario aparece en la ventana ...

Страница 143: ...Es posible ejecutar este procedimiento inmediatamente o posponer el registro Cuando finalice el número de ejecuciones sin registro es necesario desinstalar el software Para ejecutar el proceso de registro es necesaria una conexión directa a Internet e introducir el código de activación normalmente incluido en el CD ROM NOTA el registro no es necesario si la pizarra está conectada al ordenador ...

Страница 144: ...ivo XML Compruebe la versión de Internet Explorer Actualice a Internet Explorer versión 6 0 si la versión que utiliza es 5 0 o anterior 3 Sólo es posible escribir en algunas partes de la pizarra Realice el procedimiento de orientación de la pizarra 4 Algunos puntos de orientación no se encuentran al orientar la pizarra Asegúrese de que la desviación lateral y el desplazamiento vertical del proyect...

Страница 145: ...s Es necesario que sea un proyector frontal admita la resolución del ordenador tenga un flujo luminoso mínimo superior a 500 lúmenes Para la cantidad exacta se debe tener en cuenta el tamaño de la sala 8 Qué hacer cuando se ha utilizado un rotulador permanente para escribir en la pizarra Nunca utilice rotuladores para escribir en la Oliboard Si esto sucediera limpie la pizarra suavemente con algod...

Страница 146: ...OLIBOARD Pizarras interactivas 22 Esta página se ha dejado en blanco intencionadamente ...

Страница 147: ... trattamento la raccolta il riciclaggio e lo smaltimento di apparecchiature elettriche ed elettroniche dovrà essere effettuato in conformità alle Leggi in vigore in ciascun Paese DIRECTIVE 2002 96 CE ON THE TREATMENT COLLECTION RECYCLING AND DISPOSAL OF ELECTRIC AND ELECTRONIC DEVICES AND THEIR COMPONENTS 1 FOR COUNTRIES IN THE EUROPEAN UNION EU The disposal of electric and electronic devices as s...

Страница 148: ...ecyclage et la mise au rebut des équipements électriques et électroniques doivent être effectués conformément à la loi en vigueur dans chaque pays RICHTLINIE 2002 96 CE FÜR DIE BEHANDLUNG SAMMLUNG WIEDERVERWERTUNG UND ENTSORGUNG VON ELEKTRO UND ELEKTRONIK ALTGERÄTEN UND DEREN BESTANDTEILE 1 FÜR DIE LÄNDER DER EUROPÄISCHEN UNION EG Es ist verboten jede Art von Elektro und Elektronik Altgeräten als ...

Страница 149: ...S PAÍSES FUERA DE LA UE El tratamiento la recogida el reciclaje y la eliminación de equipos eléctricos y electrónicos se deberán llevar a cabo de conformidad con las Leyes vigentes en cada País DIRECTIVA 2002 96 CE RELATIVA AO TRATAMENTO RECOLHA RECICLAGEM E ELIMINAÇÃO DE RESÍDUOS DE EQUIPAMENTOS ELÉCTRICOS E ELECTRÓNICOS E DE SEUS COMPONENTES 1 PARA OS PAÍSES DA UNIÃO EUROPEIA UE É proibido elimi...

Страница 150: ...al ske i henhold til landets gældende lovgivning DIREKTIV 2002 96 CE OM BEHANDLING OPPSAMLING GJENVINNING OG ELIMINERING AV ELEKTRISKE OG ELEKTRONISKE APPARATER OG DERES KOMPONENTER 1 FOR LAND I EUROPAUNIONEN EU Det er forbudt å eliminere et hvert elektrisk og elektronisk apparat som vanlig avfall det er obligatorisk å legge dem i separat oppsamling Kasting av disse apparatene på steder som ikke e...

Страница 151: ...Cod 537096G 01 ...

Отзывы: