36.
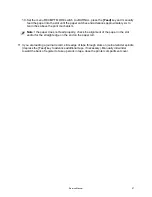
These functions respectively can be used to select PLU codes in the ranges 1-
35, 201-235 and 301 – 305. The PLU codes you want to use must previously have been programmed. To enter a
PLU codeassociated with a PLU Page, first press the
PLU Page
key, then press the key for the PLU code.
Note
:
The PLUranges associated with the
PLU Pages
can be modified.
37.
Registers single or multiple item sales to PLUs numbered between 1 and 35. To enter a PLU
code from 1 to 35, press the corres ponding key.
Entering PLU Codes
To enter a PLU code, enter its number on the numeric keypad then press
.
Clearing an Error
If you press the wrong key, the cash register emits a key tone and an error message appears on the operator display.
Press
to clear the error. The tone ends, the displays clear and the keypad unlocks allowing you to continue
with the operation. To delete the last erroneous character, press
.
UNMAPPED FUNCTIONS
The functions below are not provided by default on the keypad but can easily be configured using the
Free Key Layout
option in “Advanced Settings”:
1. [Dept Key 1]
to
[Dept Key 16] -
Enter the departments of the corresponding number.
2. [Dept Key 17]
to
[Dept Key 19] -
Enter the departments from 33 to 35.
3. [Dept Shift&Code]
- When a
[Dept Key x]
in the range 1 to 16 is pressed after
[Dept Shift&Code]
, it enters a
department number respectively in the range 17 to 32, while a
[Dept key x]
in the range 17 to 19 enters a
department from 36 to 38. For departments 39-99, press this key, manually enter the department number using the
numeric keypad and then press this key again.
4. [Credit6]
- In addition to credit cards 1 to 5, check and charge cards, you can also program a sixth credit card for
tender operations.
5. [Tray/Total Tray]
- Provides the order total for each separate guest (tray) in a party, incorporating all orders in a
final single total. Press this key after entering the sales items for each guest, then press to display the sales
total and finalize the transaction.
6. [ABR] -
At the end of a sales transaction, on customer request, a business receipt can be issued. This can also be
programmed to be printed automatically by setting
ABR Automatic
.
7. [Chain Function 1]
to
[Chain Function 5]
- A key sequence can be associated with a chain function to speed up
and simplify repetitive operations during a sales transaction, such as registering cash payments in common
denominations (£10, £20 and so on). You must first map the desired chain function onto a key using the
Free Key
Layout
option, and then program the key sequence using
Chain Functions
.
8. [PLU Key 36]
-
[PLU Key 50]
- Enters the PLU code mapped onto the key. As well as PLU codes 1 to 35 mapped
onto the keypad by default, you can also directly map PLU codes from 36 to 50 to speed-up operations involving
these codes. You can also associate a range of PLU codes with
PLU Pages
(see previous section) to increase the
number of fast-access PLUs available.
Entering Department Numbers
When entering a department number, you can use the Department keys (if mapped) from
[Dept Key 1]
to
[Dept Key
19]
. For:
• Departments 1 to 16, press the
[Dept Key x]
for the number from 1 to 16.
• Departments 17 to 32, press
[Dept Shift&Code]
with the
[Dept Key x]
for the number from 1 to 16.
• Departments 33 to 35, press the
[Dept Key x]
for the number from 17 to 19.
• Departments 36 to 38, press
[Dept Shift&Code]
with the
[Dept Key x]
from 17 to 19.
• To enter a Department from 39 to 99, press
[Dept Shift&Code]
(
number
)
[Dept Shift&Code]
.
where (
number
) is the department number entered using the
numeric
keys.
NOTE:
This same key sequence can be used for departments from 1 to 38 if preferred.
Service Manual
21
Содержание ECR 8220
Страница 1: ...Cash Register ECR 8200 8220 SWEDEN SERVICE MANUAL Code Y110930 6 Service Manual 1...
Страница 37: ...3 3 M30842MC MICROCOMPUTER Refer to the specification attached Service Manual 37...
Страница 38: ...Port Assignment for ECR8200 8220 SWEDEN M30842MC Service Manual 38...
Страница 39: ...Service Manual 39...
Страница 51: ...Service Manual 51...
Страница 53: ...S RAM PIN Configuration Refer to the specification attached data sheet Service Manual 53...
Страница 56: ...Service Manual 56...
Страница 58: ...Motor and Thermal Head drive timing Figure 3 14 2 2 Division Printing Timing Chart Service Manual 58...
Страница 63: ...Service Manual 63...
Страница 64: ...Service Manual 64...
Страница 65: ...Service Manual 65...
Страница 66: ...ECR8220 SWEDEN Service Manual 66...
Страница 67: ...Service Manual 67...
Страница 68: ...Service Manual 68...
Страница 69: ...It means OK when no error occurs through the checkup Service Manual 69...
Страница 70: ...FINISHED GOODS CHECK LIST ECR8200 SWEDEN Service Manual 70...
Страница 71: ...Service Manual 71...
Страница 72: ...Service Manual 72...
Страница 73: ...Service Manual 73...
Страница 74: ...ECR8220 SWEDEN Service Manual 74...
Страница 75: ...Service Manual 75...
Страница 76: ...Service Manual 76...
Страница 77: ...Service Manual 77...
Страница 86: ...17 It shows Up Load OK 18 Click Ver button Service Manual 86...
Страница 103: ...3 FIX TRANSFORMER UNIT TO DRAWER UNIT BY FASTENING 2PCS SCREW AC CORD SLOT HERE SCREW Service Manual 103...
Страница 109: ...ECR8200 SWEDEN 11 FIX SEMI SET TO BOTTOM CASE SEMI SET Service Manual 109...
Страница 112: ...14 COPLETE AND FUNCTION TEST BATTERY ASSY UNIT WINDING REEL Service Manual 112...
Страница 121: ...8 EXPLODED DIAGRAM ECR8200 SWEDEN Service Manual 121...
Страница 122: ...97 ECR8220 SWEDEN Service Manual 122...


