background image

18

Technical Information

Rating Voltage: 220V AC to 240V AC 50-60Hz, 2000W

Settings for Induction Cooking

Power Range: 1-15. The appliance will default to power level 7. 
Timer Range: 99:59 (Hours:Mins)
Temperature Range: 80°C to 260°C (175°F to 500°F)

Settings for Sous Vide Cooking

Temperature Range: Default temperature is 60°C Celsius. Temperature range is 30°C 
to 90°C (86°F to 194°F).
Timer Range: 99:59 (Hours:Mins)

Содержание IH95A

Страница 1: ...USER MANUAL SAVE THESE INSTRUCTIONS IH95A IH75A ST95A ST75A...

Страница 2: ...Maintenance Troubleshooting the SmartHub Troubleshooting Error Codes Warranty 3 7 10 15 16 17 18 19 20 25 27 28 29 30 31 32 Contents Thank you for purchasing the Oliso SmartHub You are just a few ste...

Страница 3: ...or lack of experience and knowledge if they have been given supervision or instruction concerning use of the appliance in a safe way and understand the hazards involved 6 Children shall not play with...

Страница 4: ...dren with reduced physical sensory or mental capabilities or lack of experience and knowledge unless they have been given supervision or instruction concerning use of the appliance by a person respons...

Страница 5: ...op controls 31 Clean the appliance regularly to keep all parts free of grease that could catch fire 32 Never attempt to dissemble and repair the appliance yourself 33 This appliance is intended to be...

Страница 6: ...fter use please use caution IMPORTANT SAFEGUARDS SAVE THESE INSTRUCTIONS This marking indicates that this product should not be disposed with other household wastes throughout the EU To prevent possib...

Страница 7: ...shock 4 Cookware handles should be turned inward and should not extend over adjacent cooking elements to reduce the risk of burns ignition of flammable materials and spillage due to unintentional con...

Страница 8: ...entually warm up the glass cooking surface especially the area directly underneath the pot or pan Be careful when handling the cooktop after use and let it cool down before storing 13 Persons with a p...

Страница 9: ...tion cooktop when it is not functioning properly shows signs of damage or if it has been dropped 18 Do not submerge the induction cooktop in water or other liquids and do not wash it in the dishwasher...

Страница 10: ...with the Precision Smart Top to rapidly reach a precise temperature and continue to maintain that temperature with minimal energy consumption Additionally the Precision Smart Top may be removed provi...

Страница 11: ...cision Smart Top is a removable water bath used for cooking sous vide After placing the Precision Smart Top onto the induction base the SmartHub will automatically enter sous vide mode when powered on...

Страница 12: ...th Max capacity of approximately 10L when filled to the max line with food and water Fill line fill initially to this line Max fill line water to not exceed this line Temperature Module Transfers temp...

Страница 13: ...e searing temperatures models IH95A IH75A DETAILS Glass cooking plate Induction ready pans may be used when placed centrally on this glass plate LED indicator light Glows red to indicate when the indu...

Страница 14: ...r sous vide pouches within the water bath The rack may be oriented in different positions to accommodate longer or thicker pouches Food in sealed Vac Snap bags should be placed in the racks allowing s...

Страница 15: ...heat As heat is produced on the bottom of the water bath natural convection currents cause the hot water to rise and create an even bath temperature Easy cleanup Smooth glass surfaces make spills eas...

Страница 16: ...ouch to increase or decrease temperature or time settings Touch and hold to scroll faster 5 START When you first touch the start button the unit will begin heating You may touch the START button again...

Страница 17: ...he flat of your finger The buttons will respond better to the surface of your finger than the pressure you apply Hold out your thumb or index finger over the button you wish to touch providing as much...

Страница 18: ...ng Power Range 1 15 The appliance will default to power level 7 Timer Range 99 59 Hours Mins Temperature Range 80 C to 260 C 175 F to 500 F Settings for Sous Vide Cooking Temperature Range Default tem...

Страница 19: ...that is double the thickness required of a recipe it is important to note that the actual cooking time may need to increase by as much as 4 times the specified amount Additionally tougher and leaner...

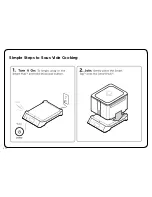
Страница 20: ...20 Simple Steps to Sous Vide Cooking...

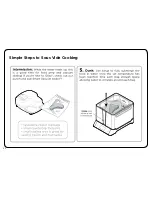
Страница 21: ...st the fill line Toggle to your desired temperature 4 Start Fill the Smart Top with water until it reaches at least the fill line Toggle to your desired temperature and press start to begin heating th...

Страница 22: ...22 Simple Steps to Sous Vide Cooking...

Страница 23: ...23 Simple Steps to Sous Vide Cooking...

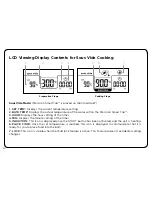
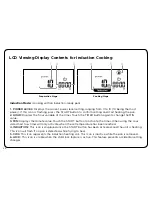
Страница 24: ...hour setting of the timer 4 MIN Displays the minute setting of the timer 5 INDUCTION This icon is displayed once the START button has been activated and the unit is heating 6 PLACE FOOD Once the set...

Страница 25: ...the SmartHub will reach the set temperature in half the time it takes competing units and maintain that temperature precisely Energy Efficient Because energy is focused on heating the pan itself ther...

Страница 26: ...IN Displays the minute value Touch the START button to activate the timer When using the sous vide smart top timer will only activate when the set temperature has been reached 4 INDUCTION This icon is...

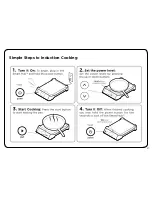
Страница 27: ...27 Simple Steps to Induction Cooking...

Страница 28: ...lt to overcook food with sous vide cooking when working with multiple food items you can often leave the rest of the Vac Snap bags in the water bath and finish one food item at a time LED indicator li...

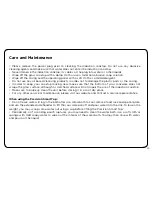
Страница 29: ...not scrape the glass surface although a scratched surface will not impair the use of the induction cooktop Make sure to properly clean the unit before storing it in a cool dry place For any other serv...

Страница 30: ...e not to use abrasive cleaners or scrubbers as it could damage the coating on the surface Also make sure after the bath cools to drain clean and dry the pan before storing so that the pan can be kept...

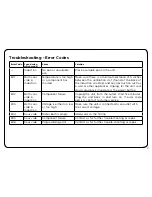
Страница 31: ...plug let the unit cool down plug back in and press the power button E02 Both sous vide induction Component failure Unplug the unit from the outlet Wait five minutes Plug the unit back in and turn on I...

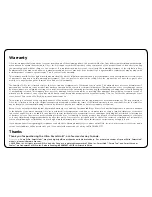
Страница 32: ...oes This warranty is extended to the original purchaser of the product and excludes all other legal and or conventional warranties The responsibility of Oliso Inc is limited to the specific obligation...

Отзывы: