Olin HVBT-3600S, Руководство пользователя
Пользовательский мануал Olin HVBT-3600S доступен для бесплатного скачивания на нашем сайте. Этот руководство поможет вам разобраться с функциями и настройками данного продукта. Загрузите его на manualshive.com прямо сейчас и наслаждайтесь использованием вашего нового устройства!
Поделиться
Скачать


Отзывы:
Нет отзывов
Похожие инструкции для HVBT-3600S
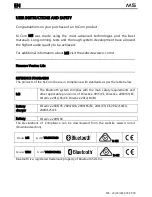
M5
Бренд: N-Com Страницы: 32

HT5000
Бренд: Homecast Страницы: 44

MPF3573HU
Бренд: F&U Страницы: 22

Janus HD
Бренд: Entone Страницы: 28

LaBOX
Бренд: SAGEMCOM Страницы: 19

Digital Set top Box
Бренд: DEN Страницы: 20

U5
Бренд: buzztv Страницы: 4

XRS 4900
Бренд: buzztv Страницы: 6

VIP1500
Бренд: Motorola Страницы: 11

VIP1002E
Бренд: Motorola Страницы: 24

VIP 1903
Бренд: Motorola Страницы: 9

VIP 1216
Бренд: Motorola Страницы: 54

VIP1200
Бренд: Motorola Страницы: 28

CVJI-E357
Бренд: Toyonix Страницы: 10

Androidminibox mx2 se
Бренд: Android Страницы: 29

ATV520
Бренд: Geniatech Страницы: 22


