background image

Adjusting On Screen Displays (OSD)

Setup: Adjusting Personal TV Settings 
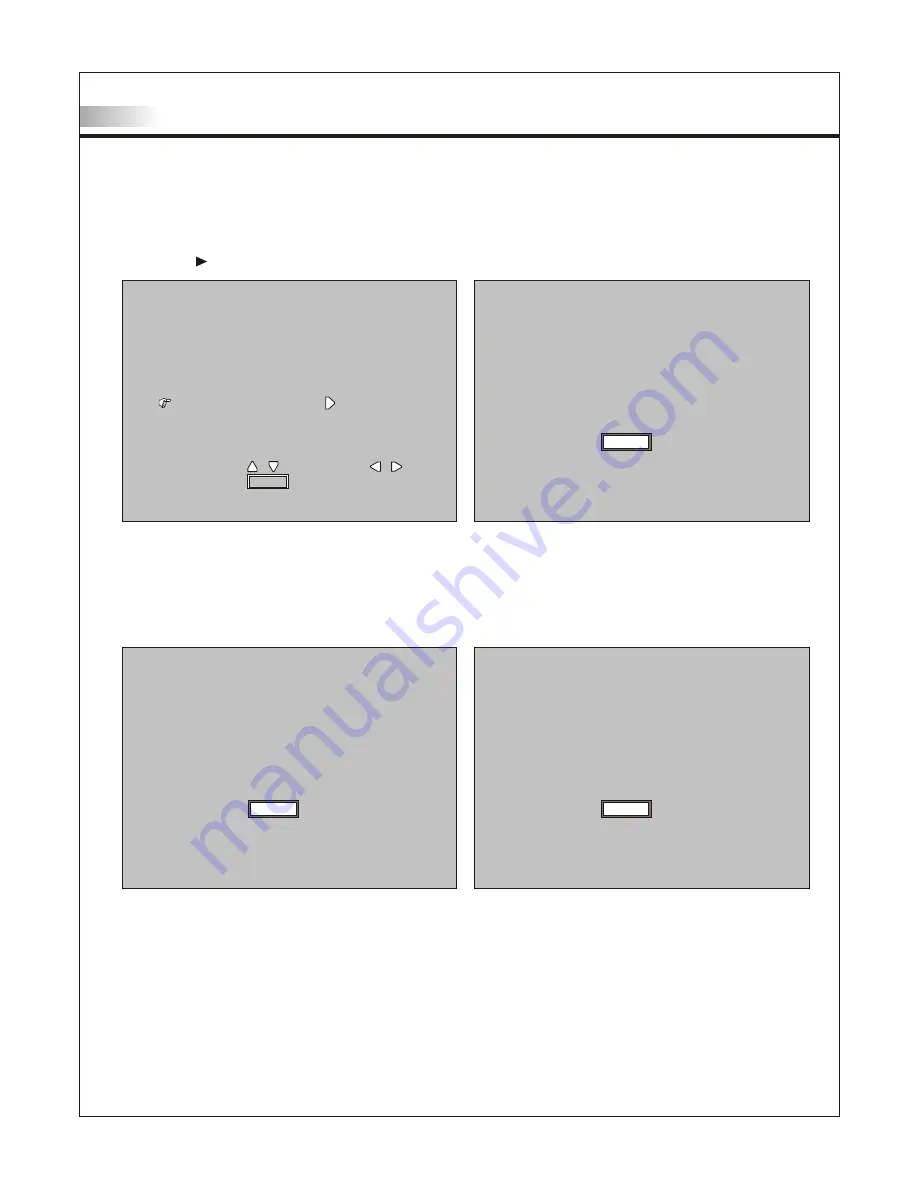
3.Press the


and input a 4 digit Password

Confirm again.

PASSWORD   DISABLE

PASSWORD   DISABLE

CHANGE

CHANGE

PASSWORD

PASSWORD

EXIT

EXIT

MENU

MENU

INPUT NEW PASSWORD 

(----)

INPUT NEW PASSWORD 

(----)

4. If you enter the incorrect password, you will see Incorrect Password  on the screen.
    Press  Menu  to exit and begin again.

EXIT

EXIT

MENU

MENU

INPUT PASSWORD 

(----)

INPUT PASSWORD 

(----)

INCORRECT PASSWORD

INCORRECT PASSWORD

EXIT

EXIT

MENU

MENU

INPUT PASSWORD 

(----)

INPUT PASSWORD 

(----)

31

SELECT

SELECT

ADJUST

ADJUST

EXIT

EXIT

MENU

MENU

Содержание LT20S

Страница 1: ...LCD TV LT20S Englis h...

Страница 2: ...ors Connecting to a PC with VGA Connector Other Connections Remote Control Guide Key Function and Descriptions Hotkeys Tutorial Adjusting the On Screen Display OSD Introduction To Operate in the OSD A...

Страница 3: ...ty When the provide plug does not fit into your outlet consult an electrician for replacement of the obsolete outlet 10 Protect the power cord from being walked on or pinched particularly at plugs con...

Страница 4: ...t cover or block these vents and openings located on the top and back of the display Inadequate ventilation may cause overheating and shorten the life span of the display Do not place in an enclosed a...

Страница 5: ...ks Follow operating instructions All operating instructions must be followed Precautions when transporting the display Carrying the display requires two or more people Attachments Do not use attachmen...

Страница 6: ...ing condition Repair When the display unit displays an abnormal condition any noticeable abnormality in the display unit indicates that the display unit needs servicing If any of the following conditi...

Страница 7: ...no guarantee that interference will not occur in a particular installation If this equipment does cause harmful interference to radio or television reception which can be determined by turning the eq...

Страница 8: ...Accessories Supplied accessories Remote control batteries AAA x 2 Power cord x 1 VGA cable D Sub 15 male x 1 User manual booklet x 1 LCD Multi Media Display LT20S Quick start guide x 1 06...

Страница 9: ...e with stereo mini jack Use the proper cable for the device Stereo mini jack cable Stereo mini jack to RCA cable AV cable with RCA connector S Video cable Audio cable with RCA connector Wall mount set...

Страница 10: ...annel programming up or down In the OSD menu both keys are used to navigate within menu VOL VOL Adjusts volume In OSD menu both keys are used to navigate within menu VOL is used to select the highligh...

Страница 11: ...ctions 2 Audio Video Connections 3 09 Video Audio Connections VGA PC Port The VGA input can be used for analog RGB signals from a personal computer VGA has 1 Audio input Audio input The audio input se...

Страница 12: ...DVD players are equipped with the following three video connectors Video Yellow Audio Left White Audio Right Red Audio Video Cable Y Green Pb Cb Blue Pr Cr Red Descriptions of Connector Input Types Y...

Страница 13: ...nnecting the Power Cord I o Complete other connections prior to connecting the power cord 1 Connect the power cord to the AC IN connector of the TV 2 Connect the other end of the power cord to the wal...

Страница 14: ...creen stand and hinge are at risk for damage This product may fall down after impact or earthquake and cause harmful damage To assure safety please place this product on firm surface Power Cord and Co...

Страница 15: ...Antenna outlet Connecting to a VCR Connecting to a DVD Player with A V or S Video Cables Connecting to a DVD Player with Component Cables Connecting to a Satellite Receiver or Cable Box with A V Cable...

Страница 16: ...the TV s right side panel Disconnect all power sources before making any connection Rear of TV 75 ohm coaxial cable If connecting to Video Equipment with Antenna outlet 1 Using a 75 ohm coaxial cable...

Страница 17: ...ctor When Connecting both Video IN and S Video IN When you connect video equipment to both the same Video and S Video input jacks display will automatically select S Video first To view Video signal p...

Страница 18: ...S Video Cable connect the DVD player s S Video OUT jack to the TV s S Video IN jack Disconnect all power sources before making any connection Rear of TV DVD player Red White Yellow S Video cable A V c...

Страница 19: ...Y Blue Pr also identified as Cr CR or R Y Red Note The Y Pb and Pr jacks on your DVD player are sometimes labeled as Y Cb and Cr or B Y and R Y If so connect the cables to the matching colors 2 Using...

Страница 20: ...antenna to the TV ANT Antenna jack Rear of TV Red White Yellow S Video cable A V cable with RCA connector Satellite Receiver or Cable Box Rear of TV Note When you connect video equipment to both the...

Страница 21: ...B Y Blue Pr also identified as Cr CR or R Y Red Note The Y Pb and Pr jacks on your Satellite Receiver or Cable Box are sometimes labelled as Y Cb and Cr or B Y and R Y If so connect the cables to the...

Страница 22: ...PC to the TV s VGA signal input terminal 2 You may need to use a Stereo mini jack to Stereo mini jack connector to receive audio Disconnect all power sources before making any connections Other Conne...

Страница 23: ...lect from SAP Mono or Stereo mode 03 MUTE Press to mute the sound 04 MENU Press to activate or close the On Screen Display menu In OSD Menu acts as a cancel button while navigating through the OSD 05...

Страница 24: ...currently unavailable PC Press to switch to VGA Mode VIDEO Press to switch between Video 1 and Video 2 sources COMPONENT Press to switch to Component source SLEEP Press to choose preset time interval...

Страница 25: ...e partially or completely drained We do not warrant the quality of the batteries in any case since many factors are considered If replacement is needed please purchase two AAA batteries 2 Handle remot...

Страница 26: ...SETUP SOURCE SOURCE MENU MENU TV TV To Operate in the OSD 1 Press Menu button to enter OSD menu mode 2 To enter each main OSD function use the keys and 3 To select the function press the keys and 4 T...

Страница 27: ...Adjusts darkness or lightness of the screen Item Adjustment Function To Reset Factory Settings If at any time you wish to go back to original factory setting you may do so by choosing the Default set...

Страница 28: ...Adjusts volume balance in Left and Right Selecting Stereo or Bilingual Programs You can enjoy stereo bilingual and mono programs under the TV Source Press the hotkey MTS until the desired sound indic...

Страница 29: ...annel Skip To cancel available channel Add Delete CH EDIT Channel Edit Chooses the source from ANT CATV TV CH SOURCE Channel Source Selects to auto scan the available channels of the TV or CATV Auto s...

Страница 30: ...annels at the same time PRESS TO STOP PRESS TO STOP MENU MENU CHANNEL SEARCHING PLEASE WAIT CHANNEL SEARCHING PLEASE WAIT 9 9 Editing Channels You can also edit channels to your personal preference On...

Страница 31: ...s 4 Switch Off to close the Closed Caption mode Using the Parental Control Feature To block programs you feel unsuitable for your children you need to set the TV for desired rating systems The TV Pare...

Страница 32: ...CAPTION PARENTAL PARENTAL SLEEP SLEEP LANGUAGE LANGUAGE SETUP SETUP OFF OFF CATV CATV OFF OFF OFF OFF ENGLISH ENGLISH 1 Press the key to enter Parental Control Setup Page This function can also be di...

Страница 33: ...ORD PASSWORD EXIT EXIT MENU MENU INPUT NEW PASSWORD INPUT NEW PASSWORD 4 If you enter the incorrect password you will see Incorrect Password on the screen Press Menu to exit and begin again EXIT EXIT...

Страница 34: ...again the Sleep timer automatically returns to Off The clock timer appears one minute before the TV shuts off This message may not appear if you perform any operation with the menu opened Choosing a...

Страница 35: ...16 H POS 16 H POS 16 V POS 16 V POS 16 DEFAULT NO DEFAULT NO SELECT SELECT ADJUST ADJUST EXIT EXIT MENU MENU AUTO NO AUTO NO 33 Adjust TV Source under PC VGA MODE Under the PC VGA Source mode there w...

Страница 36: ...T SOFT BACKLIGHT SOFT Item Adjustment Function BACKLIGHT CONTRAST BRIGHTNESS COLOR TMP SOFT NORMAL BRIGHT 0 31 0 31 COOL NORMAL WARM USER Adjusts darkness or lightness of the screen Adjusts picture co...

Страница 37: ...S V POS DURATION LANGUAGE Press to exit OSD screen Adjust screen horizontal position Adjust screen vertical position Adjust the time of OSD menu display on the screen English Spanish French Note The a...

Страница 38: ...utomobiles trains high voltage transmission lines neon signs or other potential sources of interference Check OSD and adjust in Picture function Check aspect ratio in Screen function Check the setting...

Страница 39: ...1 4 3 12ms typical 6xCCFL backlight lamps w 50 000 hrs Support 640x480 800x600 1024x768 Plase at bottom 1024x768 dependant on video card analog 15pin mini D SUB female connector 56Hz 75Hz 30kHz 48kHz...

Страница 40: ...esolution Horizontal frequency Khz Vertical frequency Hz Note VGA 640x400 640x480 640x480 640x480 800x600 800x600 800x600 800x600 31 469 31 649 37 861 37 500 35 156 37 879 48 077 46 865 70 60 72 75 56...

Страница 41: ...or inadequate mounting of this unit to the wall may cause it to fall down resulting in potentially fatal accidents Please consult authorized service personnel for the installation of this unit Place L...

Страница 42: ...mal operating conditions as mentioned above preferably in its native display resolution and with a 90 degrees viewing angle A LCD TV will be considered dead on arrival D O A with regards to defective...

Страница 43: ......

Отзывы: