background image

63

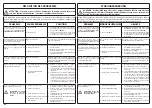
RESOLUCIÓN DE PROBLEMAS

ATENCIÓN: parar la unidad y desconectar la bujía antes de realizar todas las 
pruebas correctivas recomendadas en la tabla siguiente, a no ser que sea 
necesario el funcionamiento de la unidad.

Una vez verificadas todas las posibles causas, si el problema no se resuelve, llamar a un Centro 
de Asistencia Autorizado. Si se observa un problema no listado en esta tabla, llamar a un 
Centro de Asistencia Autorizado.

PROBLEMA

POSIBLES CAUSAS

SOLUCIÓN

El motor no arranca o se apaga a 
los pocos segundos del arranque. 
(Comprobar que el interruptor 
esté en "I")

1.  No hay chispa

2. Motor 

atascado

1.  Controlar la chispa de la bujía. Si no hay 

chispa, repetir la prueba con una bujía 
nueva   (RCJ-8Y).

2.  Seguir el procedimiento de la pág.23. 

Si el motor no arranca, repetir el 
procedimiento con una bujía nueva.

El motor arranca, pero no acelera 
correctamente o no funciona 
correctamente a alta velocidad.

Es necesario regular el carburador.

Llamar a un Centro de Asistencia Autorizado 
para regular el carburador.

El motor no alcanza la máxima 
velocidad y/o emite demasiado 
humo.

1.  Controlar la mezcla aceite-gasolina.
2.  Filtro de aire sucio.

3.  Es necesario regular el carburador.

1.  Utilizar gasolina fresca y un aceite adecuado 

para motores de 2 tiempos.

2.  Limpiar; leer las instrucciones del capítulo 

Mantenimiento del filtro de aire.

3.  Llamar a un Centro de Asistencia Autorizado 

para regular el carburador.

El motor arranca, gira y acelera, 
pero no mantiene el mínimo.

Es necesario regular el carburador.

Regular el tornillo del mínimo "T" (Fig.84, 
pág.47) en sentido horario para aumentar la 
velocidad; consultar el capítulo Mantenimiento 
del carburador.

La barra y la cadena se calientan 
y emiten humo durante el 
funcionamiento

1.  Depósito de aceite de la cadena 

vacío

2.  Cadena demasiado tensa

3.  Malfuncionamiento del sistema de 

lubricación

1.  El depósito de aceite se debe llenar cada vez 

que se llene el depósito de combustible.

2.  Tensado de la cadena; ver las instrucciones en 

el capítulo Montaje de la barra y la cadena 
(Pág.15).

3.  Hacer funcionar a pleno régimen 15-30 

segundos. Detener y comprobar que el 
aceite gotee desde la punta de la barra. Si 
hay aceite, el malfuncionamiento puede 
deberse a que la cadena está floja o la barra 
está dañada. Si no hay aceite, contactar con 
un Centro de Asistencia Autorizado

El motor arranca y funciona, pero 
la cadena no gira

1.  Freno cadena activado

2.  Cadena demasiado tensa

3.  Ensamblaje barra y cadena

4.  Cadena y/o barra dañadas

5.  Embrague y/o piñón dañados

1.  Desactivar el freno de la cadena; ver el capítulo 

Uso – Freno cadena (Pág.29)

2.  Tensado de la cadena; ver las instrucciones en 

el capítulo Montaje de la barra y la cadena 
(Pág.15)

3.  Ver las instrucciones en el capítulo Montaje de 

la barra y la cadena (Pág.15)

4.  Ver las instrucciones en el capítulo 

Mantenimiento barra y/o cadena (Pág.43)

5.  Sustituir si es necesario; contactar con un 

Centro de Asistencia Autorizado

ATENCIÓN: no tocar 
n u n c a   l a   c a d e n a 
cuando el motor esté 
en funcionamiento

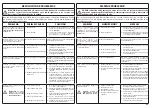
RIEŠENIE PROBLÉMOV

POZOR: jednotku vždy zastavte a odpojte sviečku, až potom urobte všetky 
nápravné opatrenia podľa tabuľky dolu, samozrejme okrem tých, pri ktorých sa 
vyžaduje, aby bola jednotka v chode.

Ak sa vám nepodarilo problém odstrániť ani po overení všetkých príčin, obráťte sa na 
autorizovaný servis. Ak príčina problému nie je uvedená v tejto tabuľke, obráťte sa na 
autorizovaný servis.

PROBLÉM

MOŽNÉ PRÍČINY

RIEŠENIE

Motor sa nenaštartuje alebo 
z h a s n e   u ž   p o   n i e k o ľ k ý c h 
sekundách po naštar tovaní. 
(Uistite sa, že je vypínač v 
polohe "I")

1.  Sviečka nevydáva iskru

2.  Motor je zahltený

1.  Skontrolujte iskru sviečky. Ak sviečka 

nevydáva iskru, zopakujte test s novou 
sviečkou (RCJ-8Y).

2.  Postupujte podľa pokynov na str.23. Ak 

sa motor ani tak nenaštartuje, zopakujte 
procedúru s novou sviečkou.

M o t o r   s a   n a š t a r t u j e ,   a l e 
n e z r ý c h ľ u j e   s p r á v n e   a l e b o 
pri vyššej rýchlosti nefunguje 
správne.

Treba nastaviť karburátor.

Zavolajte autorizovaný servis, aby vám 
nastavili karburátor.

Motor nedosiahne plnú rýchlosť a 
/ alebo veľmi dymí.

1.  Skontrolujte zmes olej / benzín.

2.  Špinavý vzduchový filter.

3.  Treba nastaviť karburátor

1.  Používajte čerstvý benzín a olej pre 

2-taktné motory.

2.  Vyčistite; pozrite pokyny v kapitole 

Údržba vzduchového filtra.

3.  Zavolajte autorizovaný servis, aby vám 

nastavili karburátor.

Motor sa naštartuje, otáča sa a 
zrýchľuje, ale pri minime zhasne.

Treba nastaviť karburátor.

Nastavte skrutku minima "T" (Obr.84, 
str.47) smerom vpravo na dosiahnutie 
vyššej rýchlosti; pozrite kapitolu Údržba 
karburátora.

Lišta a reťaz sa počas používania 
ohrejú a dymia

1.  Prázdna nádržka na olej reťaze
2.  Príliš napnutá reťaz
3.  Porucha činnosti lubrifikačného 

systému

1.  Olejovú nádržku treba naplniť pri 

naplnení palivovej nádrže.

2.  Napnutie reťaze; pozrite pokyny v kapitole 

Montáž lišty a reťaze (Str.15).

3.  Nechajte pri plnom výkone 15-30 sekúnd. 

Zastaviť a skontrolovať, či olej kvapká 
zo špičky lišty. Ak vidno olej, problém 
môže byť spôsobený uvoľnenou reťazou 
alebo poškodením lišty. Ak olej nevidno, 
zavolajte autorizované servisné stredisko

Motor sa naštartuje a funguje, ale 
reťaz sa neotáča

1.  Zaradená brzda reťaze
2.  Príliš napnutá reťaz
3.  Montáž lišty a reťaze
4.  Poškodená reťaz a/alebo lišta
5.  Poškodená spojka a/alebo 

ozubenie

1.  Odpojte brzdu reťaze; pozrite kapitolu 

Používanie – Brzda reťaze (Str.29)

2.  Napnutie reťaze; pozrite pokyny v 

kapitole Montáž lišty a reťaze (Str.15)

3.  Pozrite pokyny v kapitole Montáž lišty a 

reťaze (Str.15)

4.  Pozrite pokyny v kapitole Údržba lišty a/

alebo reťaze (Str.43)

5.  V prípade potreby ich vymeňte; zavolajte 

autorizované servisné stredisko

P O Z O R :   n i k d y   s a 
nedotýkajte reťaze, 
kým je motor v chode

Содержание 932C

Страница 1: ...torsäge ist nur für Facharbeiter bestimmt die für die Baumpflege geschult sind ATENCIÓN Esta motosierra es sólo para personal adiestrado en el mantenimiento de los árboles POZOR Táto motorová píla je určená iba pre pracovníkov zaškolených na prácu s orezávaním stromov I D F GB E SK OWNER S MANUAL MANUALE USO E MANUTENZIONE BETRIEBS UND WARTUNGSANLEITUNG MANUEL D UTILISATION ET D ENTRETIEN MANUAL D...

Страница 2: ... and are subject to change without notice by the manufacturer F INTRODUCTION TRADUCTION DES INSTRUCTIONS ORIGINALES Pour un emploi correct de la tronçonneuse et pour éviter les accidents ne commencez pas le travail sans avoir d abord lu attentivement le manuel Vous trouverez les descriptions du fonctionnement des divers composants et les instructions pour les contrôles nécessaires et pour l entret...

Страница 3: ..._________ 58 TROUBLE SHOOTING CHART ____ 61 WARRANTY CERTIFICATE _______ 66 INTRODUCCION ______________ 2 EXPLICACION SIMBOLOS Y ADVERTENCIÂS DE SEGURIDAD _ 4 COMPONENTES DE LA MOTOSIERRA ______________ 5 NORMAS DE SEGURIDAD_______ 10 MONTAJE DE LA BARRA Y LA CADENA_________________ 15 PUESTA EN MARCHA __________ 17 PARADA DEL MOTOR __________ 27 UTILIZACIÓN_________________ 29 MANTENIMIENTO _____...

Страница 4: ... Immer Helm Schutzbrille und Geräuschschutz tragen 3 Gerät KETTENSÄGE 4 Garantierter akustischer Schalleistungspegel 5 Seriennummer 6 CE Zeichen 7 Achtung Vorsicht Rückschlaggefahr 8 Die in der Bedienungsanleitung und an der Maschine angegebenen Warnungstexte 9 Diese Kettensäge ist ausschließlich für den Baumschnitt durch geschulte Baumpfleger ausgelegt 10 Einen geeigneten Schutz für Unterarme Bei...

Страница 5: ...e démarrage 13 Bouchon réservoir huile 14 Pompe primer 15 Poignée avant 16 Poignée arriére 17 Bouton demi accélération D BAUTEILE DER KETTENSÄGE 1 Chokehebel 2 Gashebel 3 Sicherheitsgasgriff 4 Vergaser Einstellschrauben 5 Hebel Inertialbremse 6 Schalldämpfer 7 Kette 8 Schwert 9 Luftfilterdeckel 10 Ein Aus Schalter 11 Tankdeckel 12 Startergriff 13 Öltankdeckel 14 Starterpumpe 15 Vorderer Griff 16 H...

Страница 6: ...d azione della motosega durante l avviamento o il taglio Fig 2 7 Non iniziare il taglio finchè l area di lavoro non sia completamente pulita e sgombra Non tagliare in vicinanza di cavi elettrici 8 Tagliare sempre in posizione stabile e sicura Fig 3 9 Usare la motosega solo in luoghi ben ventilati non utilizzare in atmosfera esplosiva infiammabile o in ambienti chiusi Fig 4 10 Non toccare la catena...

Страница 7: ...ers to remain within your working area when starting or cutting with the saw Fig 2 7 Do not start cutting until you have a clear work area Do not cut near electric cables 8 Always cut from a firm footed and safe position Fig 3 9 Only use the chainsaw in well ventilated places do not operate the chainsaw in explosive or flammable atmospheres or in closed environments Fig 4 10 Never touch the chain ...

Страница 8: ... 6 Veillez à ce que personne ne se trouve dans le rayon d action de la tronçonneuse pendant la mise en route et la coupe Fig 2 7 Ne commencez pas la coupe tant que l espace dans lequel vous devez travailler n est pas totalement propre et libre Ne coupez pas à proximité de fils électriques 8 Coupez toujours en position stable et sûre Fig 3 9 N utilisez la tronçonneuse que dans des endroits bien aér...

Страница 9: ... der Kettensäge sollten andere Personen sich nicht innerhalb des Arbeitsbereiches aufhalten Abb 2 7 Beginnen Sie nicht mit dem Schneiden bevor der Arbeitsbereich nicht vollkommen sauber und frei von Hindernissen ist Schneiden Sie nicht in der Nähe von elektrischen Kabeln 8 Schneiden Sie immer in stabiler und sicherer Stellung Abb 3 9 Achten Sie auf gute Abzugsmöglichkeiten der Abgase Benutzen Sie ...

Страница 10: ... de acción de la motosierra durante el arranque o el corte Fig 2 7 No iniciar el corte hasta que el área de trabajo no esté completamente limpia y despejada No se deben de efectuar cortes en las cercanías de cables eléctricos 8 Cortar siempre en posición estable y segura Fig 3 9 Usar la motosierra sólo en lugares bien ventilados no usar en atmósfera explosiva inflamable o en ambientes cerrados Fig...

Страница 11: ...acovnom priestore pri štartovaní alebo pri pílení pílou Obr 2 7 Nezačínajte pílenie ak pracovný priestor nie je úplne vyčistený a vyprázdnený Nepíľte v blízkosti elektrických káblov 8 Vždy píľte v pevnom a bezpečnom postoji Obr 3 9 Motorovú pílu používajte iba v dobre vetraných priestoroch nepoužívajte ju vo výbušnom horľavom prostredí alebo v uzavretých priestoroch Obr 4 10 Nikdy sa nedotýkajte r...

Страница 12: ...Wear adherent anti cut clothing Oleo Mac anti cut jackets Fig 1 dungarees Fig 2 and leggings are the ideal Do not wear clothes scarves ties or bracelets that can stuck into woods or twigs Tie up and protect long hair example with foulards cap helmets etc Safety shoes or boots having skid proof sole and anti piercing insert Fig 4 5 Wear protective helmet Fig 3A in places where there can be falling ...

Страница 13: ...dente Consultar con el vendedor de la máquina sobre los indumentos adecuados La ropa debe ser cumplir su función de protección y ser cómoda Utilizar ropa adherente y a prueba de cortes La chaqueta Fig 1 el peto Fig 2 y las polainas de protección Oleo Mac son ideales No llevar ropa bufandas corbatas o adornos que puedan ser atrapados por la madera o la maleza Recogerse el cabello largo y cubrirse p...

Страница 14: ...ensioning pin D fits into its seat G Fig 3 Fit the chain H Fig 4 inside the sprocket E and the bar groove M Pay attention to the direction of rotation of the chain Fig 6 Fit the chain cover and the relative nuts without tightening them Tension the chain by means of the tensioning screw L Fig 5 Hold the tip of the guide bar up and tighten the chain cover nuts securely Fig 7 The chain should be taut...

Страница 15: ...ra F sobre los espárragos de forma que el pestillo D entre en el asiento correspondiente G Fig 3 Montar la cadena H Fig 4 dentro el piñón E y en la guía de la barra M Prestar atención al sentido de rotación de la cadena Fig 6 Montar la tapa cubrecadena y las relativas tuercas sin apretarlas Tensar la cadena mediante el tornillo tensacadena L Fig 5 Apretar definitivamente las tuercas de fijación de...

Страница 16: ...rom escaping around the cap Tighten fuel cap securely after refueling Unit vibration can cause an improperly tightened fuel cap to loosen or come off and spill quantities of fuel Wipe spilled fuel from the unit Move 3 metre away from refueling site before starting engine Fig 11 Never attempt to burn off spilled fuel under any circumstances Do not smoke while handling fuel or while operating the ch...

Страница 17: ...r y dejar enfriar antes del llenado Aflojar el tapón del combustible lentamente para aliviar la presión y evitar fugas de combustible Apretar firmemente el tapón de combustible después del llenado Las vibraciones pueden causar un aflojamiento del tapón y fugas de combustible Secar el combustible de las fugas de la unidad Desplazar la máquina a 3 metros de distancia del sitio de llenado antes de po...

Страница 18: ...igh quality engine oil JASO specification FD or ISO specification L EGD When oil specifications are NOT equivalent or unknown use 4 1 25 oil fuel mixing ratio CAUTION DO NOT USE AUTOMOTIVE OIL OR 2 CYCLE OUTBOARD OIL CAUTION Match your fuel purchases to your consumption don t buy more than you will use in one or two months Store gasoline in a tightly closed container in a cool dry place CAUTION Fo...

Страница 19: ... 20 o un aceite para motor de alta calidad equivalente especificaciones JASO FD o ISO L EGD Si las especificaciones del aceite no se conocen o NO son equivalentes utilizar una relación de mezcla aceite combustible del 4 1 25 PRECAUCIÓN NO UTILIZAR ACEITE PARA VEHÍCULOS O ACEITE PARA MOTORES FUERA DE BORDA DE 2 TIEMPOS PRECAUCIÓN Comprar sólo la cantidad de combustible necesaria en base al consumo ...

Страница 20: ...structed When the engine is idling the chain must not turn Otherwise contact an Authorized Service Center to carry out a check and fix the problem When the chainsaw is running grip the front handle firmly with your left hand and the back handle with your right hand Fig 26 Check that all parts of the body are kept away from the chain and muffler Over exposure to vibrations can result in blood vesse...

Страница 21: ...onentes de la motosierra Antes de arrancar el motor asegurarse que la cadena no esté en contacto con un cuerpo extraño Con el motor al mínimo la cadena no debe girar De lo contrario en contacto con un Centro de Servicio Autorizado para llevar a cabo un control y solucionar el problema Con el motor en movimiento sujetar siempre fuertemente la empuñadura anterior con la mano izquierda y la posterior...

Страница 22: ...the gasket 5 Immediately replace fuel cap and hand tighten Wipe up any fuel spillage WARNING Check for fuel leaks if any are found correct before use Contact a Servicing Dealer if necessary Engine is Flooded Set the on off switch to STOP Engage a suitable tool in the spark plug boot 1 Fig 31 Pry off the spark plug boot Unscrew and dry off the spark plug Open the throttle wide Pull the starter rope...

Страница 23: ...to Evitar que el combustible se derrame 4 Antes de volver a poner el tapón del combustible limpiar e inspeccionar la junta 5 Colocar inmediatamente el tapón y apretarlo a mano Eliminar todo eventual residuo de combustible ATENCIÓN comprobar que no haya fugas de combustible si las hay eliminarlas antes del uso Si es necesario contactar con el servicio de asistencia del revendedor Motor ahogado Ajus...

Страница 24: ... firmly with the right hand Fig 37 Pull the starting rope slowly until you meet resistance then pull it hard several times and when the engine starts put the choke lever D back into its initial position Repeat until the engine starts Once the engine has started press the throttle trigger B to release it from the half throttle position and let the engine idle Release the brake Fig 38 WARNING Once t...

Страница 25: ...el motor compruebe que la cadena no toca ningún objeto No arranque nunca la motosierra cuando la barra guía se encuentre en un corte Sujetar firmemente con la mano derecha la empuñadura Fig 37 Tirar lentamente de la cuerda de arranque hasta encontrar resistencia después tirar energicamente algunas veces y a las primeras explosiones del motor llevar de nuevo el cebador D a la posición inicial Repet...

Страница 26: ...djustment should only be made when the chain is cool First turn the chain and lubricate it with additional oil Fig 42 Then start the saw and allow it to run at moderate speed checking that the oil pump is working properly Fig 43 Stop the engine and adjust the chain tension Start the saw again and make a few cuts in a trunk to heat up the chain Stop the engine allow the chain to cool and adjust aga...

Страница 27: ... sobre el terreno si la cadena está aún en movimiento RODAJE CADENA La regulación debe efecutarse siempre con la cadena fría Hacer girar la cadena manualmente lubricándola con aceite suplementario Fig 42 Arrancar el motor durante algunos minutos a velocidad moderada controlando el regular funcionamiento de la bomba de aceite Fig 43 Parar el motor y regular la tensión de la cadena Arrancar el motor...

Страница 28: ...atically by inertia when the protection is pushed forward Fig 52 in the event of sudden kickback inertial operation The chain brake is released by pulling the lever towards the operator Fig 53 CHECKING BRAKE OPERATION At machine inspection prior to each job check the operating condition of the brake following the steps below 1 Start the engine and grasp the handle securely with both hands 2 Pullin...

Страница 29: ...ne activado con el consiguiente bloqueo instantáneo de la cadena cuando la mano del operador hace presión sobre la palanca Fig 51 accionamento manual o bien automáticamente por inercia cuando la protección viene empujada hacia adelante Fig 52 en caso de rebote al improviso accionamento inertial El freno cadena se desbloquea tirando de la palanca hacia el operador Fig 53 CONTROL FUNCIONAMIENTO FREN...

Страница 30: ...30 Fig 1 Fig 4 Fig 3 Fig 2 Fig 5 Fig 6 ...

Страница 31: ...istri e una perdita di controllo causata da una posizione di lavoro non sicura e che dia luogo ad un contatto con la motosega movimento non intenzionale durante il funzionamento della motosega Posizione di lavoro sicura per un uso a due mani Per consentire agli operatori di impugnare la motosega con le due mani è opportuno come regola generale che gli operatori guardino ad una posizione di lavoro ...

Страница 32: ...osition for two handed use To allow the operator to hold the saw with both hands they should as general rule aim for secure work position where they are operating the saw at hip level when cutting horizontal sections solar plexus level when cutting vertical sections Where the operator is working close into vertical stems with a low lateral forces on their work position then a good footing may be a...

Страница 33: ...ition de travail non sûre entraînant un contact avec la tronçonneuse mouvement non attendu pendant le fonctionnement de la tronçonneuse Mise en position sûre pour une utilisation à deux mains Pour permettre aux opérateurs de tenir la tronçonneuse avec les deux mains il convient comme règle générale qu ils visent une position de travail sûre lorsqu ils font fonctionner la tronçonneuse au niveau de ...

Страница 34: ...e zu einer Berührung mit der Kettensäge führt unabsichtliche Bewegung während des Betriebs der Kettensäge die Kontrolle ganz verliert Sichere Arbeitsposition für die beidhändige Benutzung Damit die ausführenden Personen die Kettensäge mit beiden Händen festhalten können gilt grundsätzlich dass sie auf eine sichere Arbeitsposition achten müssen bei der Arbeit mit der Kettensäge auf Hüfthöhe wenn si...

Страница 35: ...insegura que puede dar lugar a movimientos involuntarios que provoquen el contacto con la motosierra Posición de trabajo segura para el uso con dos manos Para que el operador pueda sujetar la motosierra con ambas manos es indispensable que encuentre una posición segura ubicando correctamente las partes del cuerpo que más intervienen en estas operaciones la cadera cuando realiza cortes horizontales...

Страница 36: ...amena a strata kontroly spôsobená nesprávnou polohou pri práci ktorá bola príčinou kontaktu s pílou nechcený pohyb počas práce s pílou Bezpečná pracovná poloha pri práci s dvoma rukami Aby bolo umožnené pracovníkovi držať motorovú pílu oboma rukami jenutnédodržiavaťvšeobecnépravidlo abypracovník našiel bezpečnú pracovnú polohu pri práci s pílou na úrovni bedier pri rezaní horizontálnych častí a na...

Страница 37: ...37 NOTE ...

Страница 38: ... the opposite side to the bend e When lopping large diameter branches make use of the bumper spike WARNING Do not use the upper edge of the tip of the guide bar to cross cut otherwise you might risk a kickback PROHIBITED USE WARNING Always follow the safety regulations This chain saw is designed and built for pruning and tending standing trees or shrubs It is forbidden to cut other types of materi...

Страница 39: ... el caso de ramas bajo tensión buscar una posición segura para protegerse del posible golpe de látigo Iniciar siempre el corte por la parte opuesta a la doblez e Para desramar ramas de diámetro grande utilizar el trinquete ATENCION No use el borde superior de la punta de la barra cuando debe desramar corre el riesgo de recibir un contragolpe USOS NO ADMITIDOS ATENCION Seguir siempre las normas de ...

Страница 40: ...r balance PRECAUTIONS FOR USING THE MACHINE 1 The specially shaped handgrip on the machine calls for particular care when dealing with kickback 2 Extreme care should be taken at the end of a cutting operation in relation to the machine suddenly dropping This eventuality is difficult to control with this type of handgrip 3 Attention should be paid to chain sliding Instead of penetrating the tree tr...

Страница 41: ...rtando ramas pequeñas o arbustos que pueden bloquear la cadena o ser proyectados contra usted y hacerle perder el equilibrio PRECAUCIONES PARA EL USO DE LA MÁQUINA 1 La forma particular de la empuñadura de esta máquina requiere una atención particular cuando se produce el rebote 2 Tenga sumo cuidado al final del corte porque la máquina puede tender a caer improvisamente lo cual es difícilmente con...

Страница 42: ...After every 3 4 times the cutters have been sharpened you need to check the height of the depth gauges and if necessary lower them using the flat file and template supplied optional then round off the front corner Fig 67 WARNING Proper adjustment of the depth gauge is as important as proper sharpening of the chain GUIDE BAR The guide bars provided with a sprocket at their tip must be lubricated wi...

Страница 43: ...eben ser todos de la misma anchura y longitud ATENCION La cadena debe ser afilada cada vez que se observe que las virutas son de dimensiones muy reducidas como el normal aserrín Cada 3 4 afilados es necesario controlar y eventualmente limar el delimitador de profundidad sirviéndose de la lima plana y de la lima suministrada como opcional seguidamente se deberá redondear el ángulo anterior Fig 67 A...

Страница 44: ...NG UNIT Use a brush or compressed air to keep the cooling louvers of the starter assembly free and clean Fig 75 ENGINE Clean the cylinder fins with compressed air or a brush periodically Dangerous overheating of engine may occur due to impurities on the cylinder SPARK PLUG Clean the spark plug and check the electrode gap periodically Fig 76 Use Champion RCJ 8Y or of other brand with the same therm...

Страница 45: ...l filtro aceite Fig 74 ATENCIÓN No emplee nunca aceite recuperado GRUPO DE ARRANQUE Mantener libres y limpios los orificios de refrigeración del carter del conjunto de arranque Fig 75 con pincel o aire comprimido MOTOR Limpiar periódicamente las aletas del cilindro con un pincel o con aire comprimido La acumulación de impurezas sobre el cilindro puede provocar recalentamientos dañinos para el buen...

Страница 46: ...ange Idle screw T is adjusted in order to ensure a good safety margin between idle running and clutch engagement Screw L must be adjusted so that the engine promptly responds to sharp accelerations and gives good idle operation Screw H must be adjusted so that the engine gives maximum power during the cutting phase WARNING Weather conditions and altitude may affect carburation Do not allow anyone ...

Страница 47: ... y tenga un buen funcionamiento al mínimo El tornillo H se debe regular de manera tal que el motor pueda disponer de la máxima potencia durante la fase de corte ATENCION Las variaciones climáticas o altimétricas pueden provocar variaciones en la carburación No permitir que otras personas estén cerca de la motosierra mientras está trabajando ni durante la fase de registro de la carburación TRANSPOR...

Страница 48: ...d every two years if with normal use WARNING Any maintenance operations not specifically dealt with in this manual must be carried out by an authorised service centre To ensure that your chainsaw continues to function correctly use only ORIGINAL REPLACEMENT PARTS Any unauthorized changes and or use of non original replacement parts may result in serious injury or death to the operator or third par...

Страница 49: ...os años si el uso es normal ATENCIÓN Todas las operaciones de mantenimiento no indicadas en este manual deben ser realizadas por un taller autorizado Para garantizar un funcionamiento correcto y constante del la motosierra es preciso utilizar exclusivamente RECAMBIOS ORIGINALES Eventuales modificaciones no autorizadas y o el uso de accesorios no originales pueden causar lesiones graves o mortales ...

Страница 50: ...air filter Fig 89 and the cylinder fins Fig 90 Store the blower in a dry place preferably not in direct contact with the ground away from heat sources and the tanks empty The procedures for returning the machine to service following winter storage are the same as for starting up during everyday use page 18 24 DEMOLITION AND DISPOSAL Most materials used for the chainsaw manufacturing are recyclable...

Страница 51: ...po de arranque Fig 88 el filtro de aire Fig 89 y las aletas del cilindro Fig 90 Conservar la máquina con los depósitos vacíos en un ambiente seco en lo posible sin contacto con el suelo y lejos de fuentes de calor Para volver a utilizar la máquina después de la pausa invernal es suficiente realizar las mismas operaciones que para la puesta en marcha habitual pág 19 25 DESGUACE Y DESECHO DEL EQUIPO...

Страница 52: ...Áno Antivibranti Antivibration system Système antivibration Schwingungsdämpfung Sistema antivibratorio Antivibrácia Si Yes Oui Ja Áno Nr denti pignone No of pinion teeth Nombre de dents du pignon Anzahl der Zähne am Ritzel Número dientes piñón Počet zubov ozubenia 6 Peso senza barra e catena Weight without bar and chain Poids sans guide et chaîne Gewicht ohne Schwert Peso sin barra y sin cadena Hm...

Страница 53: ...932 C 3 8 x 050 12 30 cm 120SDEA041 91 PX 240 mm 932 C 3 8 x 050 14 35 cm 140SDEA041 91 PX 285 mm ATTENZIONE ATTENTION ATENCION Il rischio di contraccolpo kickback è maggiore in caso di combinazione barra catena errata Utilizzare esclusivamente le combinazioni barra catena raccomandate e attenersi alle istruzioni per l affilatura Le risque de contre coup kickback augmente si l association barre ch...

Страница 54: ...ssance acoustique assuré Garantierter akustischer Schalleistungspegel Nivel potencia acústica garantizado Zaručená hladina akustického hluku dB A LWA 2000 14 EC EN 22868 EN ISO 3744 110 0 Livello di vibrazione Vibration level Niveau de vibration Vibrationspegel Nivel de vibracion Úroveň vibrácií m s2 EN 11681 2 EN 22867 EN 12096 4 1 sx 8 0 dx Incertezza Uncertainty Incertitude Unsicherheit Incerti...

Страница 55: ...55 NOTE ...

Страница 56: ...zodpovednosť že stroj 1 Genere sega a catena 1 Type chainsaw 1 Catégorie tronçonneuse 1 Baurt kettensäge 1 Género motosierra 1 Typ rĕtĕzové pily 2 Marca Tipo 2 Trademark Type 2 Marque Type 2 Marke Typ 2 Marca Tipo 2 Ochranná známka Typ 3 identificazione di serie 3 serial identification 3 identification de série 3 Serien Identifizierung 3 identificación de serie 3 Identifikácia série è conforme all...

Страница 57: ...ätsbeurteilung durchgeführt Procedimientos utilizados para determinar la conformidad Bol dodržaný postup hodnotenia Livello di potenza acustica misurato Measured sound power level Niveau de puissance acoustique mesuré Schallleistungspegel gemessen Nivel de potencia acústica medido Nameraná úroveň zvukového výkonu Livello di potenza acustica garantita Guaranteed sound power level Niveau de puissanc...

Страница 58: ...vviamento Ispezionare danni e usura X Sostituire X Carburatore Controllare il minimo la catena non deve girare al minimo X X Candela Controllare distanza elettrodi X Sostituire X Ogni 6 mesi Sistema antivibrante Ispezionare danni e usura X MAINTENANCE CHART Please note that the following maintenance intervals apply for normal operating conditions only If your daily work requires longer than normal...

Страница 59: ...as tourner au ralenti X X Bougie Contrôler la distance des électrodes X Remplacer X Tous les 6 mois Système anti vibrations Vérifier dommages et niveau d usure X WARTUNGSTABELLE Die folgenden Wartungsintervalls gelten ausschließlich bei Einsatz der Kettensäge unter normalen Betriebsbedingungen Falls Ihre tägliche Arbeit unter schwereren Bedingungen als normal durchgeführt wird müssen die Wartungsi...

Страница 60: ...ectrodos X Sustituir X Cada 6 meses Sistema antivibración Inspeccionar daños y desgaste X TABUĽKA ÚDRŽBY Prosím nezabudnite že nasledujúce intervaly údržby sa vzťahujú iba na normálne pracovné podmienky Ak je vaša každodenná práca namáhavejšia vzhľadom na bežné podmienky treba intervaly údržby primerane skrátiť Pred každým použitím Po každom prerušení práce kvôli doplneniu paliva Týždenne Pri pošk...

Страница 61: ...uzioni nel capitolo Montaggio barra e catena Pag 14 3 Vedi le istruzioni nel capitolo Montaggio barra e catena Pag 14 4 VedileistruzioninelcapitoloManutenzione barra e o catena Pag 42 5 Sostituire se necessario contattare un Centro Assistenza Autorizzato AT TENZIONE non toccare mai la catena quando il motore è in funzione TROUBLE SHOOTING CHART WARNING Always stop unit and disconnect spark plug be...

Страница 62: ...orsque le moteur tourne STÖRUNGSBEHEBUNG ACHTUNG Vor Durchführung aller in der untenstehenden Tabelle empfohlenen Prüfungen das Gerät immer abstellen und die Zündkerze trennen es sei denn der Betrieb des Geräts wird ausdrücklich verlangt Wenn alle möglichen Ursachen überprüft wurden die Störung jedoch nicht behoben werden konnte wenden Sie sich bitte an eine autorisierte Kundendienststelle Wenn ei...

Страница 63: ...la cadena Pág 15 4 Ver las instrucciones en el capítulo Mantenimiento barra y o cadena Pág 43 5 Sustituir si es necesario contactar con un Centro de Asistencia Autorizado ATENCIÓN no tocar n u n c a l a c a d e n a cuando el motor esté en funcionamiento RIEŠENIE PROBLÉMOV POZOR jednotku vždy zastavte a odpojte sviečku až potom urobte všetky nápravné opatrenia podľa tabuľky dolu samozrejme okrem tý...

Страница 64: ...64 NOTE ...

Страница 65: ...le lubricants and fuels have been used non original spare parts and accessories have been fitted work has been done on the machine by unauthorised personnel 5 The warranty does not cover consumables or parts subject to normal wear 6 The warranty does not cover work to update or improve the machine 7 The warranty does not cover any preparation or servicing work required during the warranty period 8...

Страница 66: ...artes y ha de estar debidamente timbrado por el vendedor 4 La garantía pierde su validez en los siguientes casos Falta evidente de mantenimiento Uso incorrecto o manipulación del producto Uso de lubricantes o combustibles inadecuados Uso de piezas de recambio o accesorios no originales Intervenciones efectuadas por parte de personal no autorizado 5 La garantía no incluye ni los materiales consumib...

Страница 67: ...67 NOTE ...

Страница 68: ...rante tutta la sua vita GB WARNING This owner s manual must stay with the machine for all its life F ATTENTION Ce manuel doit accompagner le moteur tout au long de sa vie D ACHTUNG Bewahren Sie diese Anleitung für die gesamte Lebensdauer des Geräts auf E ATENCIÓN Este manual debe acompañar a la máquina hasta su desguace SK UPOZORNENIE Tento návod musí sprevádzať prístroj po celú dobu jej životnost...

Отзывы: