background image

HDRR-04 / HDRR-08 / HDRR-16 Quick Setup Guide 


- 6 - 

DV-18 / DV-19 / DV-20 


R201404-V23 

Item #  Label Name 

Function 

SEQ 

To enter into auto dwell mode 

Switch 

To switch the output between BNC and VGA 

 Direction button 

To move cursor in setup or pan/title PTZ 

Exit Button 

To exit the current interface 

Focus/IRIS/Zoom/PTZ 

To control PTZ camera. Move camera/zoom/IRIS/Focus 

Preset Button 

To enter into preset setting in PTZ mode 

Cruise Button 

To enter into cruise setting in PTZ mode 

Wiper Button 

To enable wiper function in PTZ mode 

Light Button 

To enable light function in PTZ mode 

10 

Track Button 

To enter into track setting in PTZ mode 

Clear Button 

To return to the previous interface 

Fn2 Button 

Unavailable temporarily 

Info Button 

Get information about DVR like firmware version, HDD information 

11 

Snap Button 

To take snapshots manually 

Search Button 

To enter into search mode 

Cut Button 

To set the start/end time for backup in playback mode 

Backup Button 

To enter into backup mode 

Zoom Button 

To zoom in the images 

PIP Button 

To enter into picture in picture setting mode 

12 

Power Button 

Switch off—to stop DVR. Use it before turning off the power 

13 

Audio 

To enable audio output in live mode 

14 

Enter Button 

To confirm the choice or setup 

15 

Menu Button 

To enter into menu 

16 


To control playback. Play/Pause/Stop/Previous-Section/ 
Next-Section/Rewind/Fast Forward 


 Switch Remote Control ID 

1. Take remote control and point to DVR then continuously press

 “8”,”8”,”ID(0-65535)”,”Enter”. 

2. Make change on DVR ID Setting,  

Go to 

“SYSTEM MENU”


> “DEVICE ID”

 to make change 

The ID must be the same on DVR. 

For example: If ID=1 ,  

Please take remote control and point to DVR then press 

8,8,1,Enter

Then go to 

“SYSTEM MENU” > “DEVICE ID” 

change the

 ID=1 

 
2.3 Mouse Control: 

REQUIRED


Connection: Recommend to connect the USB mouse to the back panel. 

Mouse functions


1

Under LIVE mode


On every channel

you could double click the left button to switch FULL SCREEN and double click again 

to switch back to original split mode. 
On every channel

you could single click right button to popup MENU page. 

2

Under MENU page


Single click left button on any functional icon could enter the function page and Single click right button to 
exit function page or jump back to previous page. 
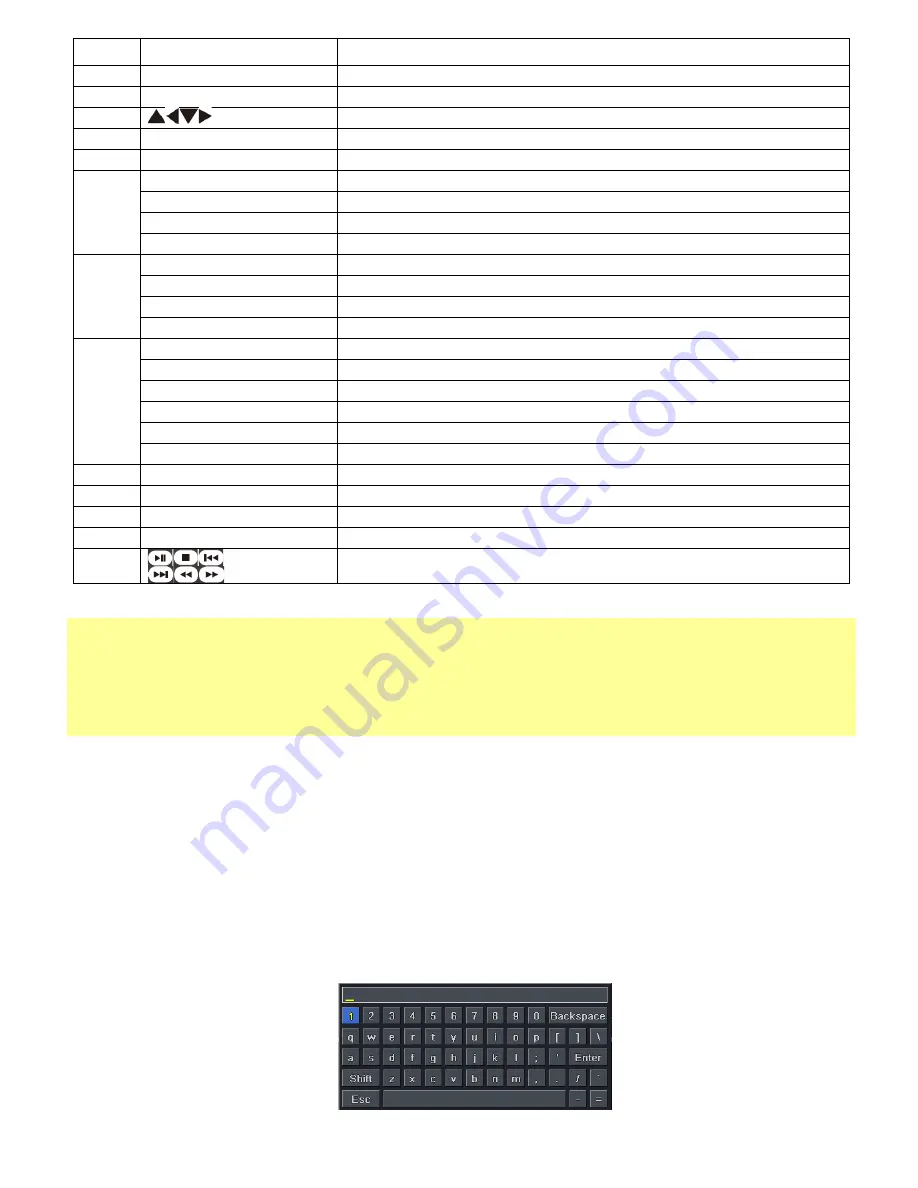
If you want to key in letter or digit, please move mouse to textbox then single click left button on textbox. 
The OSD keyboard will pop up as following, 


Содержание HDRR-04

Страница 1: ...ide before installation Quick Setup Guide User s Manual are subject to change without notice A One 1 HDRR 04 HDRS 08 HDRR 16 DVR I Two 2 Rack Mount Ear w Screws HDRR 16 B One 1 Remote Controller J Thi...

Страница 2: ...ZOOM REW on playback mode ZOOM adjustment PTZ 6 FF P T Z FF on playback mode Enter PTZ mode 7 STOP ESC STOP playback on playback mode Exit MENU or jump back to previous page 8 Digital Enter digital o...

Страница 3: ...Input number 1 9 or choose camera 0 10 Input number0 10 and the above number together with other digital keys 6 Compound Button P T Z 1 Enter PTZ mode in live 2 Decrease the value in setup AUDIO 1 Co...

Страница 4: ...port Connect external USB devices like USB flash drive HDD 14 Power Supply 12V DC 4 Back Panel 8 CH Item Label Name Function 1 Alarm Out 1 ch relay output Connect to external alarm 2 GND Grounding fo...

Страница 5: ...larm In 8 K B Connect to keyboard A is TX B is TX 9 P Z Connect to speed dome Y is TX Z is TX 10 CVBS CVBS output 11 Audio out Audio output connect to the sound box 12 MIC in Talk Connect to microphon...

Страница 6: ...ch off to stop DVR Use it before turning off the power 13 Audio To enable audio output in live mode 14 Enter Button To confirm the choice or setup 15 Menu Button To enter into menu 16 To control playb...

Страница 7: ...time Time Format to set 24 hour or 12 hour format to display Time Zone to set proper time zone GMT 8 Los Angeles Caution Please make sure to set time zone correctly To prevent getting different time s...

Страница 8: ...ording highlight the entire Blue Grid 2 2 Full Time Recording 1 Press Record Button on the front panel of the DVR Green box will appear on screen to confirm that manual recording is enabled Press Reco...

Страница 9: ...t Cable is plugged in 5 After Apply the IP Address Netmask Gateway and DNS addresses should automatically be generated For STA TIP Write down HTTP Port Server Port and IP Address on a piece of paper f...

Страница 10: ...eled firewall HTTP Port Port for IE connection Default is 80 80 Server Port Port for video and audio streaming Default is 6036 6036 Incoming Port Range advance 80 80 or alternative if port 80 is being...

Страница 11: ...er Website 1 www dyndns com 4 www dvrdydns com 2 www meibu com 5 www mintdns com 3 www no ip com 6 www autoddns com For technical specification please refer to the User Manual www okinausa com DV 18 D...

Отзывы: