PT390/LD670 Disassembly Instructions
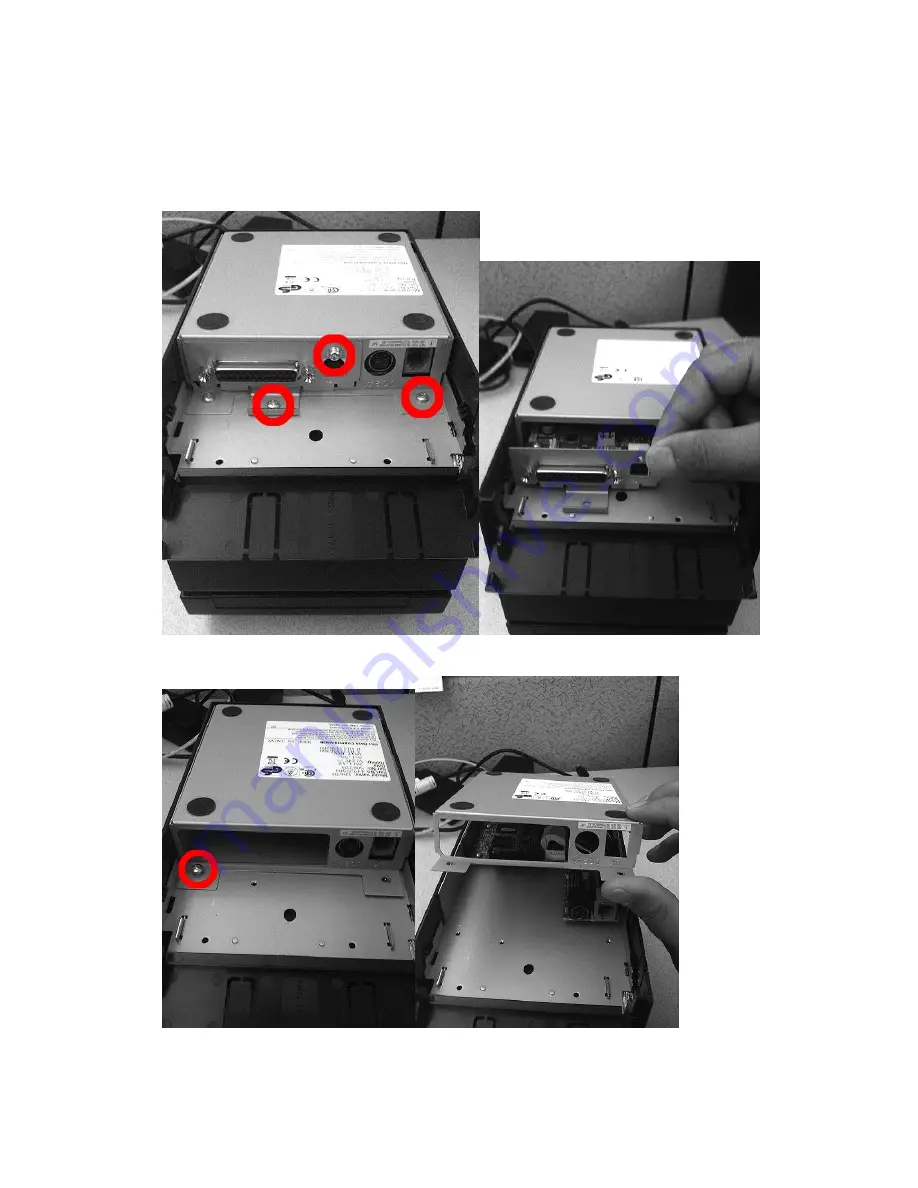
1.
Remove the 3 screws on the base of the unit and remove the interface card.
2.
Remove the 4
th
screw and remove base plate.
Страница 1: ...PT390 LD670 Disassembly Instructions 1 Remove the 3 screws on the base of the unit and remove the interface card 2 Remove the 4th screw and remove base plate...
Страница 2: ...3 Remove 7 wired connections to main board as well as 4 screws and remove board 4 Remove 2 screws on inside of top cover...
Страница 3: ...5 Push down on the cover to release the 2 black tabs and then lift top cover molding off 6 Remove 2 screws...
Страница 4: ...ar of printer 8 Slide the remaining black cover up the machine and over the top assembly to remove it I found it easiest to partially close the top cover to get it started and then open the top cover...
Страница 5: ...9 Remove 2 screws and then lift printing assembly off of plate by sliding it towards you and lifting feed wires up through plate 10 Remove screw on right side rear holds right side top cover latch on...
Страница 6: ...11 Use flathead to gently push down black clip and then slide out bar pushing right to left 12 Lift cover up and off cover will be attached to wiring harness...
Страница 7: ...13 Remove 2 screws and remove cutter 14 Remove 2 screws on the right side and 2 screws on the left side...
Страница 8: ...d connection on the underside that connects into the media sensor board LD670 only You will now have access to Platen roller and space motor for potential replacement 16 You can easily remove the prin...